Automatic export of subscriber data to a newsletter mailing system (e.g. MailChimp)
Do you want to design and send your newsletter in a simple and optimized newsletter mailing system? Using this example with MailChimp, we will show you how you can create an automatic export from edoobox to a mailing system.
In most mailing systems, you can also use the double opt-in method to verify the subscriber's email if you have not requested this via edoobox.
Create subscriber data field for newsletter
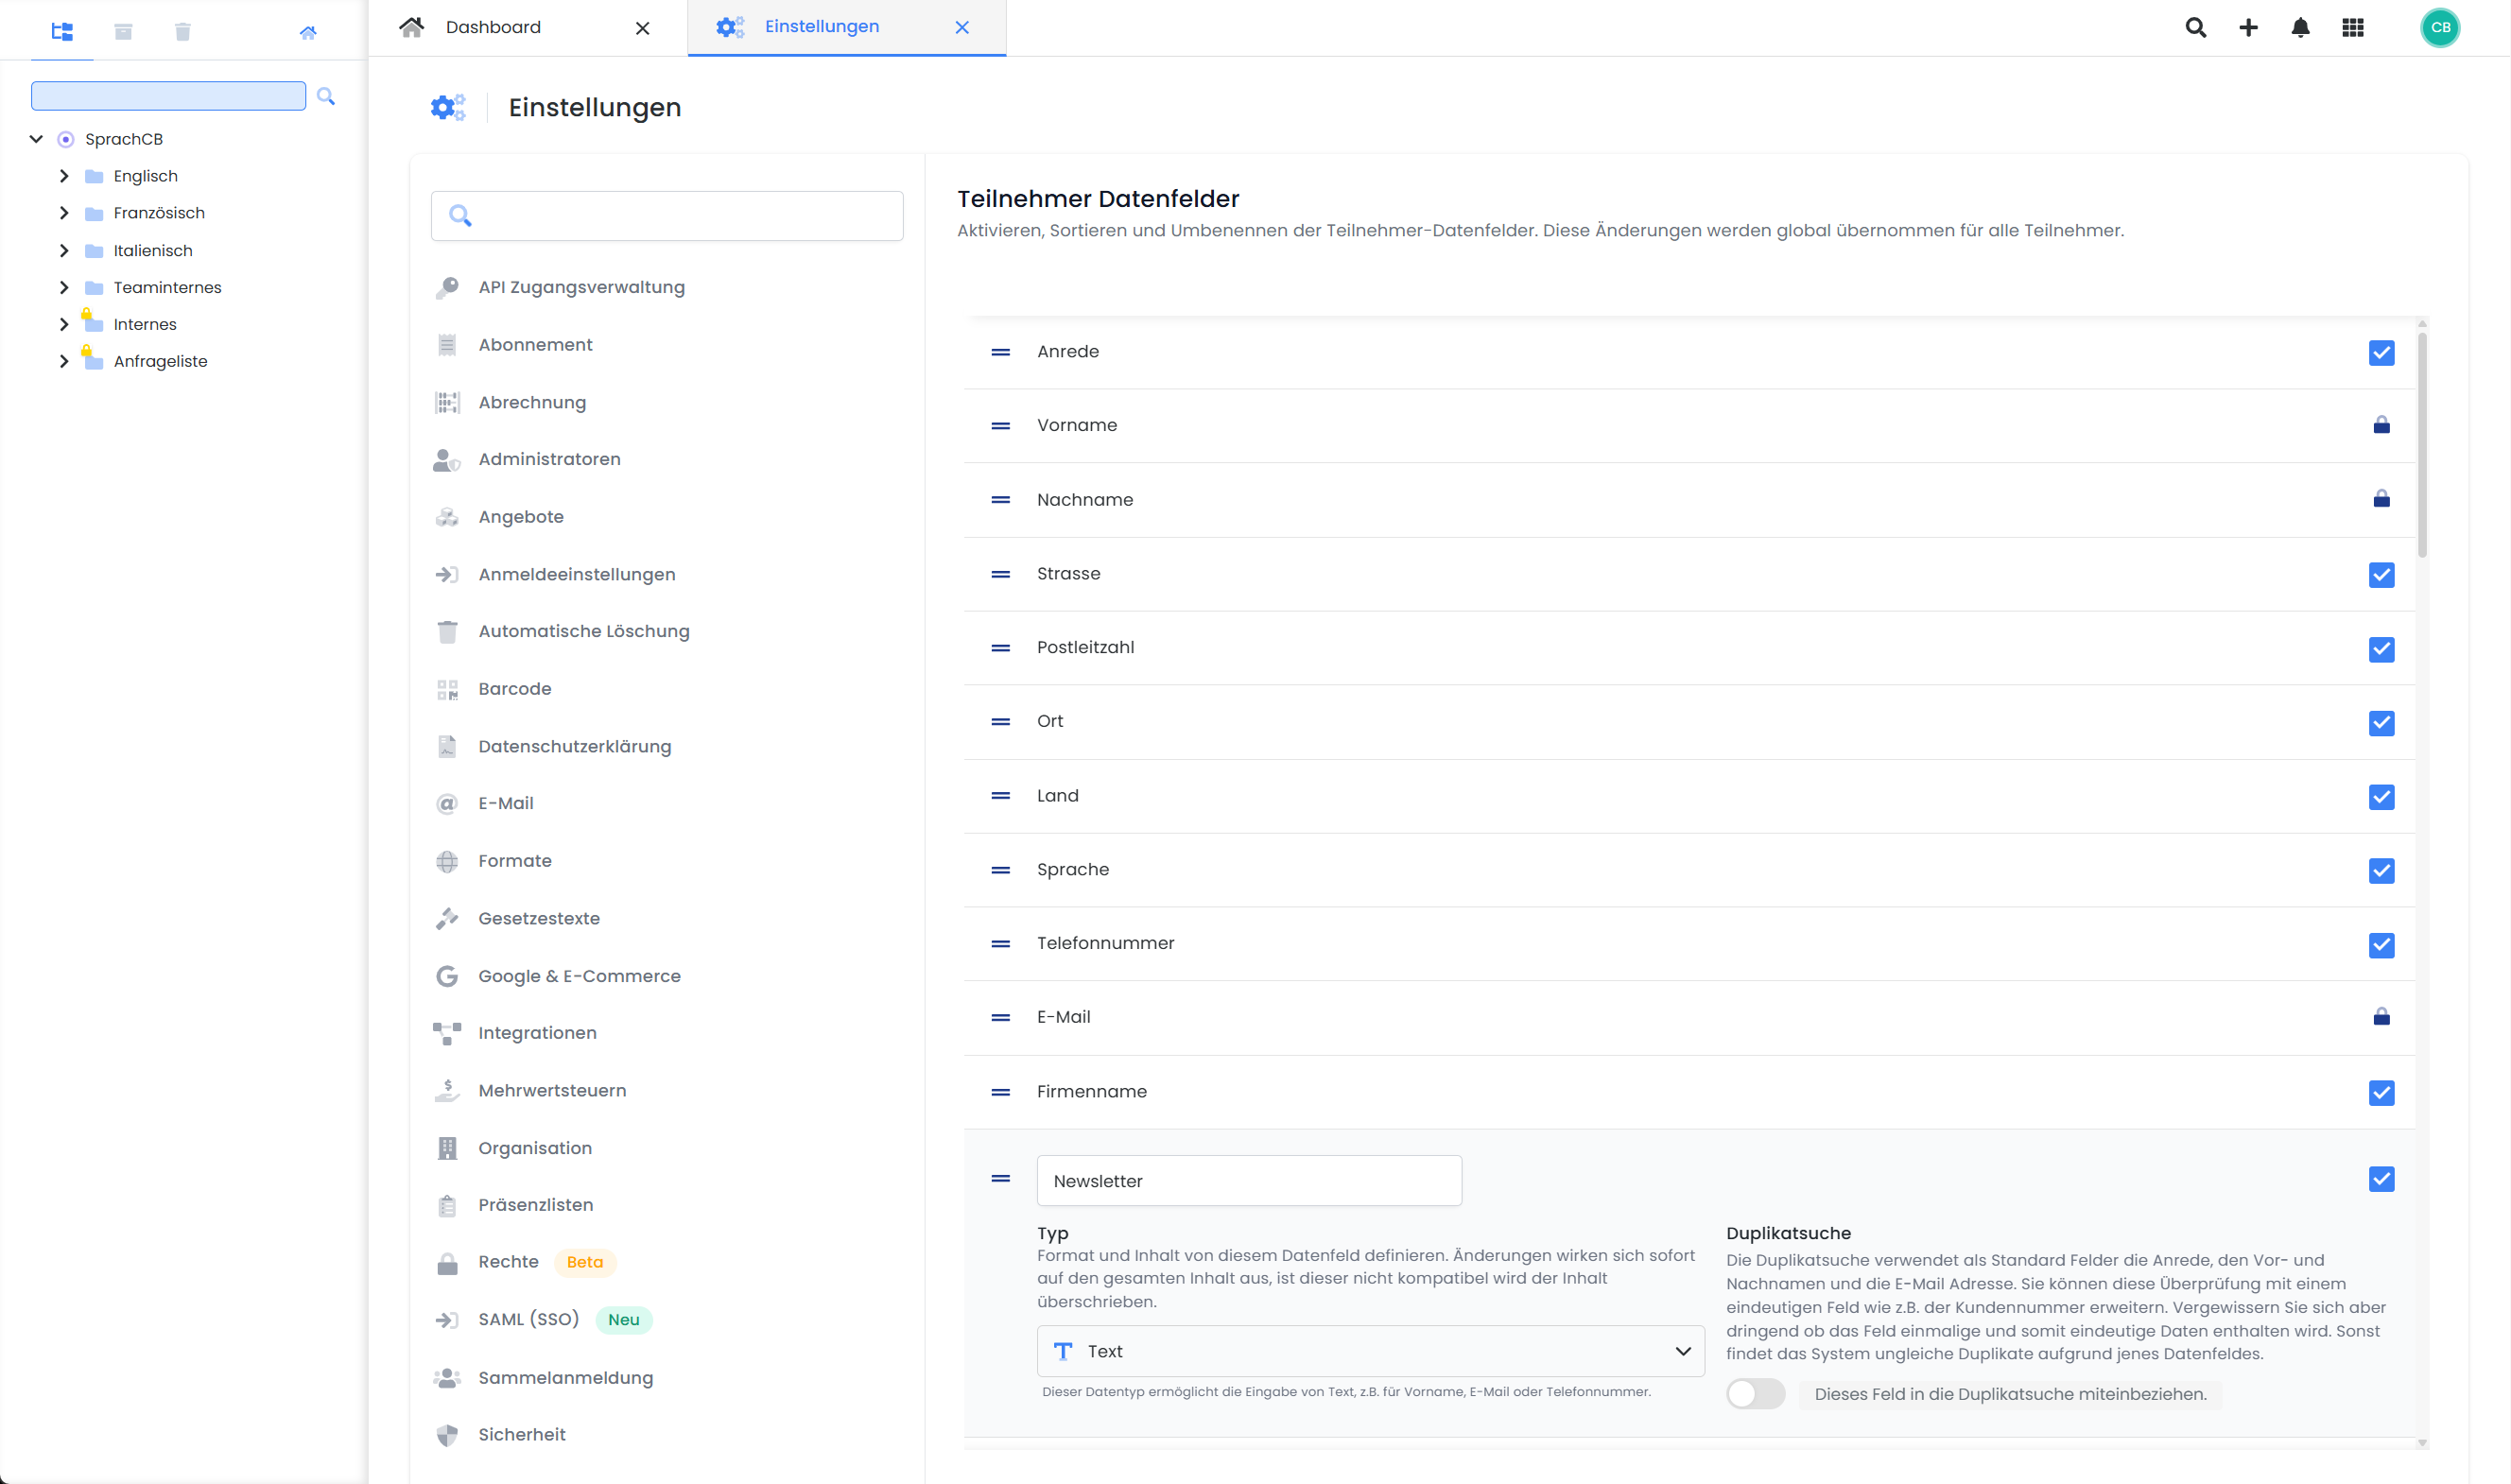
First generate a new participant data field in the global settings. subscriber data field A with the name "Newsletter".

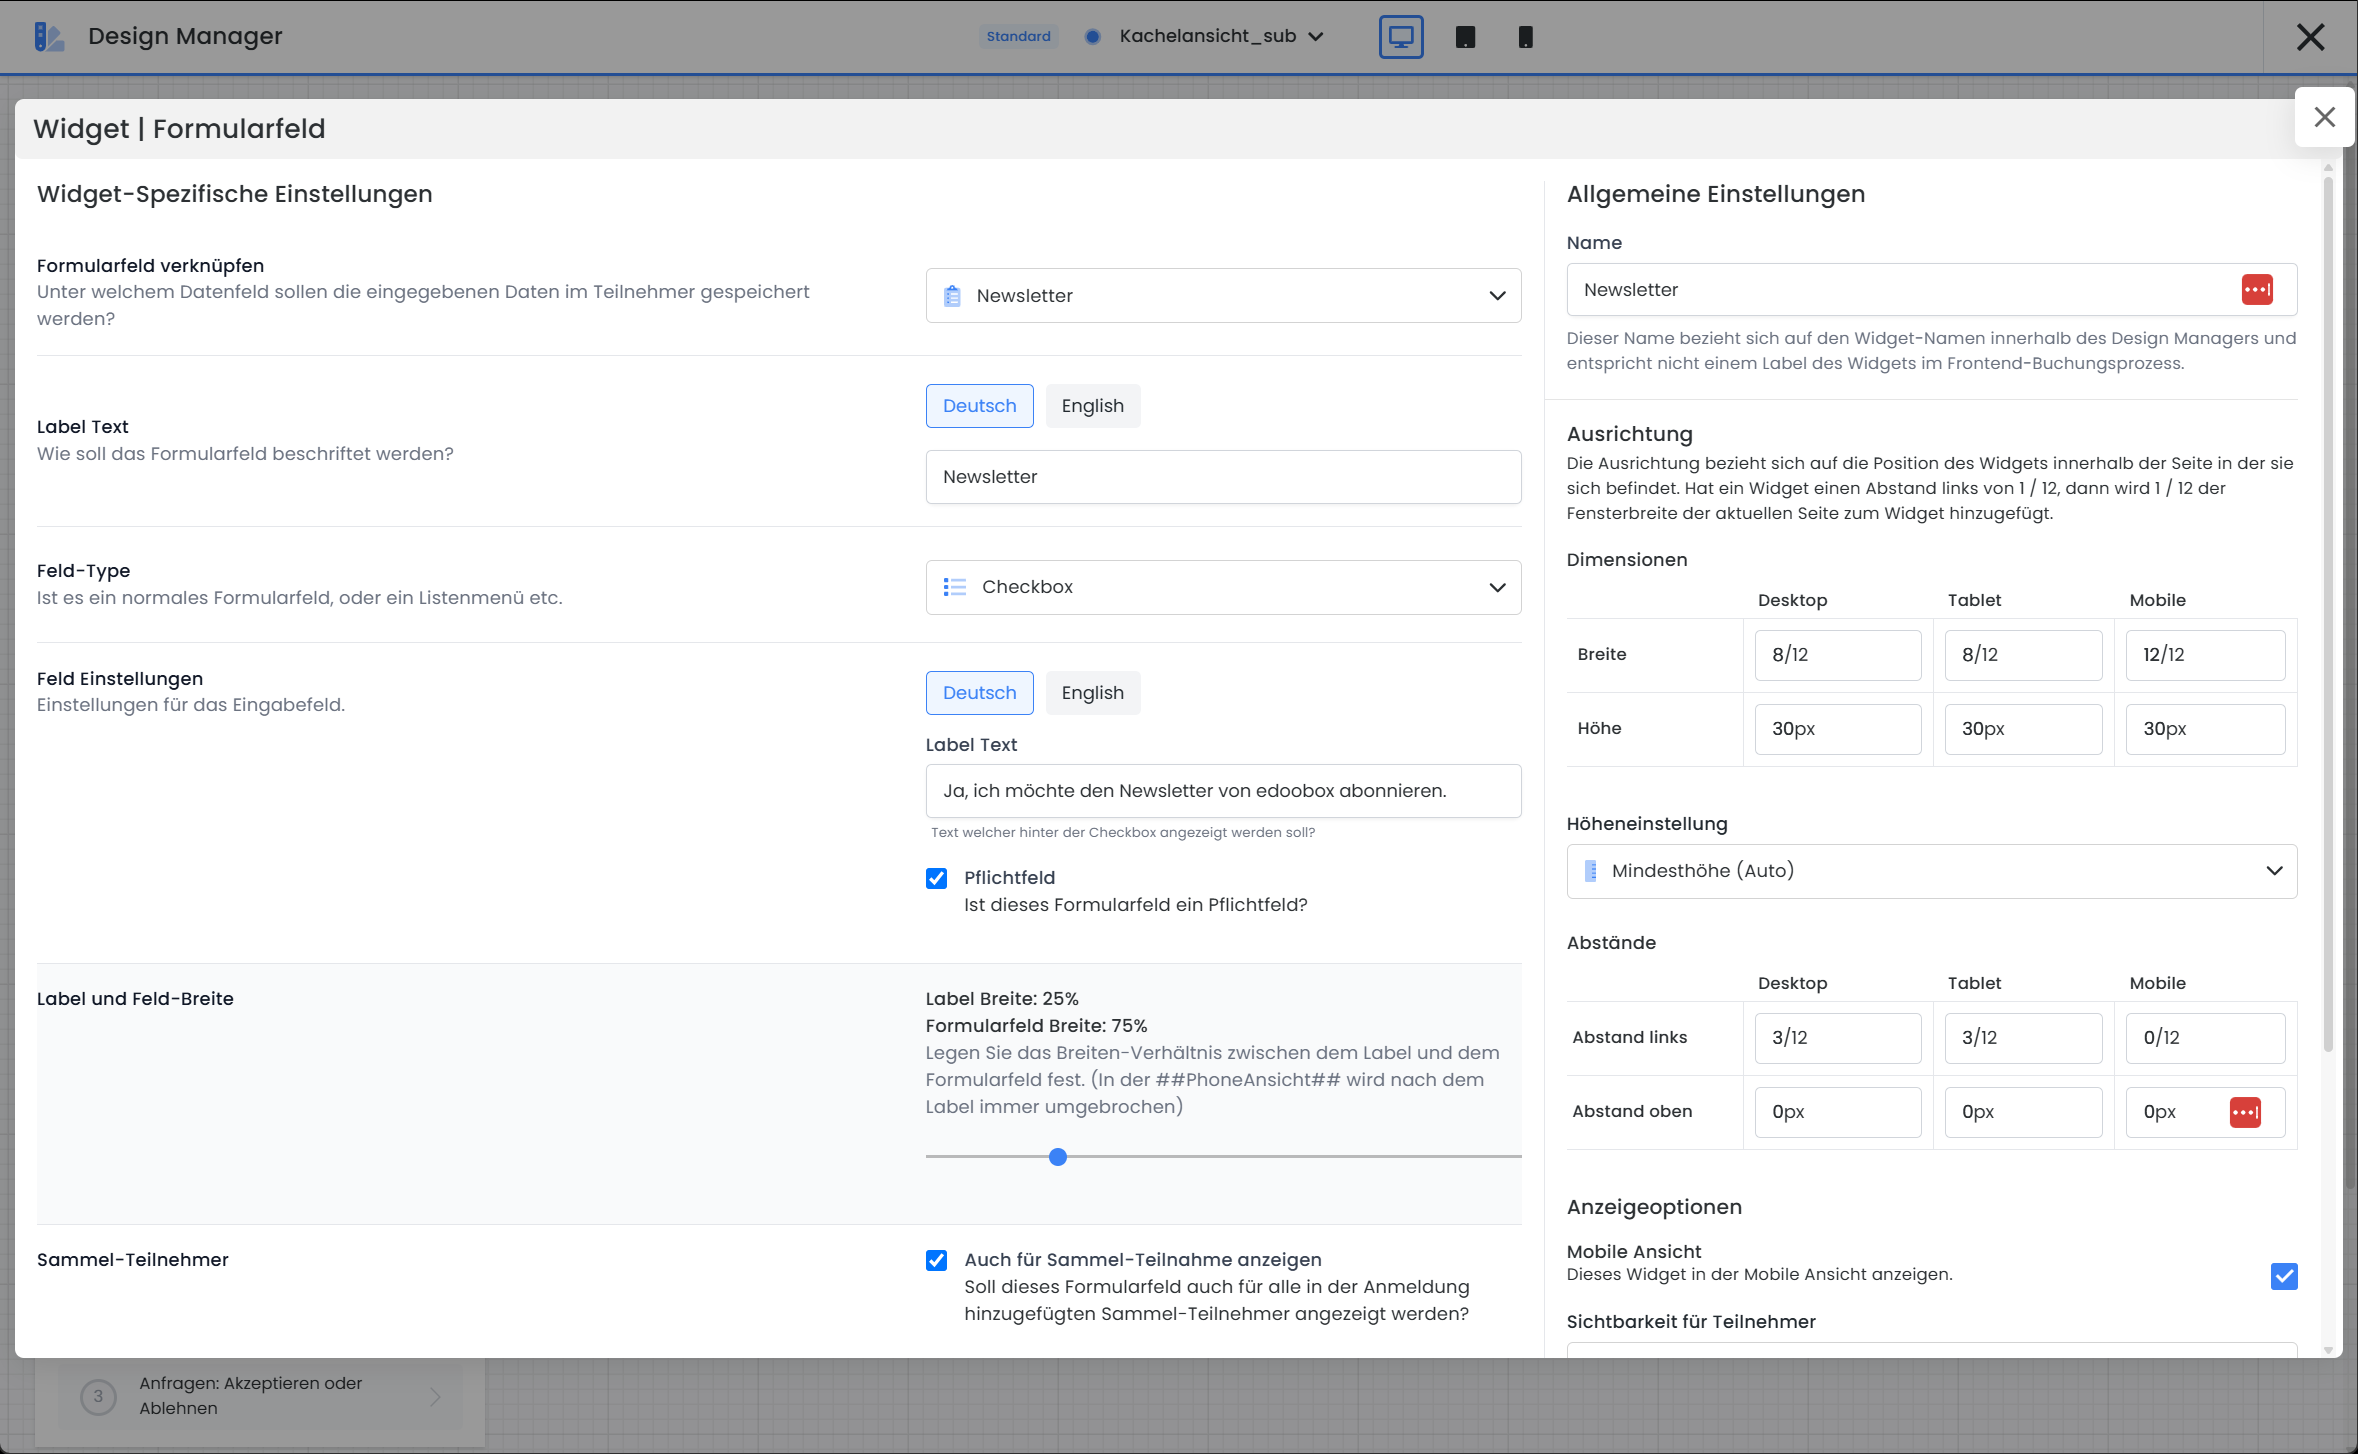
Once you have created this, open the registration form in the Design Manager and add a new form field. You can edit this using the gear icon and link it to the existing "Newsletter" data field. Set the field type to "Checkbox" and enter a clear declaration of consent, e.g: "Yes, I would like to subscribe to the newsletter from XY."

Once you have set this up, you can connect your edoobox account to Zapier and create a Zap.
Connect edoobox with Zapier
Zapier is a user-friendly web service that allows you to automate actions between the web applications you use on a daily basis without developer knowledge. This allows you to connect edoobox to external applications and automate actions.
Create a Zapier account or log in: Call up Zapier and log in.
Create a new Zap: Connect edoobox to Zapier and select a predefined template for your newsletter tool or search for your newsletter tool directly in Zapier.
Link your newsletter tool: In the next step, select the desired application (e.g. MailChimp) and connect it to Zapier.
Set filter for newsletter subscriptions (optional, but recommended): If only participants who explicitly want to subscribe to the newsletter are to be synchronized, you can define filter rules in Zap. Details on this can be found in the Zapier documentation on filters.
Activate connection: As soon as the settings are complete, the automatic data export starts. New subscribers in edoobox are now transferred directly to your newsletter tool via Zapier.
Design and send newsletters 🙂
Please note: Opt-in options
Laws in the EU require a double opt-in process for newsletter registrations. Many newsletter tools offer opt-in options to confirm the registration, e.g. MailChimp here.
Related instructions
Keywords for these instructions
Zapier ¦ Newsletter ¦ Double-Opt-In¦ Mailjet ¦ HubSpot ¦ Mailchimp ¦ Mailingwork ¦ GetResponse ¦ Sendinblue ¦ ActiveCampaign ¦ Emarsys ¦ AWeber ¦ MailerLite ¦ Mailgun ¦ Klick-Tipp ¦ Newsletter2Go
