Integrating edoobox is essential for making your listings publicly available in a suitable format and enabling your customers to book your listings on their own.
Integration Methods
edoobox provides several methods for integration:
-
iFrame Integration: This method allows you to integrate edoobox into your website using an iFrame. The booking window will then appear in its own frame on your website and can be customized to match your website's appearance using the Design Manager. This integration method is CMS- and platform-independent, making it suitable for all types of websites.
-
Link Integration: This method allows you to embed edoobox as a simple link on your website or send it via email. This enables your customers to access the standard preview of your edoobox offerings with a single click and complete the booking process in a separate browser tab. This integration method is CMS- and platform-independent, making it suitable for all types of websites.
-
Plugin Integration: If you use WordPress as your CMS for your website, edoobox offers the option to integrate it using the edoobox plugin. Details on this integration method can be found in this documentation.
-
API Integration: Utilizing the edoobox API enables the creation of custom integrations of edoobox into your website. This method requires technical expertise and offers maximum flexibility. Details on this integration method can be found in this documentation.
The choice of integration method depends on your specific requirements and technical background. Each method allows you to integrate edoobox into your web presence and provide your customers with an optimal booking experience.
To simplify the documentation, only the term 'integration code' will be used hereafter. This encompasses both integration links (Method 2) and integration codes (Methods 1 and 3), including the plural forms of both variants.
Integration Levels
To display your edoobox offerings on your website using one of the aforementioned methods (1–3), it is necessary to generate the corresponding integration code in your edoobox account and embed it at the desired locations on your website.
You have the option to create such an integration code at each level within the offer tree. The level at which you create this integration code depends on how you wish to present the offers on your website. The integration code is generated in the Preview-Share section of the respective level within the offer tree.
The following levels are available:
-
Account Abbreviation: Integration of all offers
-
Category: Integration of a single category
-
Offer: Integration of a single offer
Info: Examples of Integrations
On our demo websites, we demonstrate how iFrames can be individually integrated.
Creating Integration Codes
Integration of all services via the account code Recommendation
At this level, you create an integration code that directs your customers to an overview of all your offers published in edoobox. Through this integration, newly published categories and offers are always automatically displayed in the overall overview, and the integration code remains valid under standard conditions.
-
Navigate to the offer tree.
-
Right-click on your Account Abbreviation
-
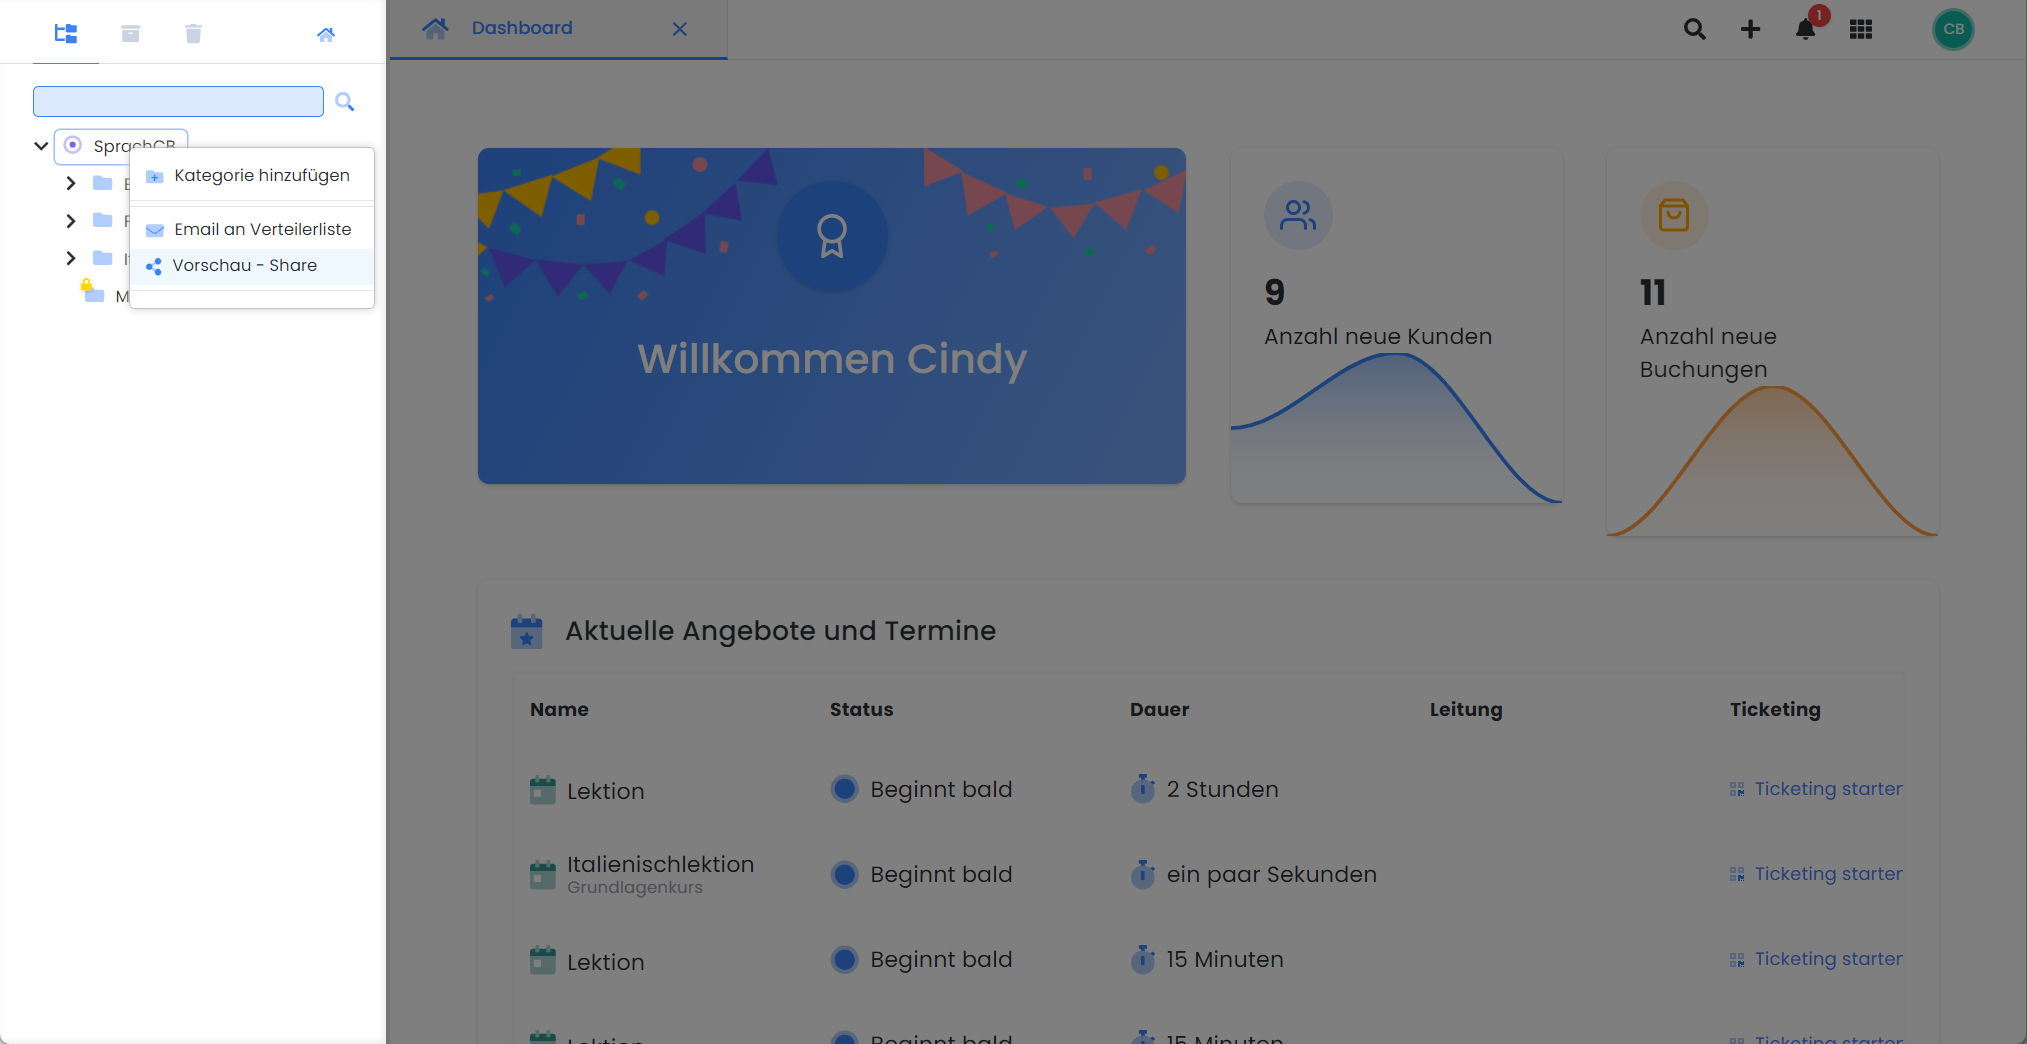
Select Preview – Share in the context menu
-
Define the settings for the integration code
-
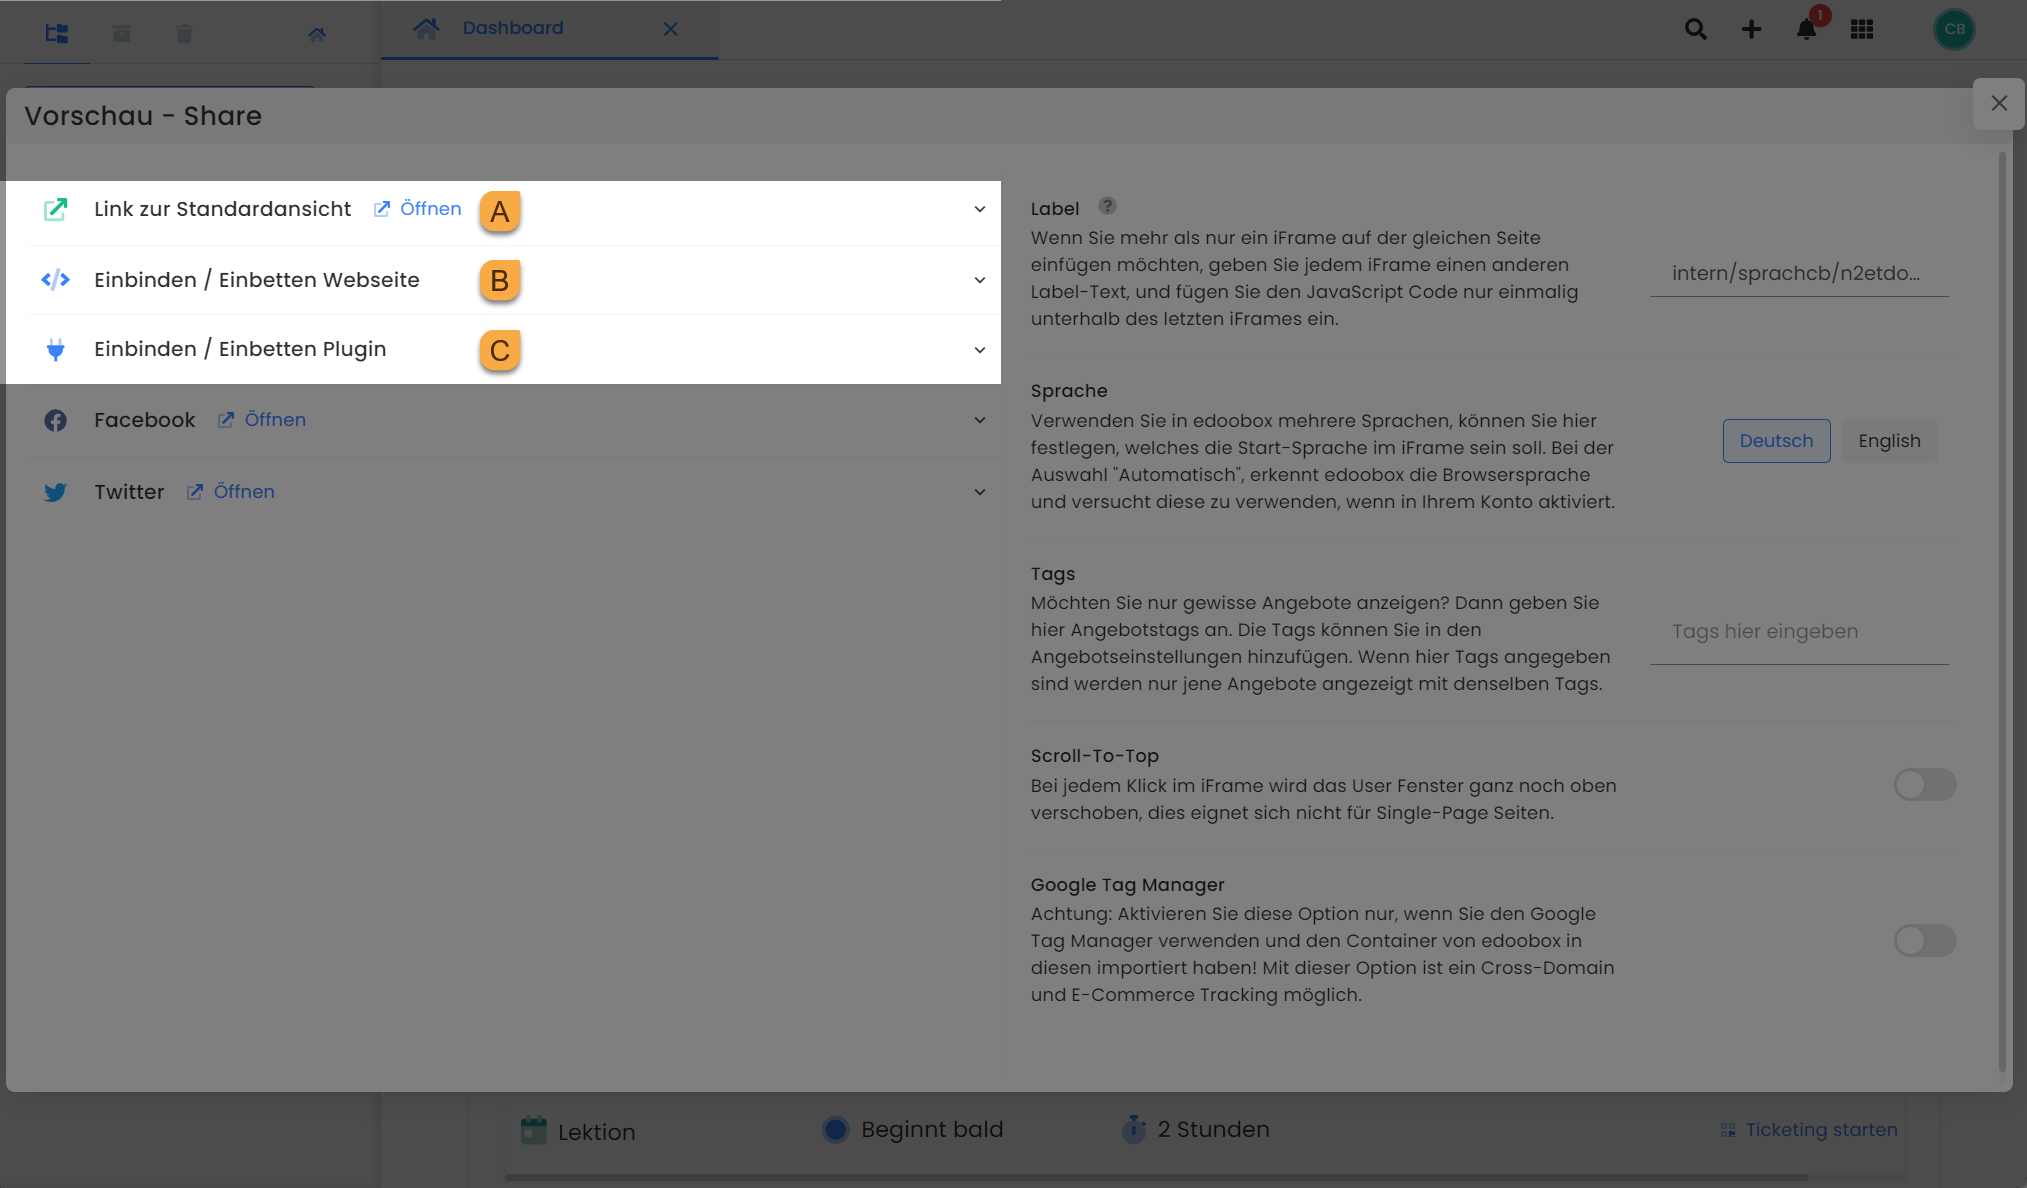
Select integration code
-
For standard view, click on 'Link to standard view'
-
For iFrame code, click on 'Embed/Integrate Website'
-
For shortcode, click on 'Embed/Integrate Plugin'
-
-
Copy the generated integration code and paste it into the website
Inclusion of individual categories Recommendation
At this level, you generate an integration code that allows your customers to directly access this category and select from its offerings. Through this integration, newly published offerings within this category are always displayed automatically, and the integration code remains valid under standard conditions.
-
Navigate to the offer tree.
-
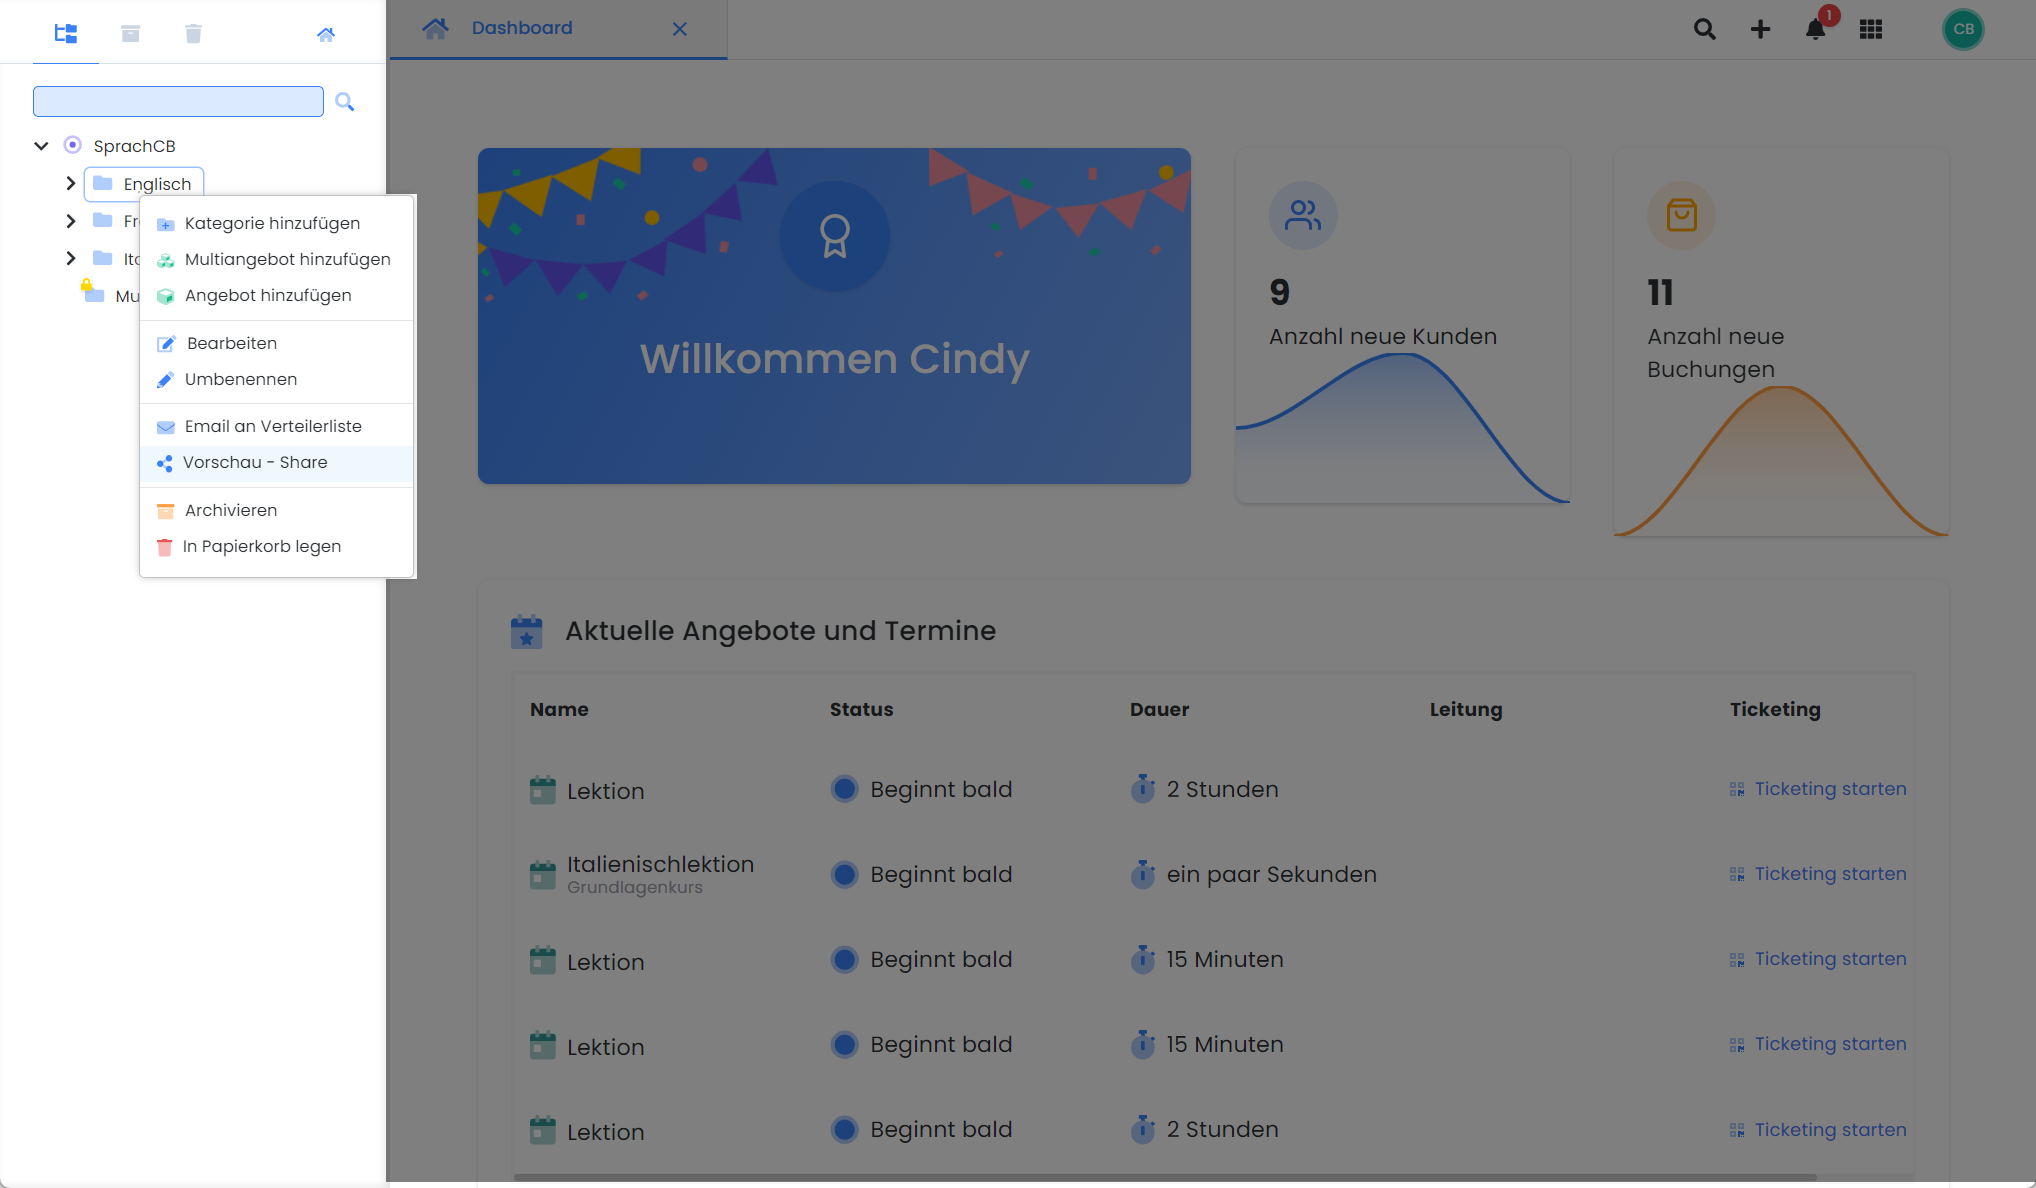
Right-click the desired category
-
Select Preview – Share in the context menu
-
Define the settings for the integration code
-
Select integration code
-
For standard view, click on 'Link to standard view'
-
For iFrame code, click on 'Embed/Integrate Website'
-
For shortcode, click on 'Embed/Integrate Plugin'
-
-
Copy the generated integration code and paste it into the website
Note: Multiple iFrames on a Page
If you wish to embed more than one iFrame on the same page, assign a different label text to each iFrame, and insert the JavaScript code only once, below the last iFrame.
Integrating Individual Offerings
At this level, you generate an integration code that directs your customers directly to a specific offering or its registration. Through this integration, newly created categories and offerings are not automatically displayed, and the link expires after the offering concludes.
-
Navigate to the offering tree
-
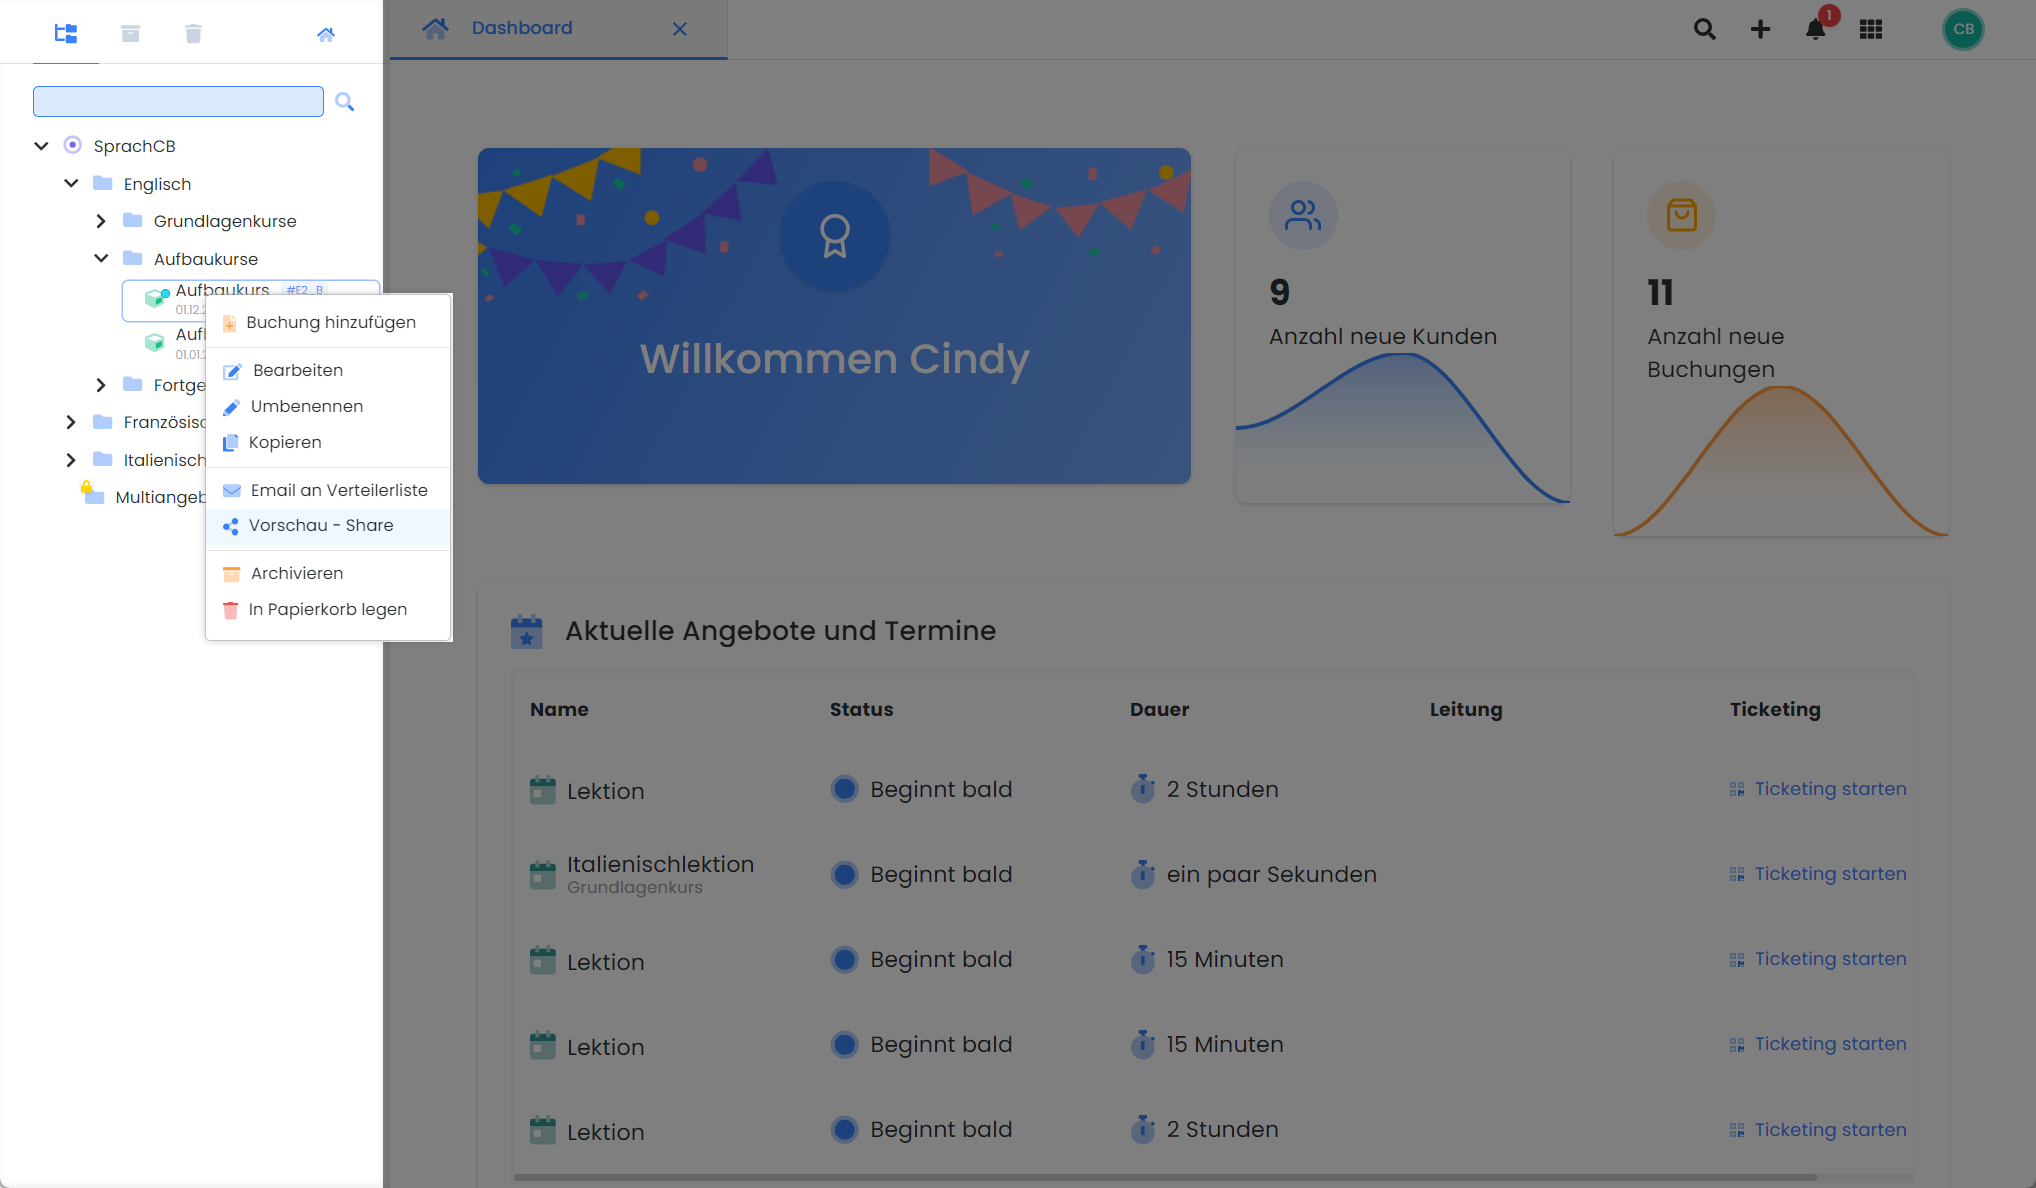
Right-click the desired offering
-
Select Preview – Share in the context menu
-
Define the settings for the integration code
-
Select integration code
-
For the standard view, click on 'Link to Standard View'; this link is also directly available as a QR code.
-
For a direct link to the offering's registration, click on «Link to registration form».
-
For iFrame code, click on 'Embed/Integrate Website'
-
For shortcode, click on 'Embed/Integrate Plugin'
-
-
Copy the generated integration code and paste it into the website
Note: Linking Individual Offerings
We recommend integrating individual offerings only in specific cases, e.g., for linking a single offering in a newsletter, as the integration link must be updated after the offering expires to display a new offering.
Please copy links to an offering's registration exclusively from the Preview Share area and never from the browser window.
Preview Share
'Preview Share' in edoobox refers to the section where you can configure and generate integration codes. As the name implies, this section allows you to preview your offerings in edoobox and prepare for the integration of your offerings into your website.
You can access this section by right-clicking anywhere in the offering tree or by accessing it via the Category or Offering Dashboard.
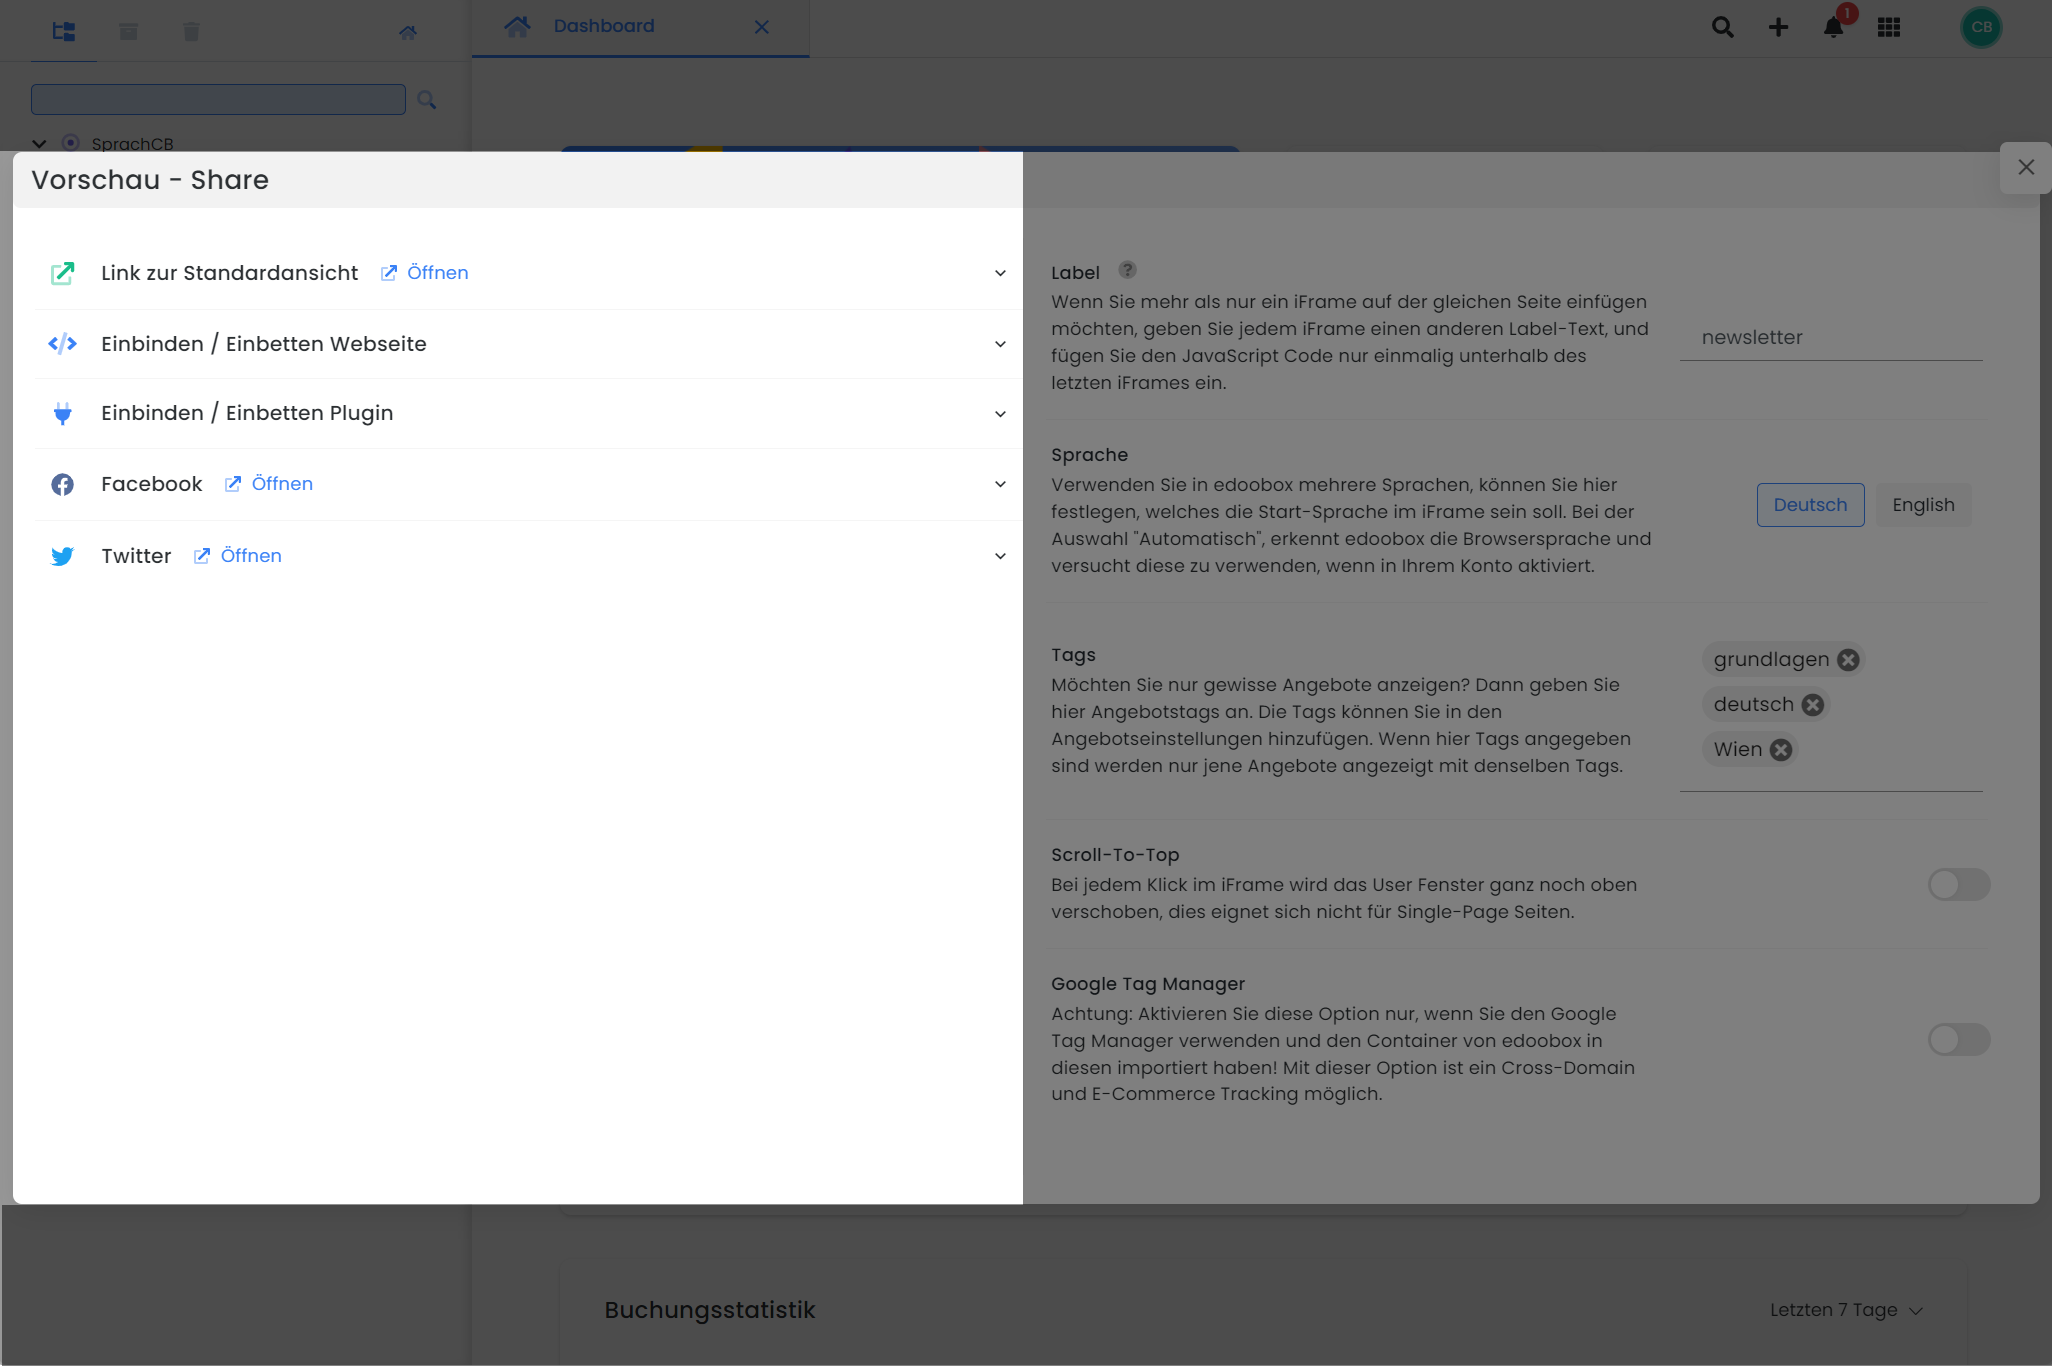
Link to Standard View
This link directs you to the standard view of the currently selected level and can be opened in a new browser tab.
https://app2.edoobox.com/intern/SprachCB/N2ETDOEMTG3KWC217G27TTL/?edref=intern/sprachcb/n2etdoemtg3kwc217g27ttl&edid=6526d7ca333a68O0O494314613bddf84aa24fe45227c52fdd96f7b14a
Integrate/Embed Website
This integration code is referred to as iFrame code and is used for iFrame integration. When integrated into a website, this iFrame code displays the standard view of the currently selected level within its own window on the webpage.
<iframe
    id="edoobox_sprach cb"
    frameborder="0"
    name="edooboxFrame_sprach cb"
    no-scroll
    seamless
    src="https://app2.edoobox.com/intern/SprachCB/N2ETDOEMTG3KWC217G27TTL/?edref=intern/sprachcb/n2etdoemtg3kwc217g27ttl&edid=6526d7ca333a68O0O494314613bddf84aa24fe45227c52fdd96f7b14a"
    style="border:none; width:100%; height:600px;">
    <a href="https://app2.edoobox.com/intern/SprachCB/N2ETDOEMTG3KWC217G27TTL/?edref=intern/sprachcb/n2etdoemtg3kwc217g27ttl&edid=6526d7ca333a68O0O494314613bddf84aa24fe45227c52fdd96f7b14a">Übersicht ansehen</a>
</iframe>

<script
    src="https://cdn1.edoobox.com/edoobox.iframe.embedded.v2.2.5.js"
    type="text/javascript"></script>
Please note: seamless attribute
The attribute seamless is deprecated as it has been removed from the standard HTML5 drafts. We therefore recommend discontinuing its use.
Info: data-mobile attribute
This attribute displays a button with your custom text on smartphones instead of an iframe, which, when clicked, leads to the default view of your offerings.
Syntax: data-mobile=“Your Text“ > (a space must be present between “ and >)
Integration/Embedding Plugin
This integration code is referred to as a Short-Code and is used for plugin-based integration. When embedded in a webpage, this Short-Code directs users to the default view of the currently selected level within a dedicated section directly on the webpage.
[edbs_panel label="intern/sprachcb/n2etdoemtg3kwc217g27ttl" language="de" tag="" url="intern/SprachCB/N2ETDOEMTG3KWC217G27TTL/" edcode="" ]
Facebook
In this section, you can generate an integration link, an iframe code, and a Short-Code for Facebook. The integration link redirects to Facebook upon clicking, allowing you to create a post for the currently selected level (e.g., an offering) in edit mode. This post can then be shared in a subsequent step.
https://www.facebook.com/sharer.php?u=https://app2.edoobox.com/intern/SprachCB/N2ETDOEMTG3KWC217G27TTL/?edref=intern/sprachcb/n2etdoemtg3kwc217g27ttl&edid=6527ad8eb52fd9O0O630800852afc84804bdbf09663155cb3a46e14e8&t=SprachCB
Using the iframe and Short-Code, you can embed a small Facebook icon on your website. Your customers can use this icon to like or share the integrated level (e.g., an offering).
Twitter (X)
In this section, you can generate an integration link, an iframe code, and a Short-Code for Twitter (X). The integration link redirects to Twitter (X) upon clicking, allowing you to create a post for the currently selected level (e.g., an offering) in edit mode. This post can then be shared in a subsequent step.
https://twitter.com/intent/tweet?source=sharethiscom&url=https://app2.edoobox.com/intern/SprachCB/N2ETDOEMTG3KWC217G27TTL/?edref=intern/sprachcb/n2etdoemtg3kwc217g27ttl&edid=6527ad8eb52fd9O0O630800852afc84804bdbf09663155cb3a46e14e8&text=SprachCB
Using the iframe and Short-Code, you can embed a small Twitter (X) icon on your website. Your customers can use this icon to like or share the integrated level (e.g., an offering).
Settings
The settings in the Preview Share section are designed to customize and optimize the integration code according to your requirements and workflows.
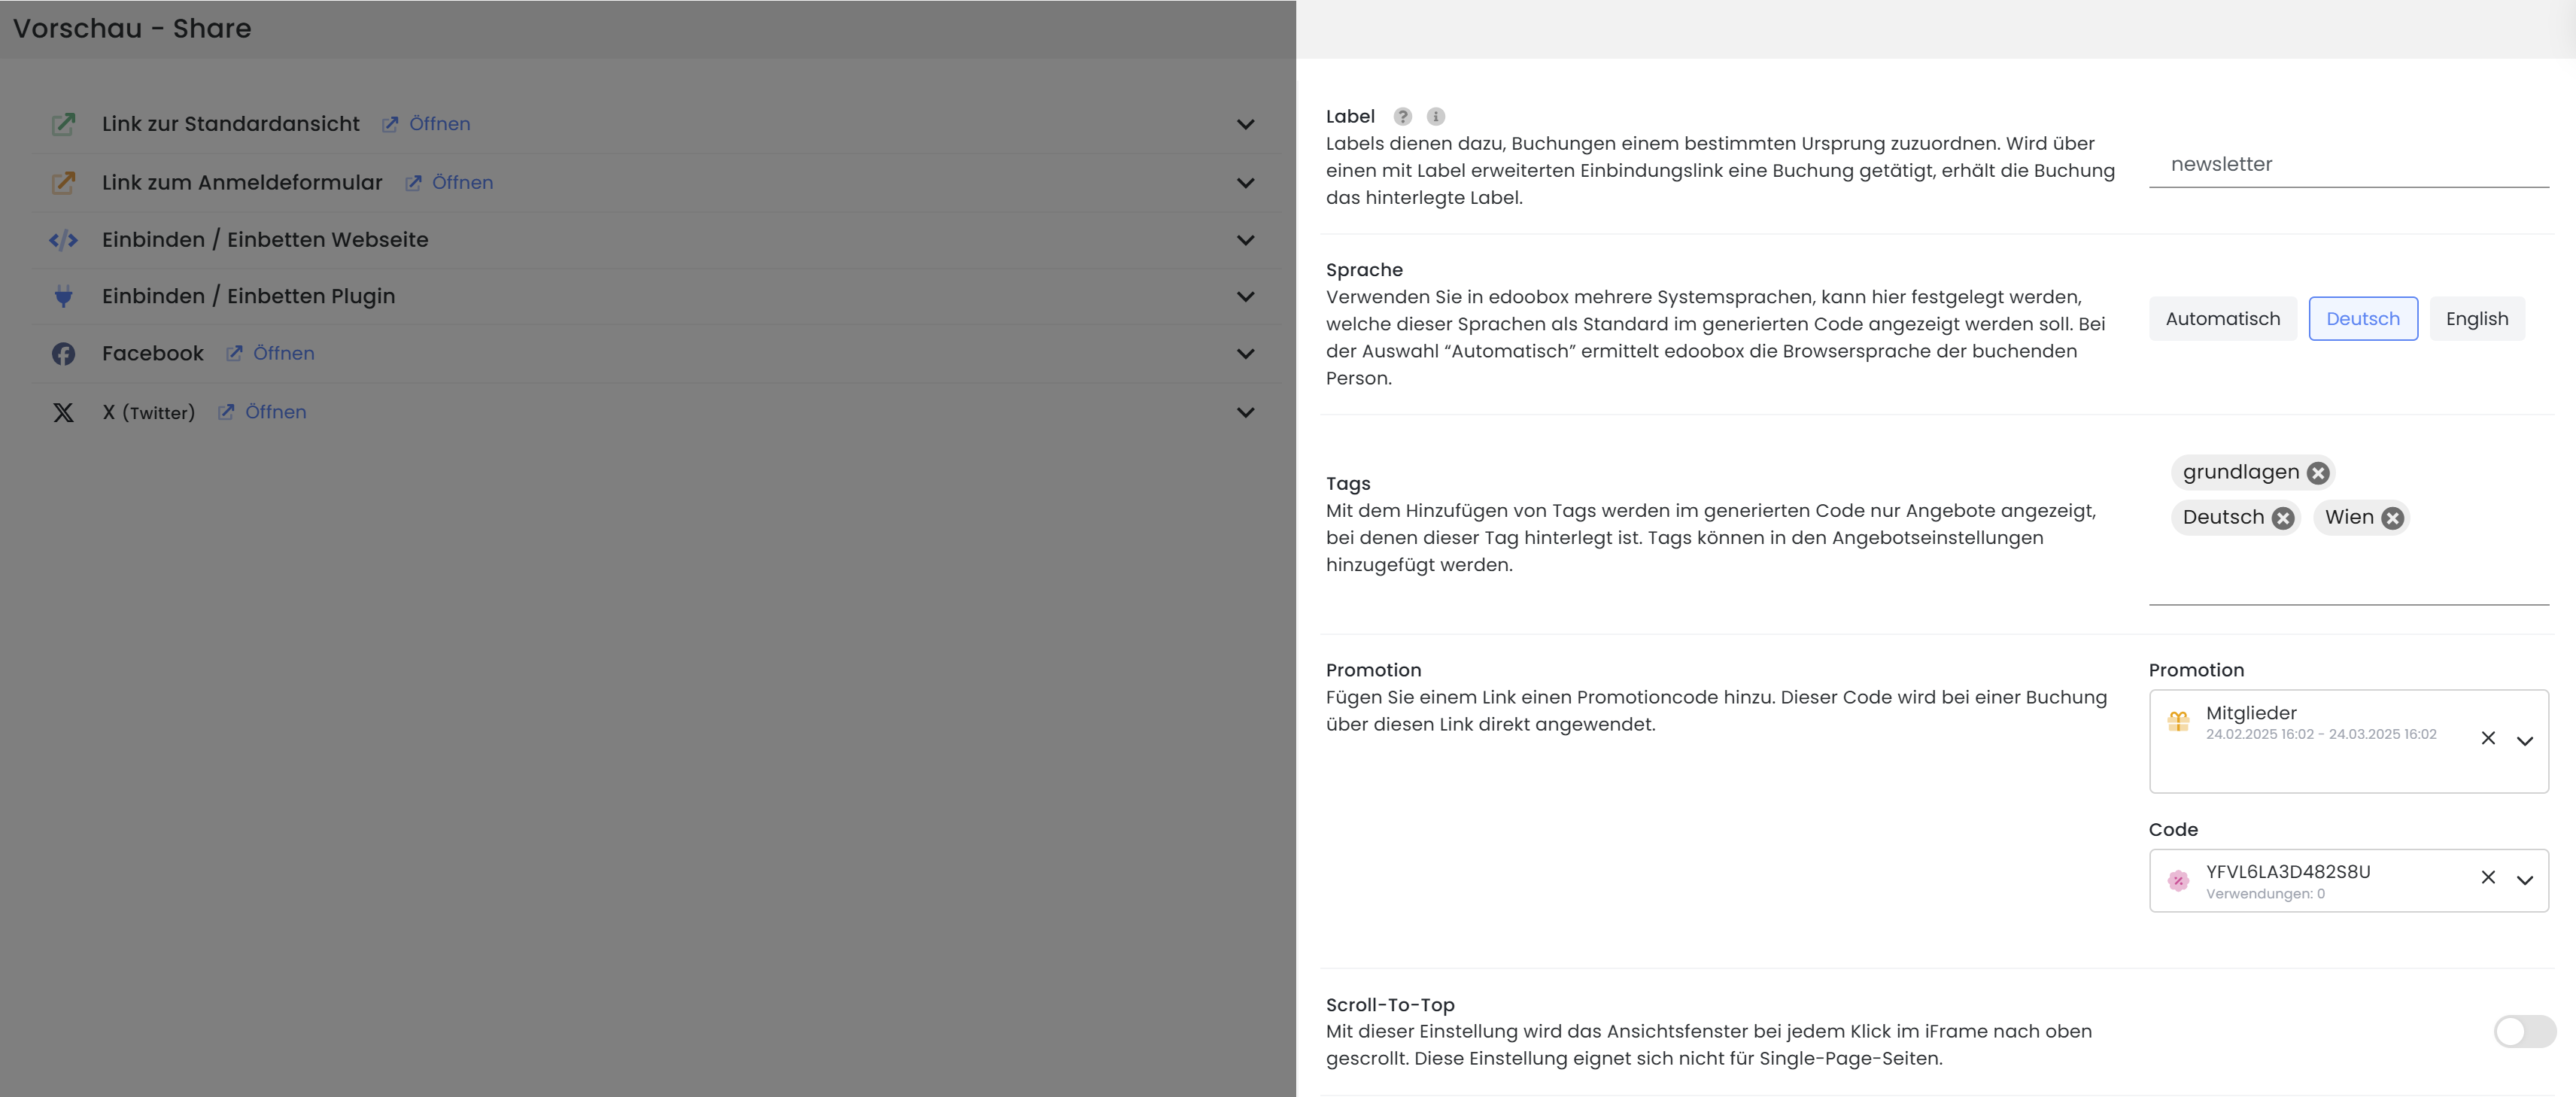
Label
You can add a label to each integration code you create. This allows you to track which integration code generated specific bookings. Please enter the label in lowercase.
You can also set up automatic email notifications for each label. In the notification settings, you can configure the system to automatically send an email to a specified address whenever a booking is made with that label. To do this, you must first create a custom email template in the Emails section (e.g., for a new booking with a specific label).
Language
The language setting determines the default language in which the integration code should display the booking window. If no specific language is set for the integration code, the booking window will default to the browser language of the participant making the booking, provided that the corresponding language (DE, EN, or FR) is activated in the system.
Tip: Changing the Language in the iFrame
In the Design Manager, under Page Header in the Navigation Menu, enable the language selection. This allows your participants to set their preferred language for the booking process themselves.
Tags
Each offering can be assigned tags. By using tags in the integration code, all offerings with the corresponding tags for the current level can be displayed.
Promotion
Add a promotion code to a link to ensure it is automatically applied when a booking is made through that link. This feature can also be utilized in conjunction with tags. For instance, if you have assigned the 'Members' tag to a specific participant group, and this tag is configured as a validity criterion for a member-specific promotion, you can embed this promotion directly into the registration link. Participants who book via this link and have the 'Members' tag associated with their account will then automatically receive the discounted registration rate compared to other customers.
Scroll-To-Top
Within the iFrame, each click causes the window content to scroll to the top. This behavior can be inconvenient for single-page applications or lengthy content pages, as users are forced to re-scroll to the iFrame after every interaction. This automatic scroll effect can be disabled by deactivating the 'Scroll-To-Top' function.
Related Guides
Keywords for this guide
iFrame | Integration | Scroll-To-Top | Tag | Label | Embedding | Tracking