The "Inquiry List" feature allows multiple lists to be integrated for each offering. This opens up various possibilities during the booking process:
-
Reservation for Approval: Participants can submit booking requests to you, which must be approved by an intermediary on the participant's side (e.g., their supervisor) before the booking is definitively completed.
-
Expression of Interest: Here, interested parties can submit an inquiry to express their interest in an offering. Spots can be reserved and held until confirmed by the provider.
-
Invitations for Specific Groups: This option allows you to actively invite specific groups of people to an offering directly from edoobox. Participants can accept with a few clicks and are immediately booked.
Example: Reservation for Approval
An employee wishes to register for your seminar but requires their booking to be confirmed by their supervisor. The participant can provisionally book into the offering via the inquiry button in the offering details and immediately receives an inquiry confirmation by email, which they can forward to their supervisor. If the supervisor confirms the booking, the employee becomes a definitive participant. Depending on your settings in the inquiry list, the spot for the employee will be reserved during the approval period.
To use the query list for this example, please follow the step-by-step instructions, omitting step 7.
Example: Sending Invitations
For your seminar, you wish to invite a specific department of a company and make the registration process as simple as possible for the employees. To do this, you add all employees of the respective department to the offering via the inquiry list and send the invitation with a single click via email to all employees. They receive an email with the invitation and can accept or decline it with a few clicks. If an invitation is accepted, the booking confirmation and ticket are automatically sent to the customer.
To use the query list for this example, please follow the step-by-step instructions, omitting step 3.
1. Create Inquiry List
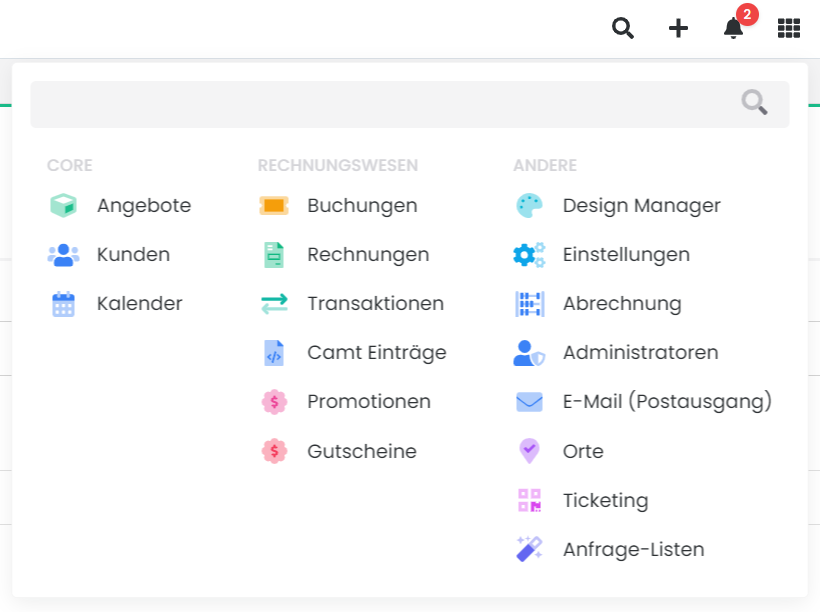
In the App menu, click on the “Inquiry Lists” menu item.
Click "New List" to create a new list.
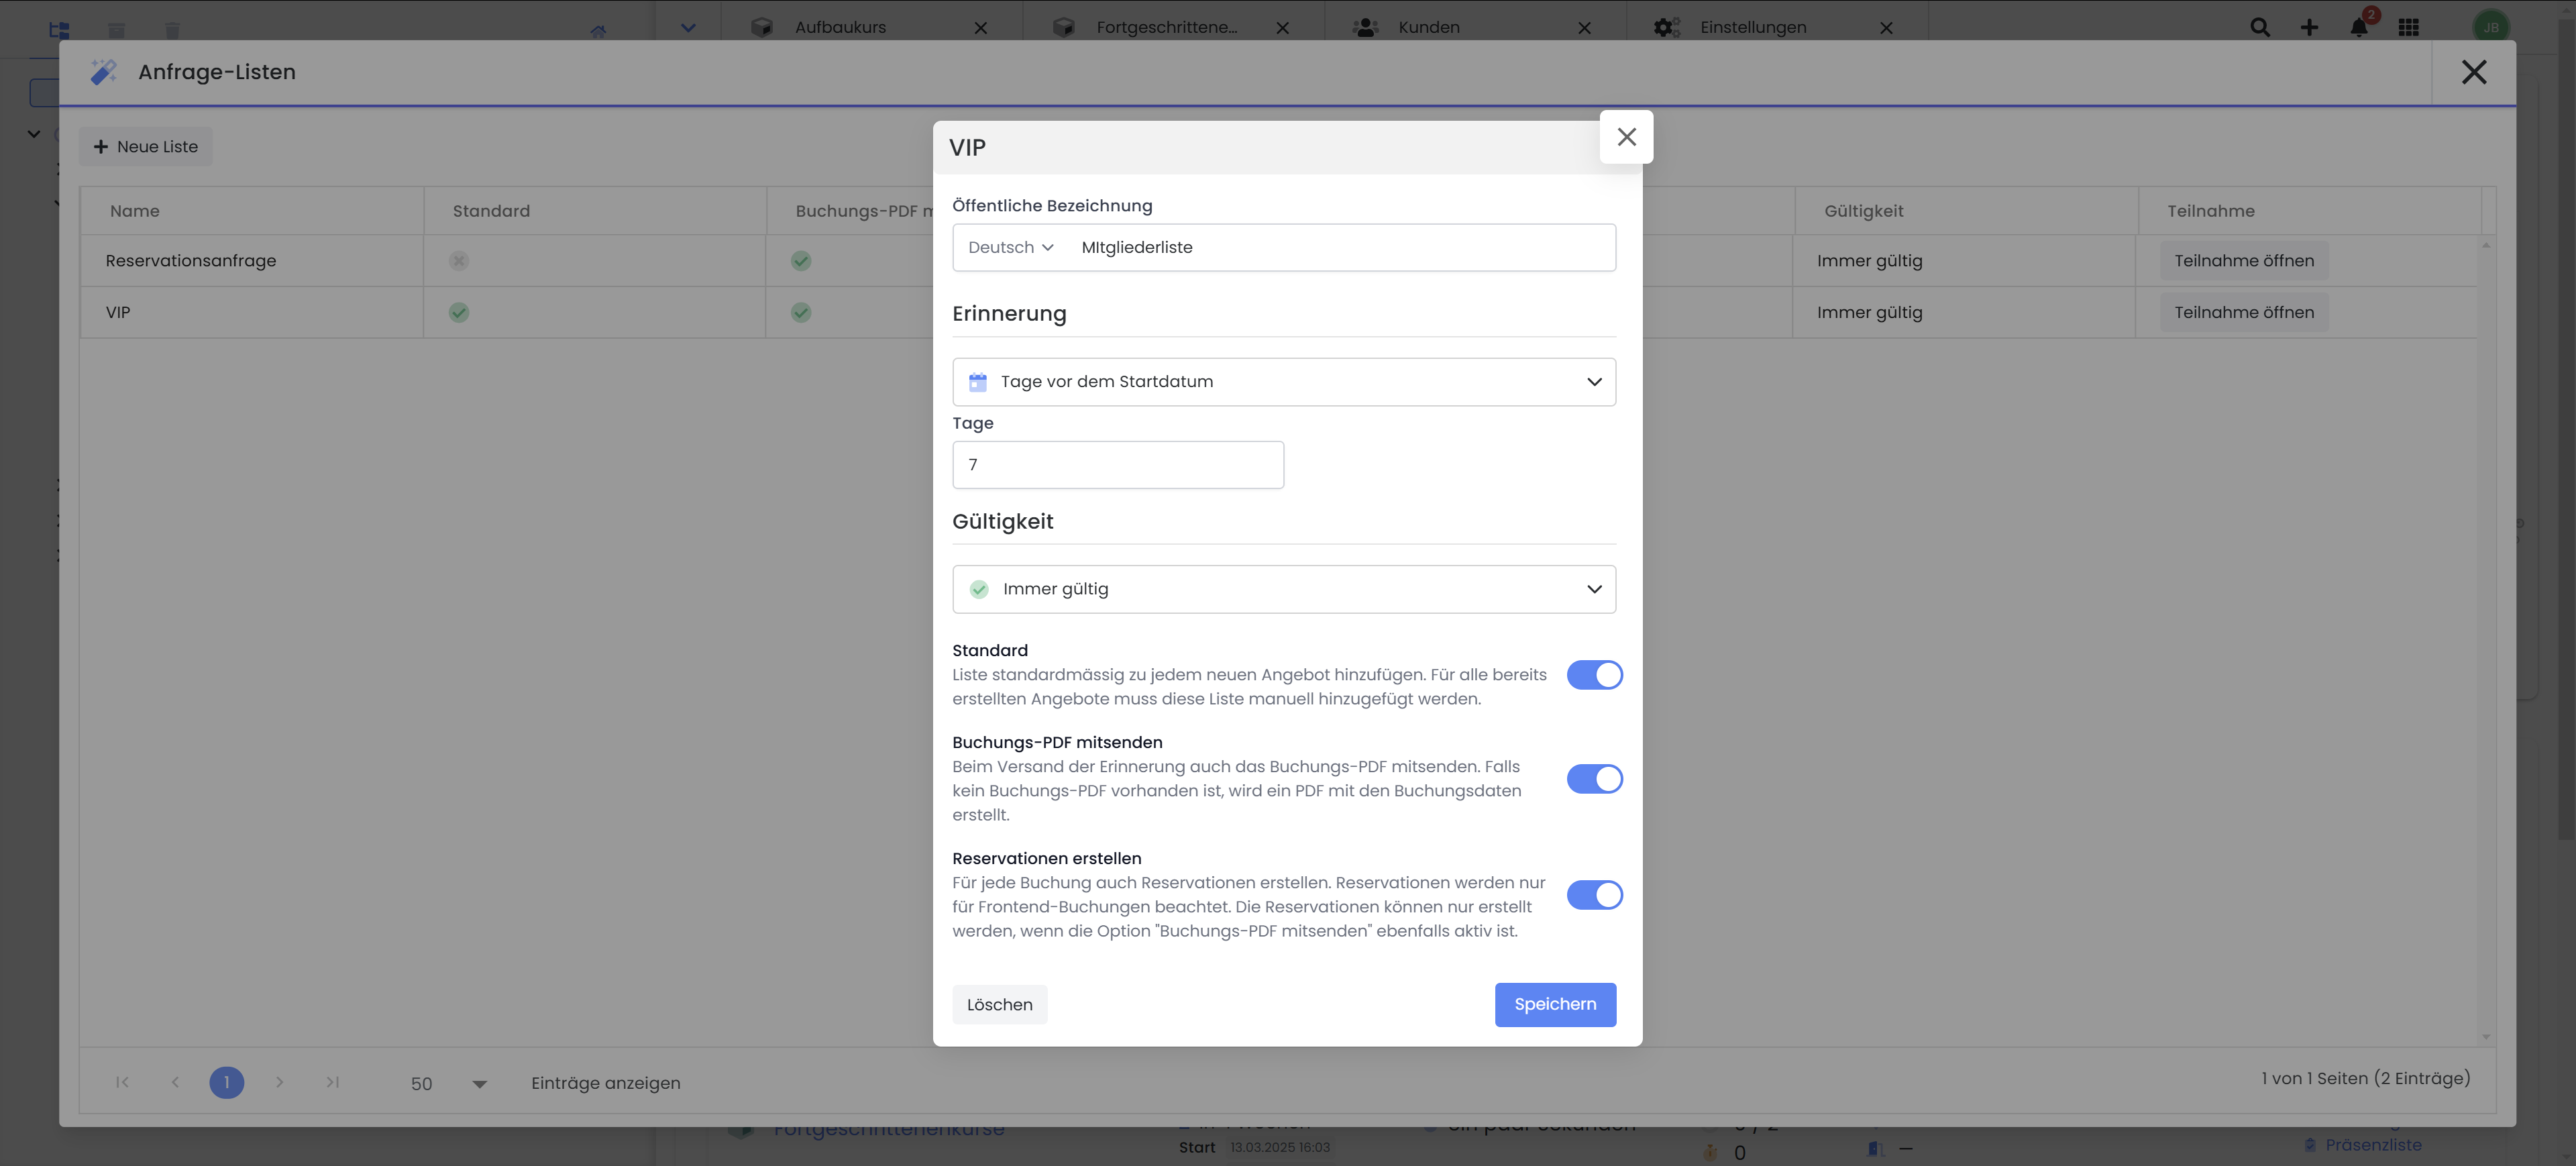
In the new list, you will find various configuration options:
-
Name (Public Designation): Provide a clear name for your inquiry list for administrative purposes. This name will be displayed at various points in the user interface and during your participants' booking process.
-
Reminder: Specify whether and how many days before the start date or from the issuance of an inquiry a reminder should be sent.
-
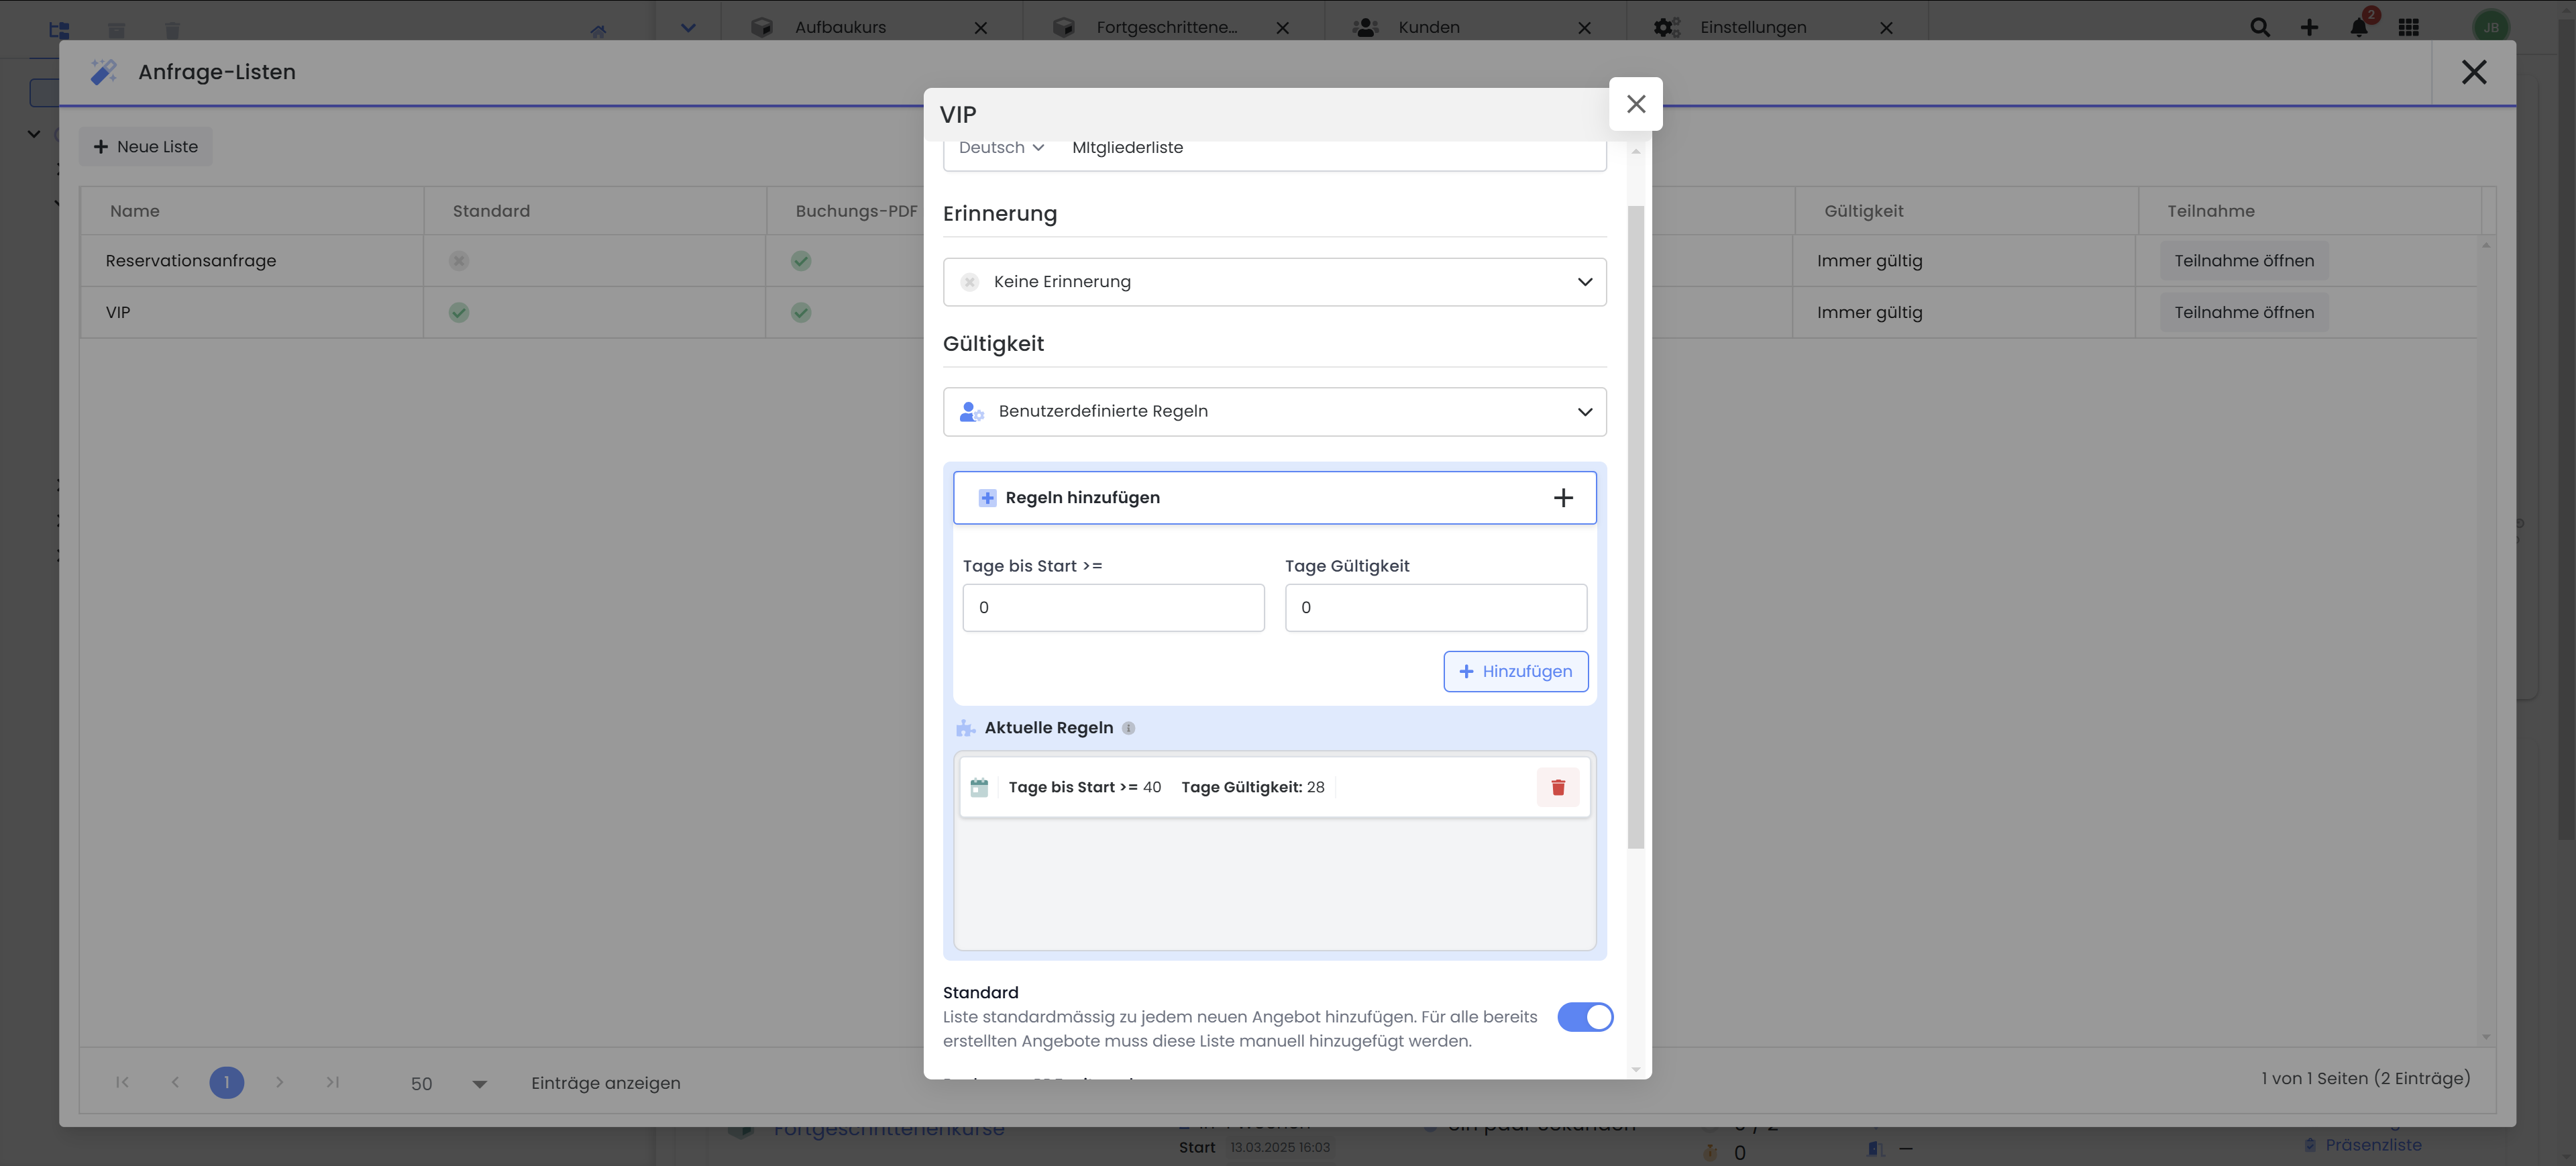
Validity: Define the period during which the request is valid. Here, too, you can select a time frame based on the offer’s start date or from the date the request was issued. If you wish to set multiple different validity periods, you have the option to create and add custom rules. Please note that the reminder should always be sent before the validity period expires.
Example: Custom Rules
If the course start date is 40 days or more prior to the course commencement, the offer is only valid for 28 days.
-
Default: Activate this option to automatically add this inquiry list as a default to every new offer in edoobox.
-
Includebooking PDF: Select this option if you always want to include the "Inquiry List Booking.pdf" file as an attachment in the inquiry list email.
-
Create Reservations: Enable this option if you want to reserve spots in the relevant offer for received or sent inquiries. This ensures that a spot is guaranteed for the person making the inquiry or the person being inquired about. This setting is only available in combination with the booking PDF.
Please note that when participants make bookings, only the maximum number of spots in an offer can be reserved. If you allow both bookings and requests for a single offer at the same time, the booked spots and the reservations are added together. This prevents overbooking of the offer. Overbooking by an admin is always possible.
2. Add Inquiry List to Offer
To add an inquiry list to an offer, proceed as follows:
-
Navigate to the offer where you wish to add the inquiry list.
-
Click on 'More' and then on 'Inquiry Lists'. Here you will find an overview of the available inquiry lists in your edoobox account, and you can add the desired lists to your offer selection using the plus symbol.
You have now added the desired inquiry lists to your offer. If you activate the 'Default' setting in the list settings (Point 1), the corresponding inquiry list will automatically be added to every newly created offer.

3. Integrate Inquiry Button into the Booking Process
To insert an inquiry button into the booking process, please follow these steps:
-
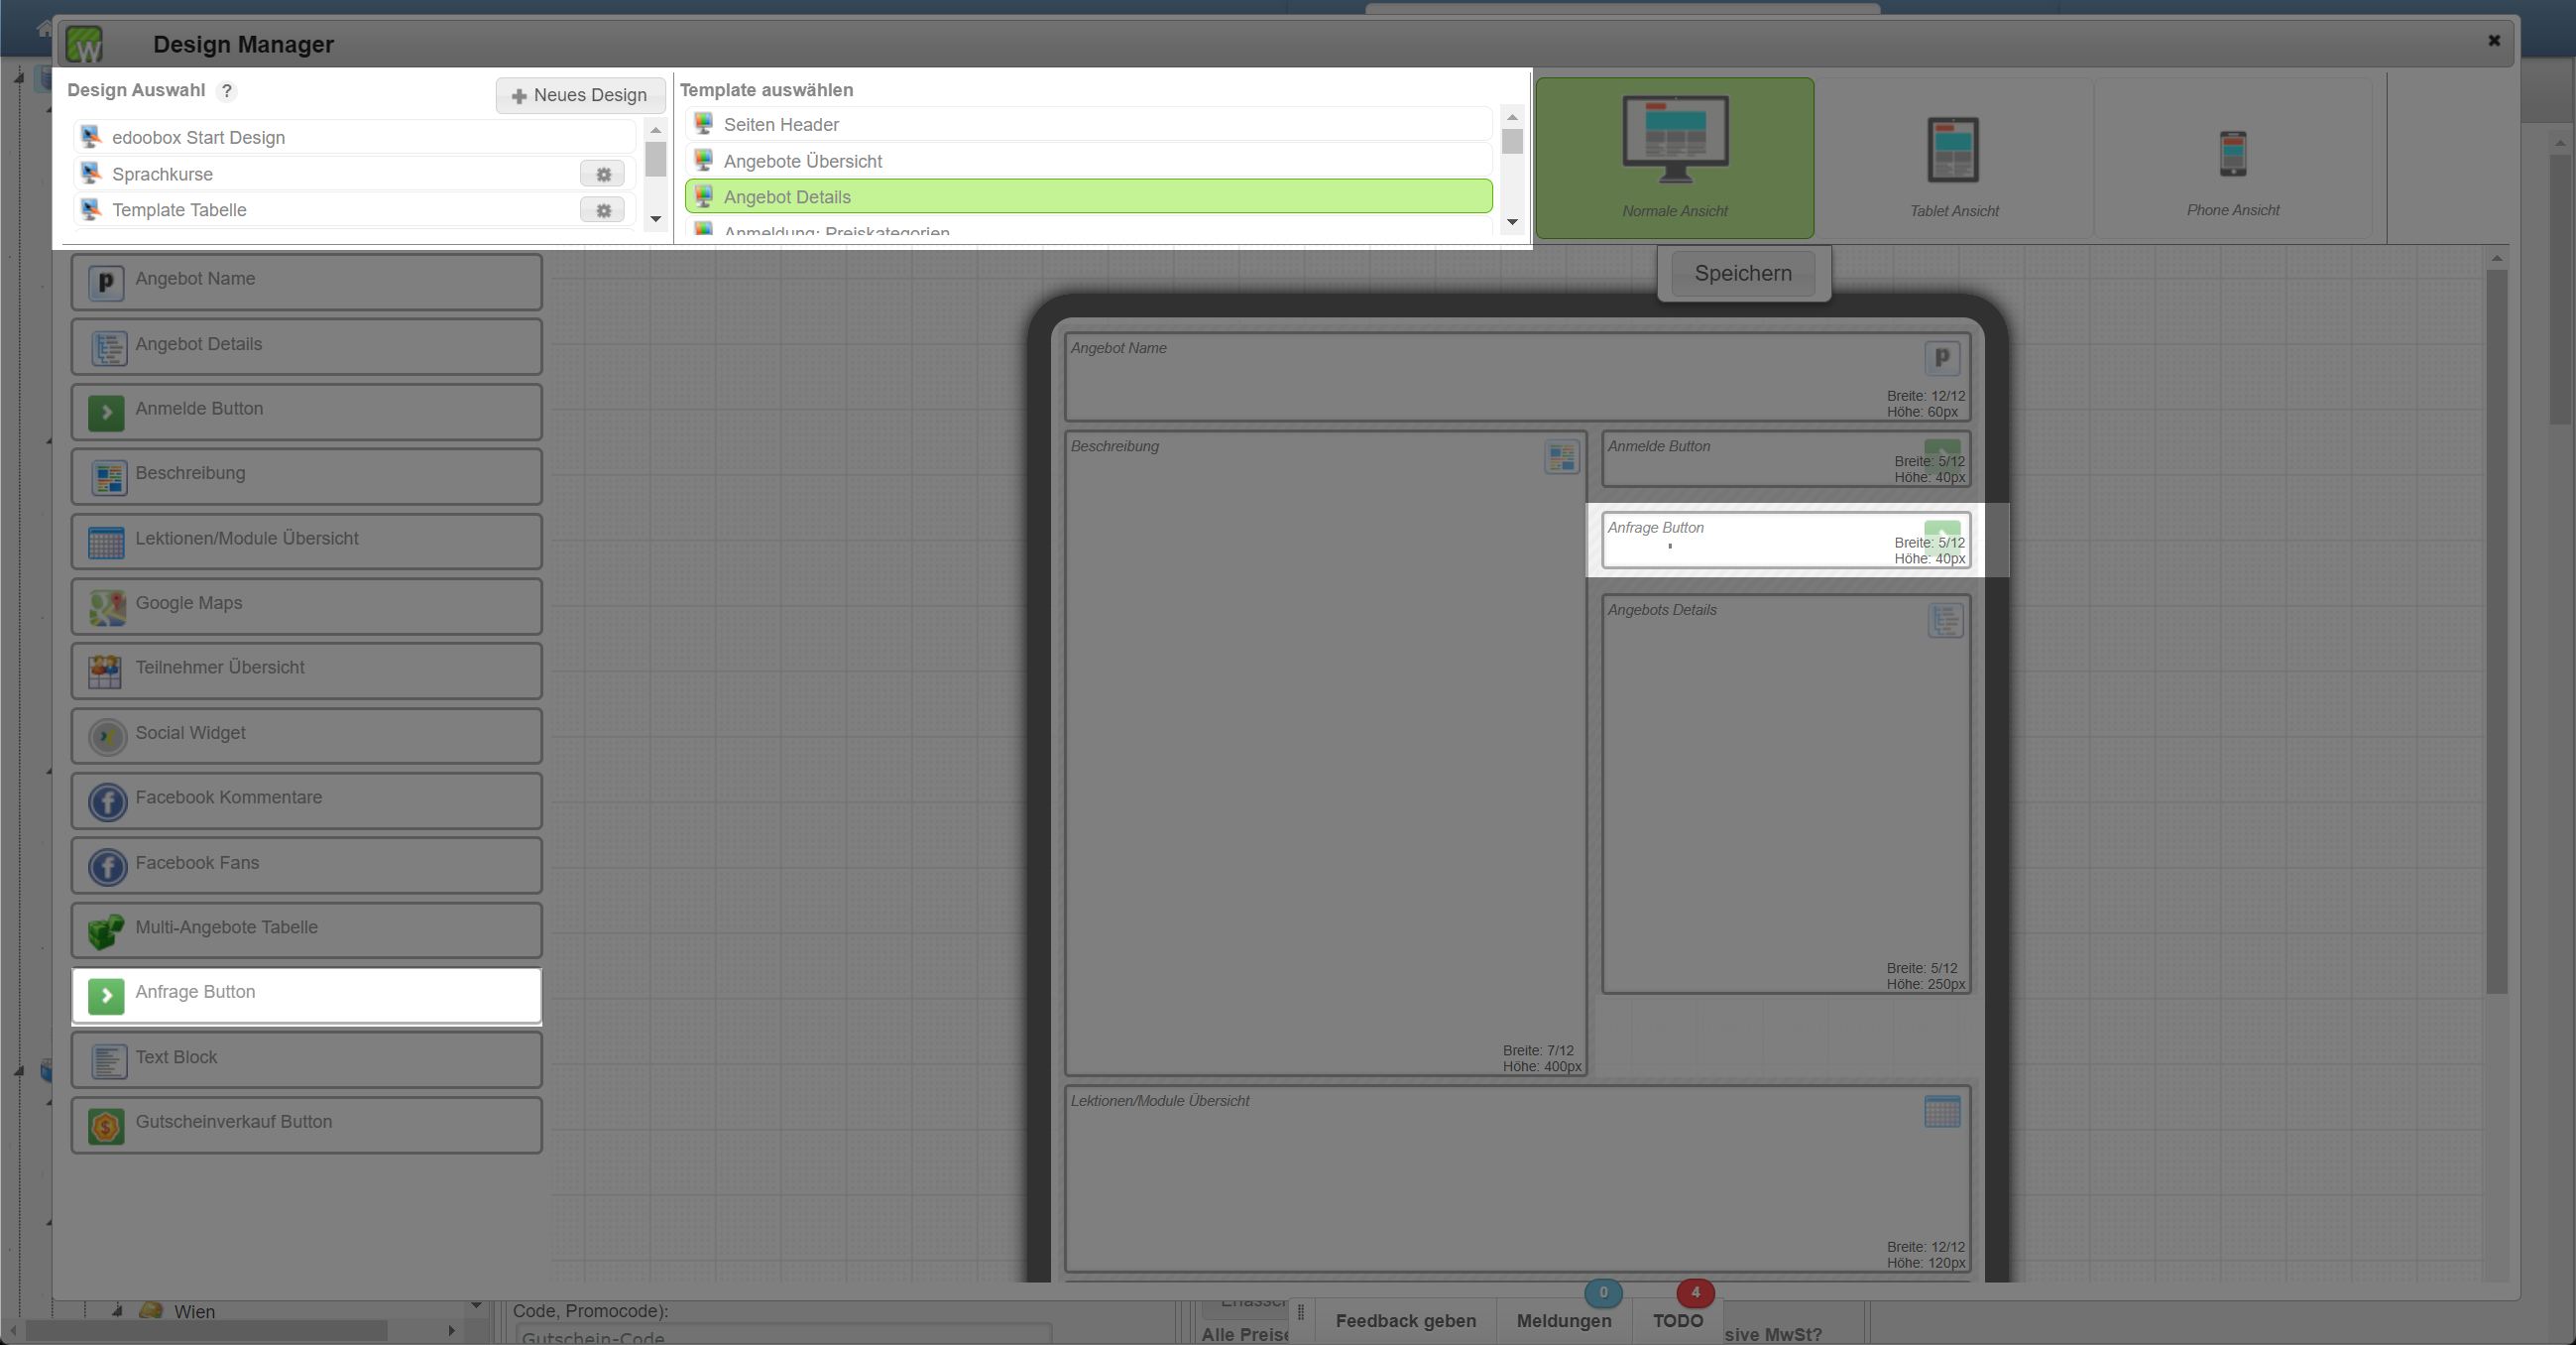
Open the Design Manager, select the desired design, and navigate to the 'Offer Details' template.
-
Insert the 'Inquiry Button' widget from the widget overview into the template at the desired location.
-
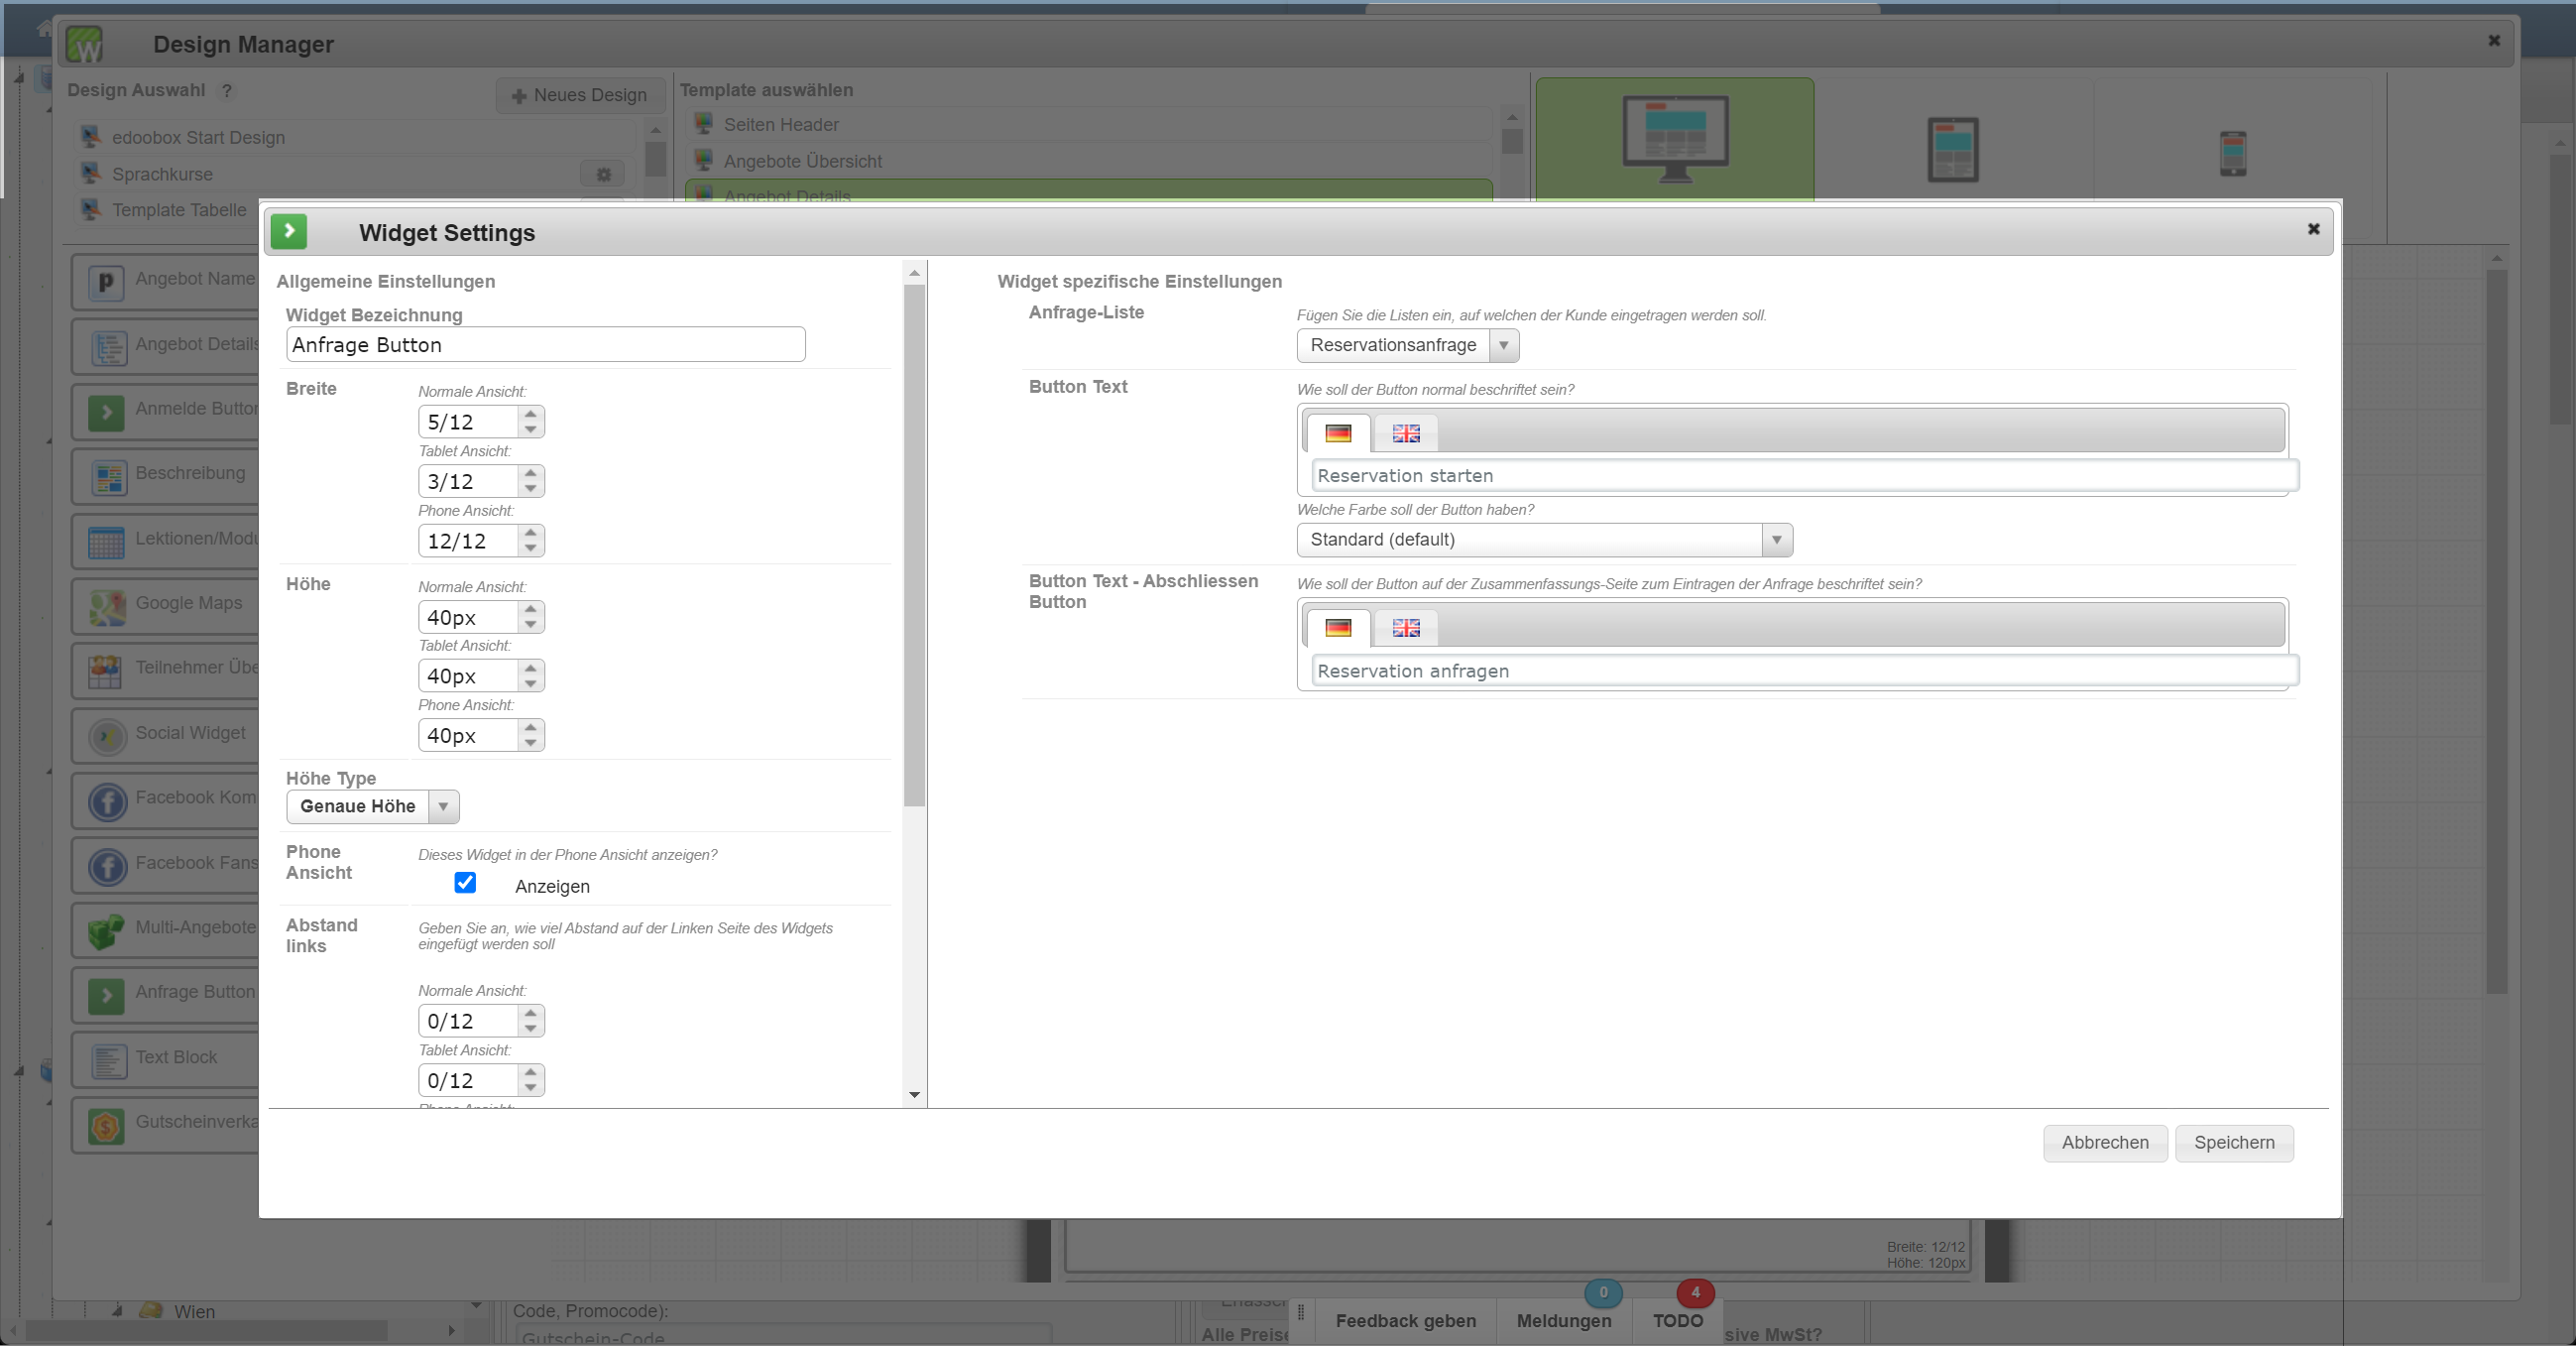
Open the widget settings for the 'Inquiry Button' by clicking on the gear icon.
-
Link the desired inquiry list to be used via the inquiry button. The desired list can be searched by its name.
-
Adjust the button labels for the start and completion of the inquiry in the booking process to suit your application. You can also define the button color.
-
Save your settings.
-
If you wish to use multiple lists for an offer, repeat this step and add additional inquiry buttons.
4. Customize Decision Process
Your participants (or their supervisors) have the option to decline or accept an inquiry during the inquiry process. This decision page can be designed by you via the Design Manager.
-
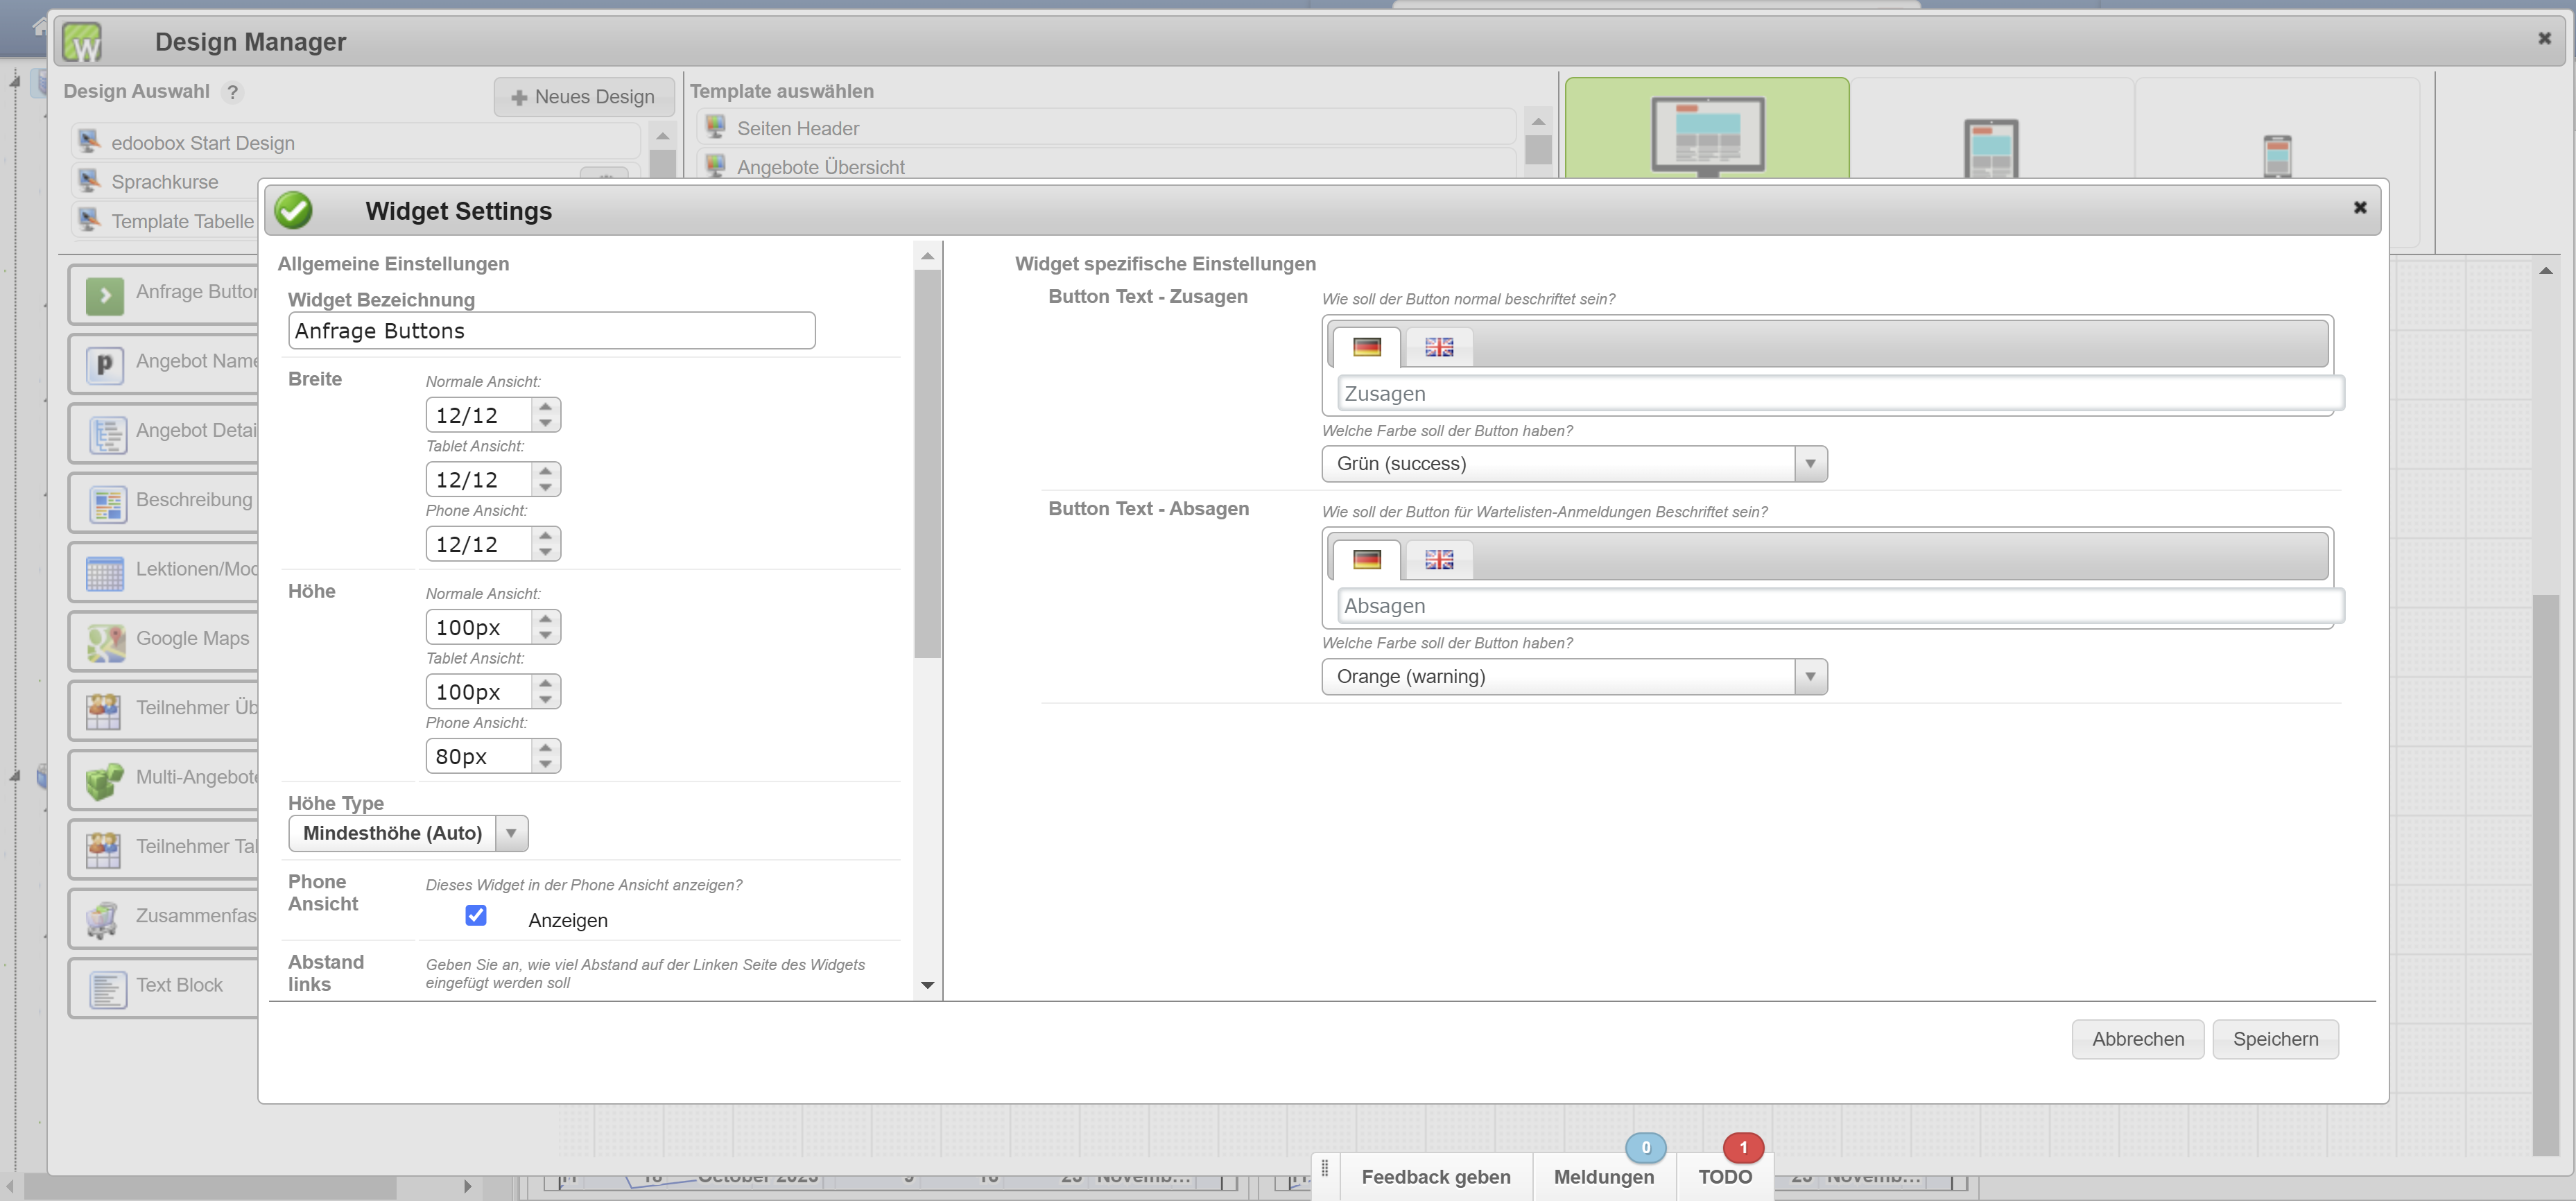
Open the Design Manager, select the desired design, and navigate to the 'Inquiries: Accept or Decline' template.
-
Select the widgets you want to display on this page and customize the individual widget settings to meet your needs.
Tip: Make an initial inquiry via a test booking and open this decision page in a second browser tab or window. This allows you to view the saved customizations in the Design Manager immediately in the second browser tab or window as soon as you reload the page. -
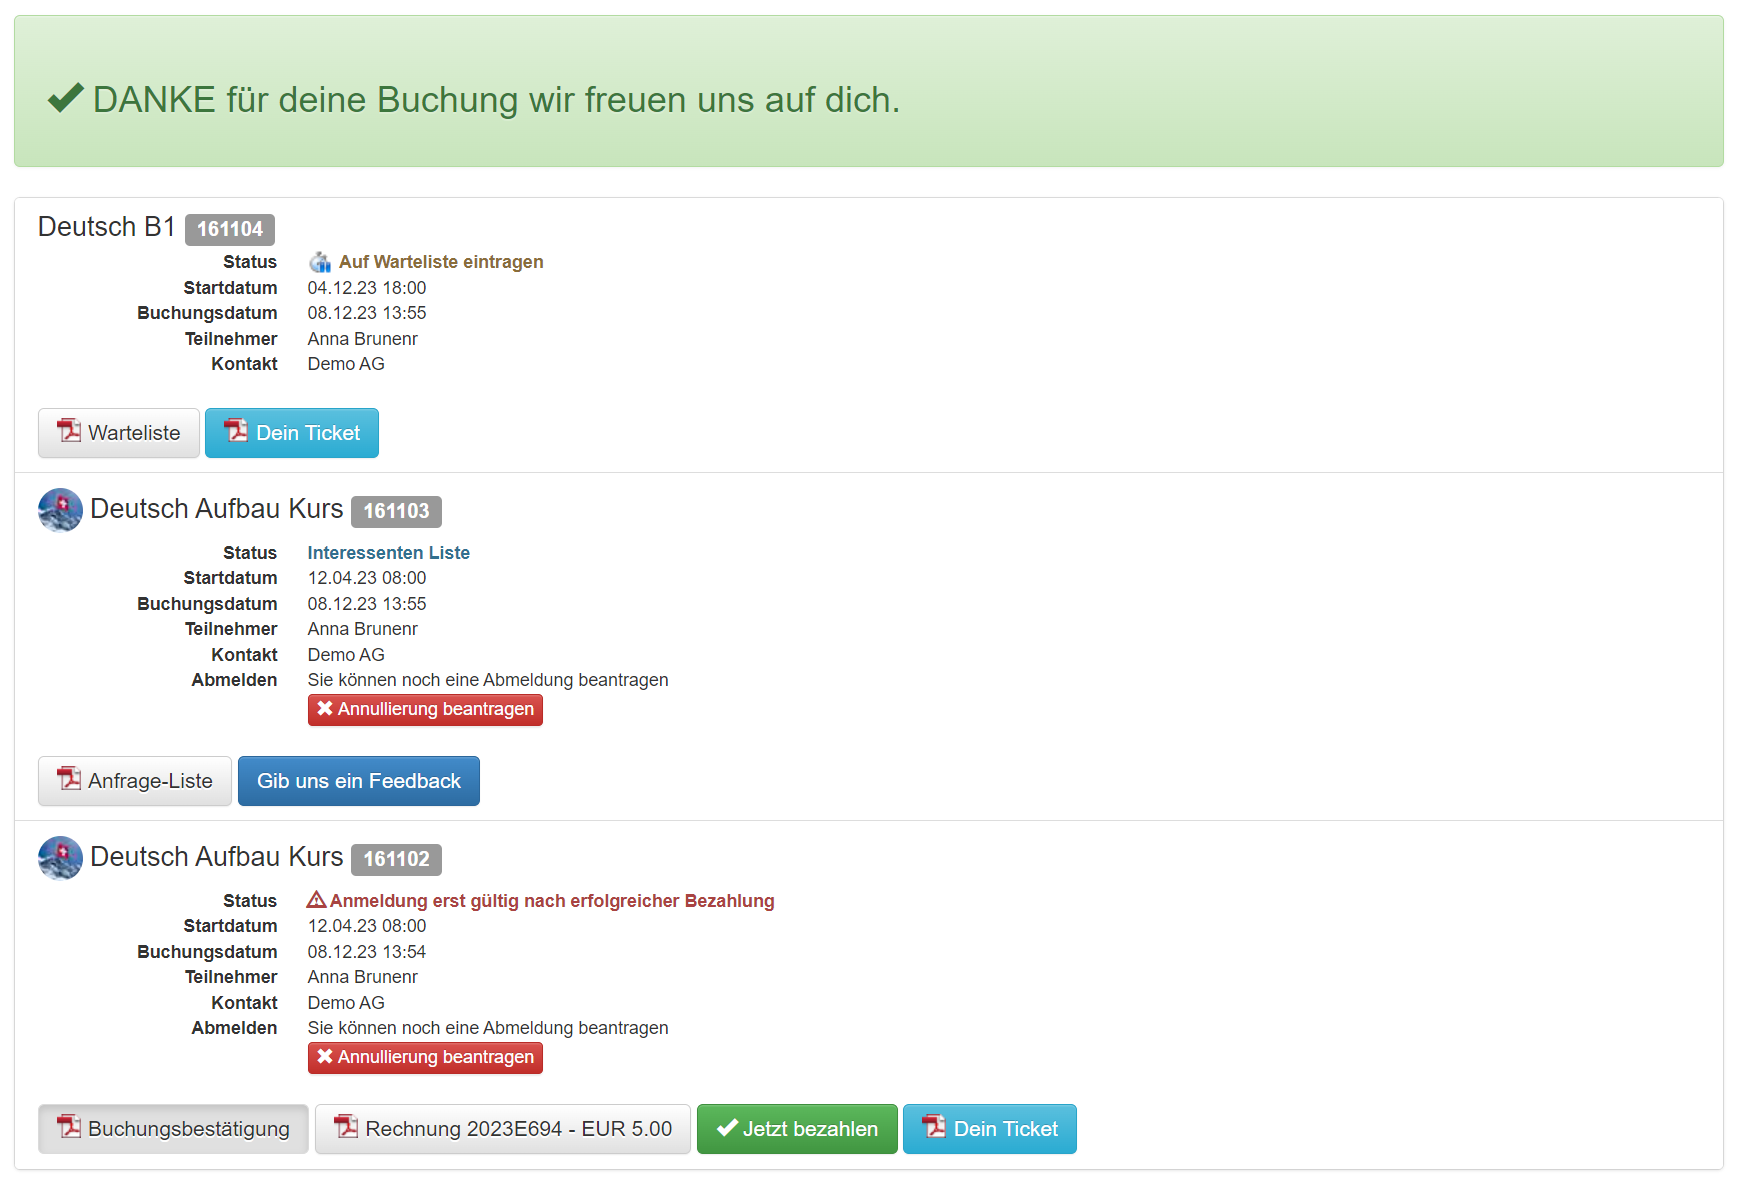
In the Design Manager, within the "Completion Page" template, the "Thank You" widget allows for customization of the thank-you message text per booking type. Alternatively, in the "All Bookings" widget, the text for the decision button with various attachments can be defined.
-
You can change the names of the buttons on the final page using the names of the PDF attachments.
5. Customize Email Templates
For utilizing the inquiry list function, three new email templates are available in the email settings. These can be individually customized in terms of design and text. Please note that the same three email templates are used for all inquiry lists and must therefore be formulated to suit all application scenarios.
-
Inquiry List Email: This email is sent when an inquiry is submitted via the frontend inquiry process or when you click the "Send Inquiries" button in the inquiry list section of an offer. It includes the Booking.pdf (Inquiry List), depending on the settings in the individual inquiry list.
-
Inquiry List Reminder Email: This email is sent when a reminder is triggered for an inquiry. It can be triggered either automatically via the inquiry list settings or manually by clicking the "Send Reminders" button. The reminder email is sent to all individuals on an inquiry list who have not yet responded to the inquiry at the time the email is triggered.
-
Booking.pdf (Inquiry List): Depending on the configuration in the individual inquiry lists, the PDF is either attached to the Inquiry List Email or not.
IF Conditions with true and false Using Values in Inquiry List Email
The placeholder ##OfferlistSecondMailExists## can be utilized within an IF condition to verify if a secondary email address is stored for a booking. If present, the inquiry will additionally be dispatched to a second recipient. A prerequisite for this functionality is that the relevant participant data field for capturing the secondary email address has been selected in the global email settings.
Example:
{IF?OfferlistSecondMailExists = true}Text for the second email address is included here{ENDIF}
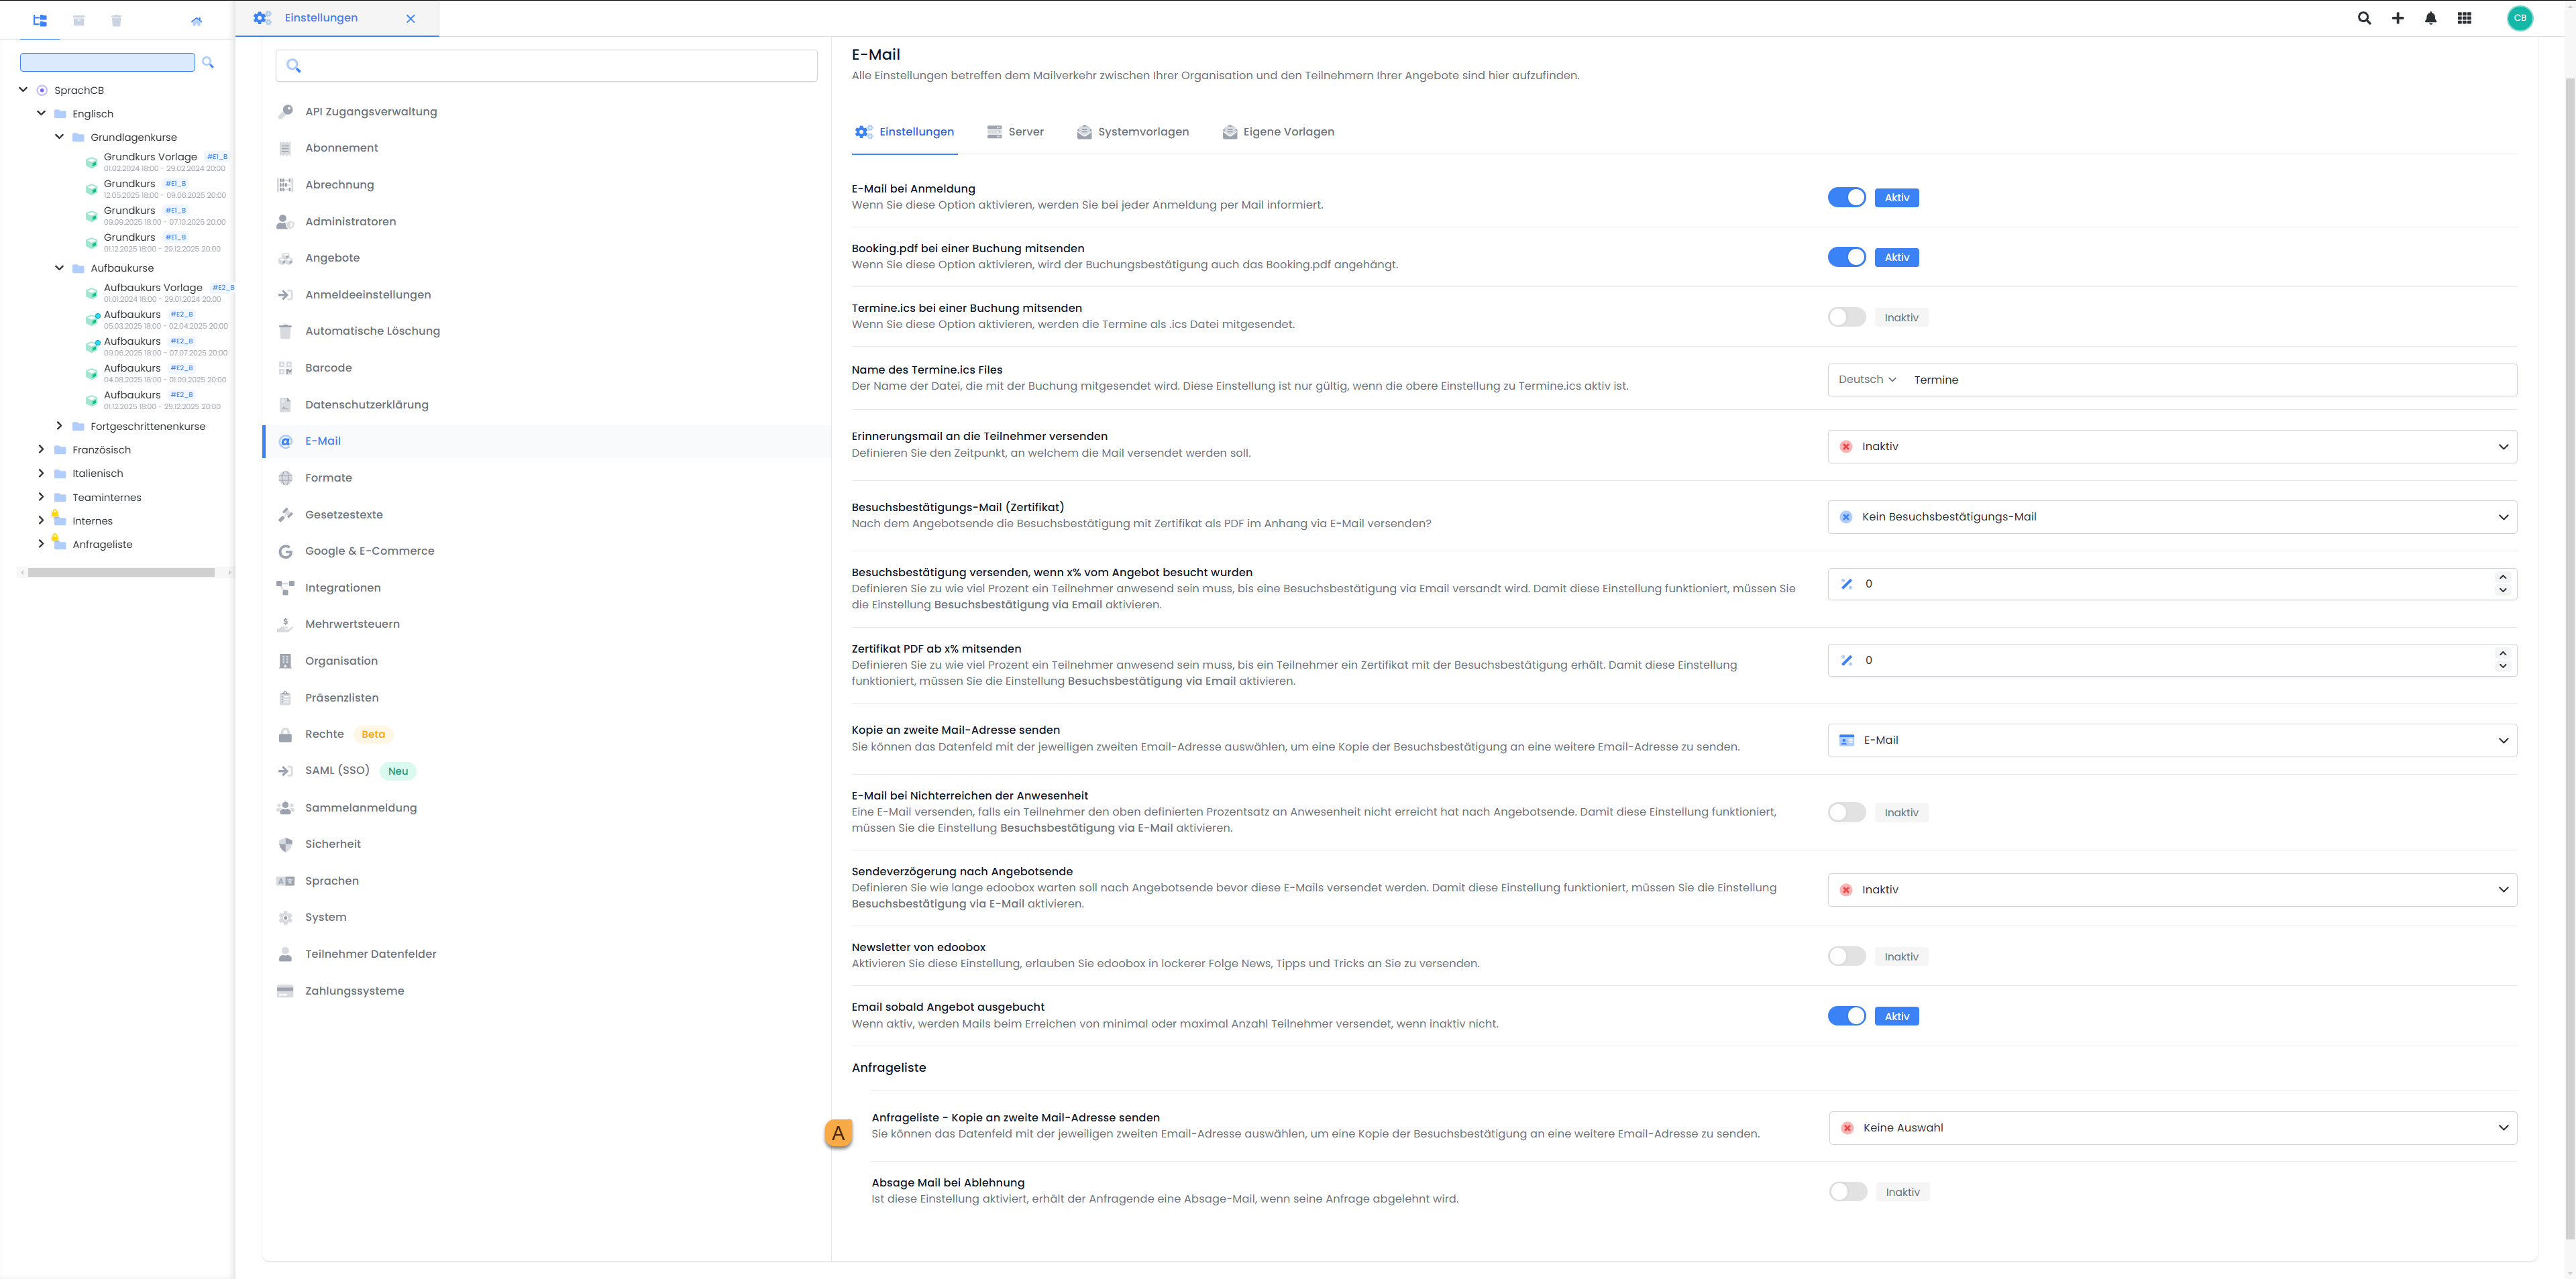
If you want the second email address to appear only in the inquiry list and not in a regular booking for an offer, you can configure this in the Design Manager. Open the settings for the added participant data field and select the "Only Inquiry List Allowed" B option under Visibility by Booking Type.

6. View Inquiry List Bookings
To view bookings in an inquiry list, click on the desired offer and navigate to the "Inquiry Lists" section via the "Participants" tab.
Here, all active inquiry lists for the offer are available for selection. Clicking on the desired inquiry list will display the inquiries contained within it.
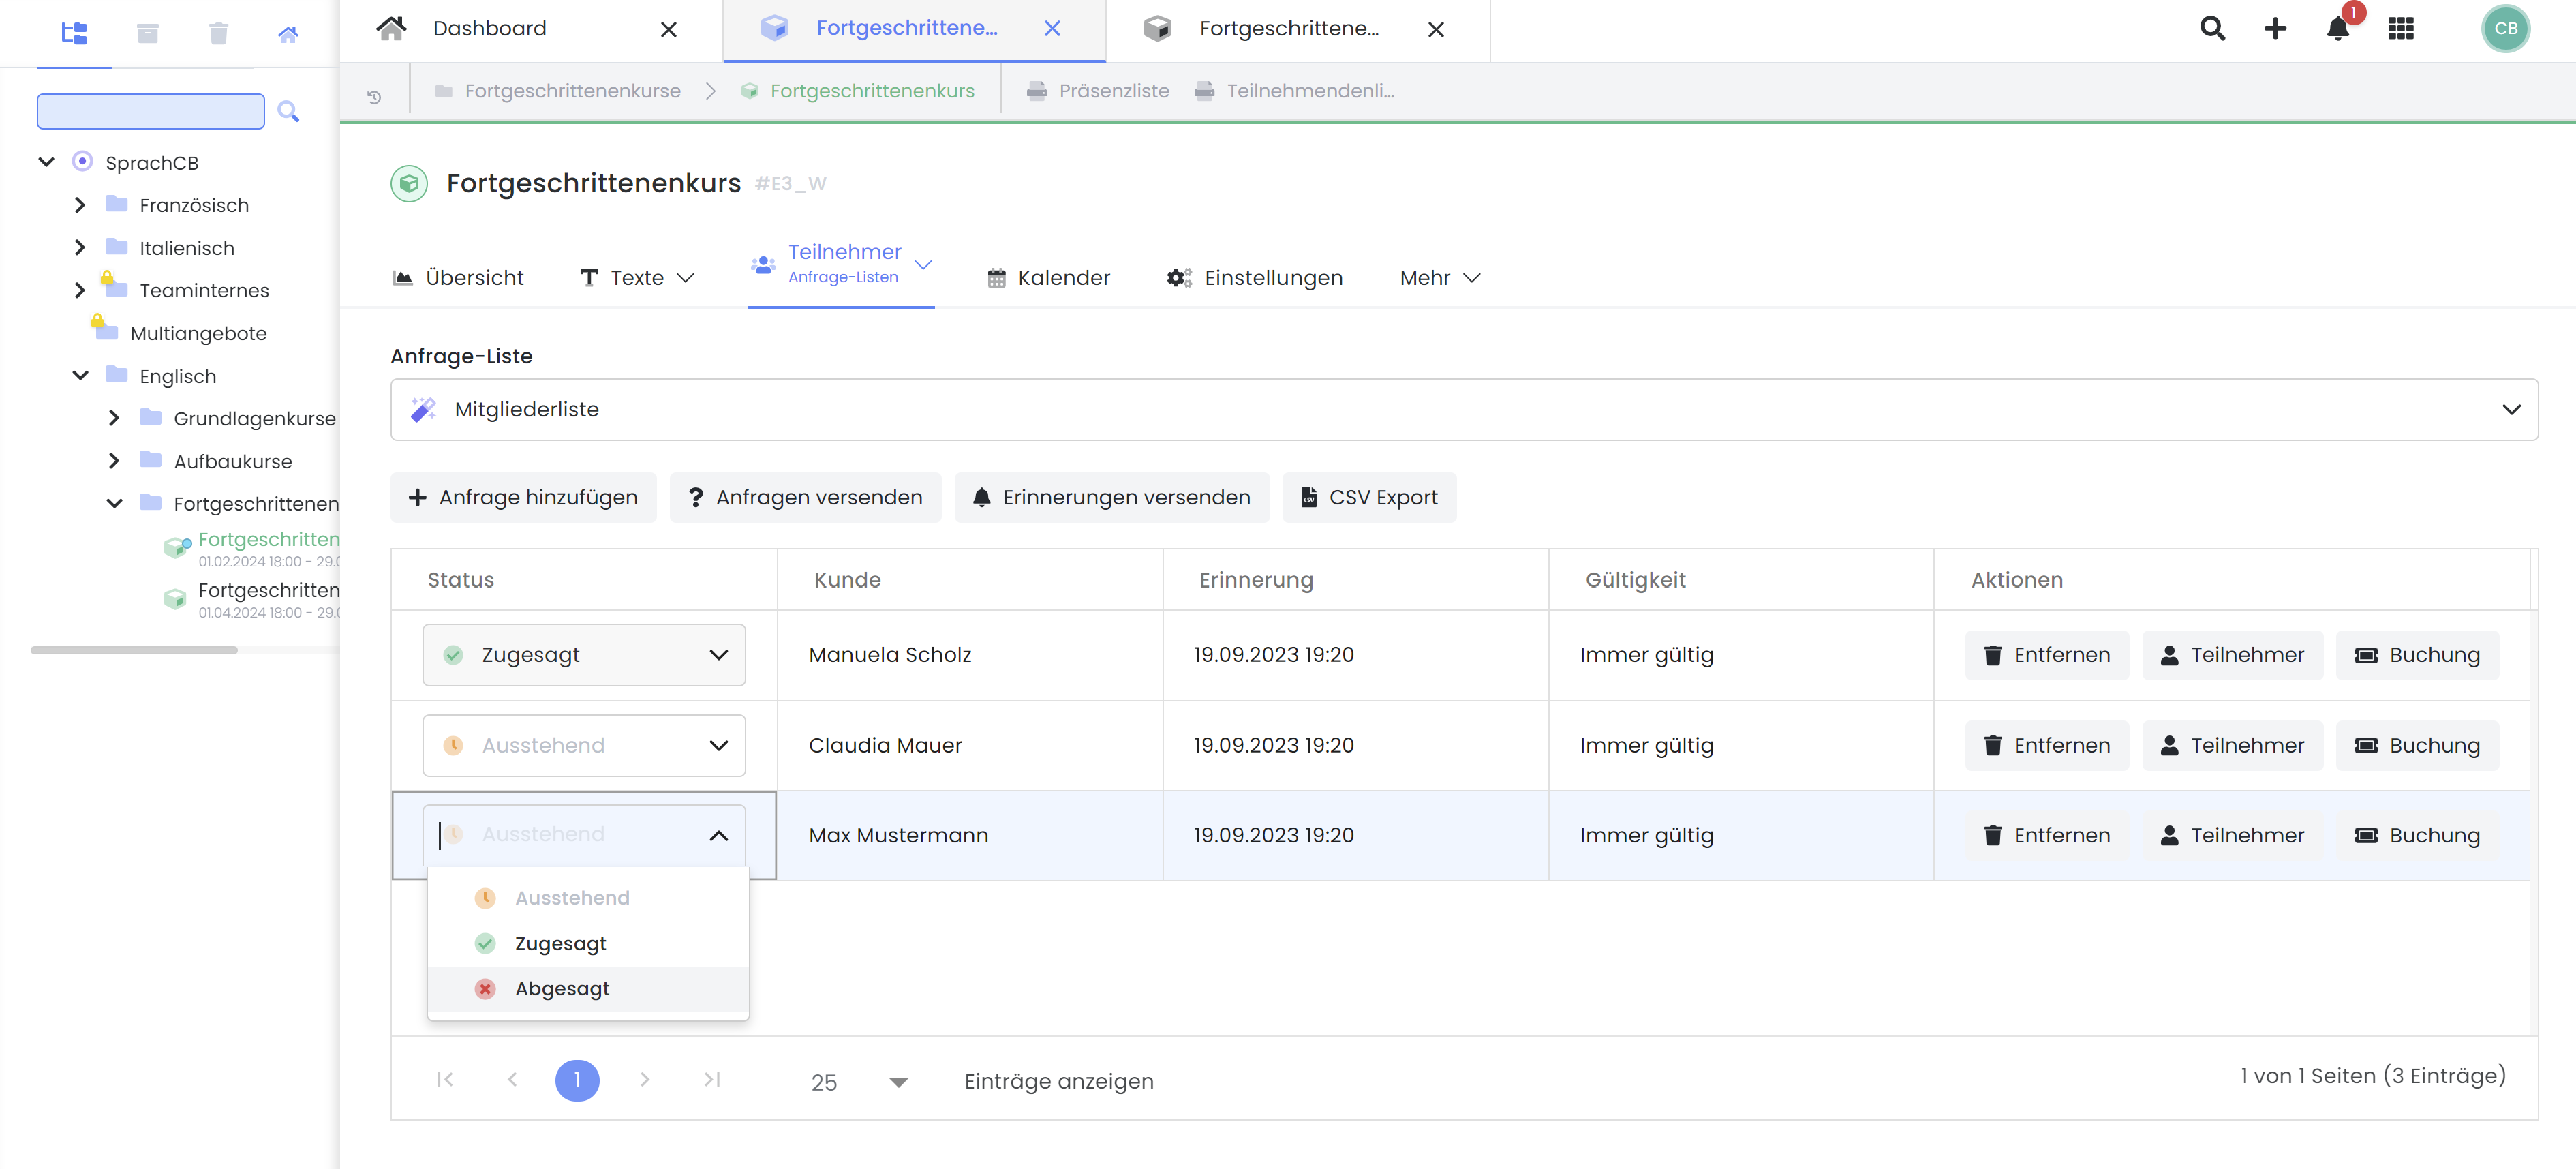
In the "Status" column, you will find an overview indicating for which participants the inquiry has been accepted or rejected, and where a response is still pending. Upon acceptance of an inquiry, the booking for the respective participant is immediately finalized, and they are added to the definitive participant list.
Please note: The status can only be set once
The status of a participant request can only be set once. If the wrong status is selected, the request can be deleted and added again. If a participant has been confirmed by mistake, the booking can also be deleted from the offer.
7. Invite/Inquire Participants for an Offer
If you wish to invite a specific group of people to one of your offers, click on the desired offer and navigate to the "Inquiry Lists" section via the "Participants" tab. Here, you can add the desired individuals to the list using "Add Inquiry". Once all desired individuals are on the list, the invitation can be sent by clicking "Send Inquiry". This will send the "Inquiry List Email" template to all individuals on the list.
Info: Invite Participants by Mail
In the "Request Lists" section, there is a CSV export that can be used for a mail merge. In addition to the active data fields, the CSV export also includes the URL for the "Vote" button.
In Microsoft Word, the URL can be converted into a QR code.
-
Create Field: Open the Word document and create a new field with
CTRL+F9. -
Enter QR Code Command: Type within the curly braces
{ }the commanddisplaybarcode "edoobox.com" QR \s 50Replaceedoobox.comwith the desired URL from the CSV. 50 denotes the QR code size. -
Generate QR Code: Using the key combination
ALT+F9, the field is converted into a QR code.
Important to Note:
The following functionalities have limitations when used in conjunction with the inquiry list:
-
MustPay: Can be enabled for the inquiry list, but has no impact upon confirmation. The participant is enrolled in the course with the status 'payment pending'.
-
Group Registration: For group bookings within the inquiry list, only the contact person is displayed and notified via email, consistent with standard booking procedures. Confirmation or cancellation actions must be applied to both participants jointly.
-
Countdown: Not displayed in the inquiry list
-
Multi-Offer: Cannot be combined
-
Flexible Date Selection: Cannot be combined
Tip: Respond to Inquiries Promptly
To ensure you do not miss any inquiries or bookings within your edoobox account, we recommend enabling the 'Email on Registration' setting in your email configurations. This action will trigger the 'Registration Info' email template for every frontend booking, dispatching it to your organization. You can customize this email template with relevant placeholders (e.g., ##BookingInfoType## to display the booking type), thereby staying continuously informed about the latest bookings in your edoobox account.
Related Guides
Keywords for this guide
Guest list ¦ Request a quote ¦ Request an offer ¦ Confirmation ¦ Cancellation ¦ Internal list ¦ VIP customer group