Please note: Limited 3
The option to use SAML in your edoobox account is available starting from the Limited 3 subscription. Free support for this topic is limited. Should you require more extensive assistance, we are pleased to offer paid services.
Implementing a SAML-based Single Sign-On (SSO) solution in edoobox enables users (Super Admins, Admins, and Managers) to navigate seamlessly and securely between their Identity Provider (Microsoft Azure) and edoobox without having to log in to edoobox again or use a new password each time. This integration helps save time and enhances the security of user accounts.
What is SAML?
SAML (Security Assertion Markup Language) Identity Provider (IdP) is a security service that allows users to log in to multiple applications with a single username and password. The IdP generates secure login credentials (SAML assertions) and sends them to the Service Providers (SP) that host the applications the user wishes to access. The IdP handles user authentication and permission verification, while the SP processes the user's credentials and controls access to the applications.
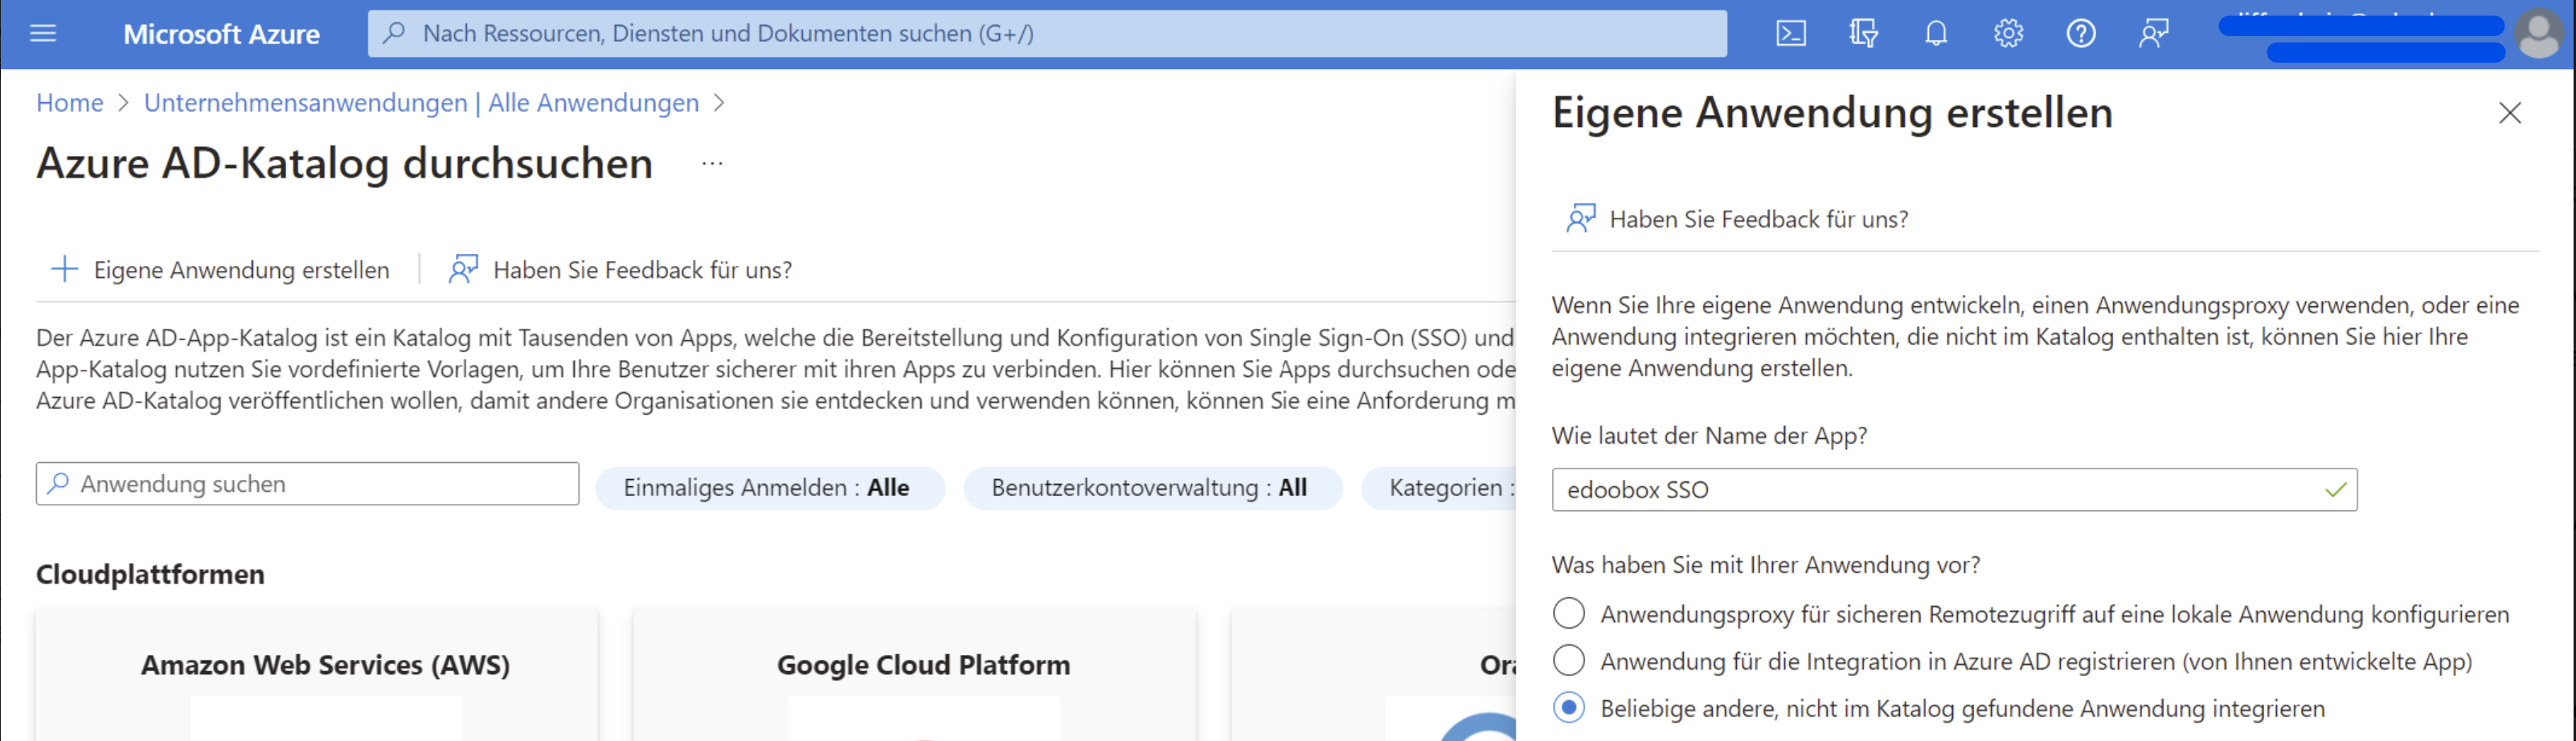
1. Create an Enterprise Application in Azure AD
Create a new Enterprise Application in Azure AD. To do this, go to the Azure portal and select "Enterprise applications". Click on "Create your own application" and enter a name for the application (e.g., edoobox SSO).
2. Configure the App
-
In the "Single sign-on" menu, configure the settings. Select the SAML method and enter the following values:
-
Reply URL: Enter the value "https://app2.edoobox.com/v2/auth/saml/reply".
-
Identifier (Entity ID): Defined in Step 5
Creating the Entity ID for use as a Remote XML URL
-
-
Optimize the app settings as needed. Here, you can, among other things, configure login policies or define custom attributes.
-
Optional: Add additional attributes:
-
If an email address already exists, you have the option to merge the new user with the existing user or create a new user with a different email address.
"allow_migration_user": true -
Do you plan to pass the ACL (recommended)? If so, please refer to optional steps 3 and 4 of this guide and set the value here to "true".
"allow_permission_acl": true
If you do not wish to integrate ACL, skip directly to Step 5 (Enable/Activate SSO via edoobox) after c. -
If an active SAML connection exists, the classic edoobox login can be disabled.
"allow_edoobox_login_when_connected": true
-
Info: What is edoobox ACL?
edoobox ACL (Access Control List) can be used for user permission management, and each user group can be assigned a value from an edoobox right. If you do not use edoobox ACL, the admin with the same email address and permission must be manually recorded in edoobox before the user can log in via SSO.
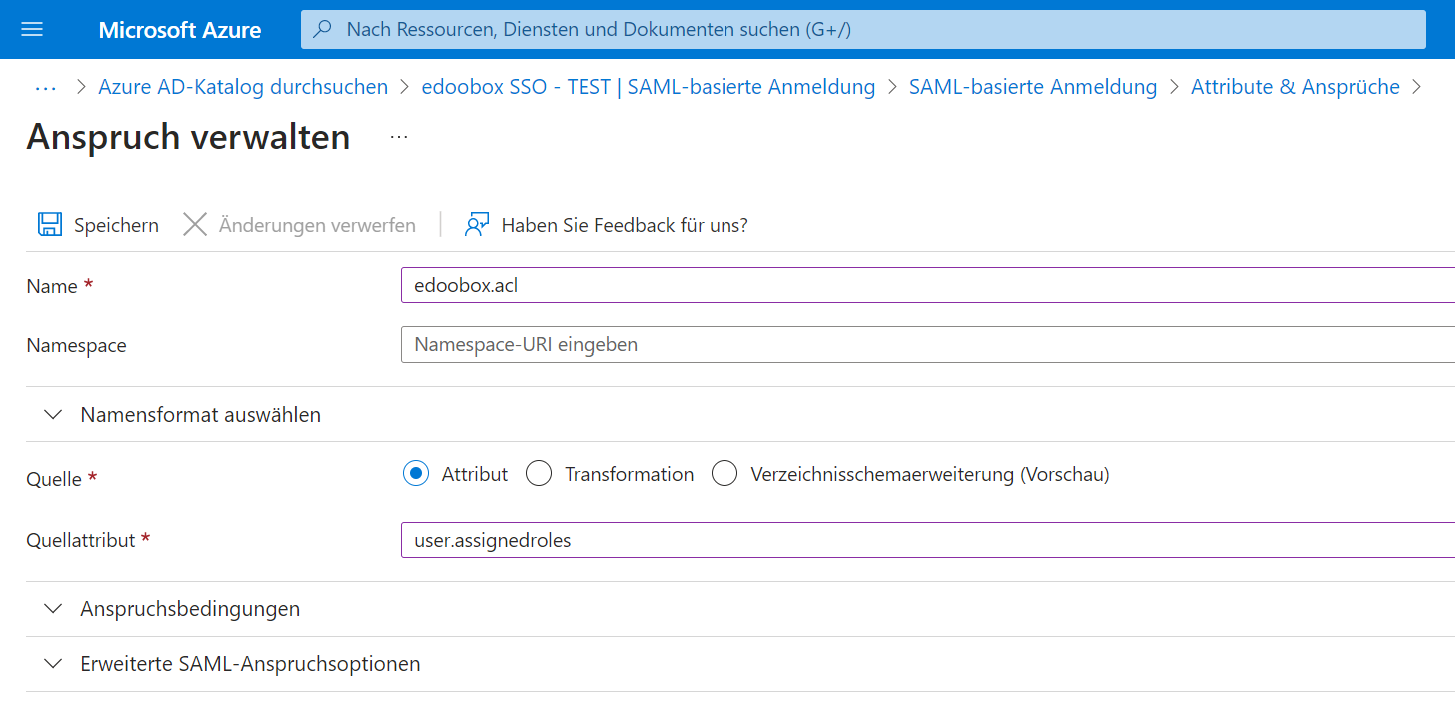
3. Define edoobox ACL User Rights Groups (Optional)
We generally recommend using edoobox ACL to control access permissions. To receive permissions from your Azure AD, create a new "Claim" under "Attributes" with the name: "edoobox.acl" and the source attribute "user.assignedroles".
To define App Roles (edoobox.acl) in Azure, follow these steps:
-
In the left-hand menu, select "App roles". If this menu item is not visible, select "Users and groups" from the menu and click the "App registrations" link, which will take you to the page where you can define the App roles.
-
Create a new role by clicking the "Create new role" button.
-
Enter a display name and the value for the role, then save the 5 roles.
Value: Display Name
edoobox.acl.0: No Permissions
edoobox.acl.1: User (No Permissions)
edoobox.acl.2: Manager
edoobox.acl.3: Administrator
edoobox.acl.4: Super-Admin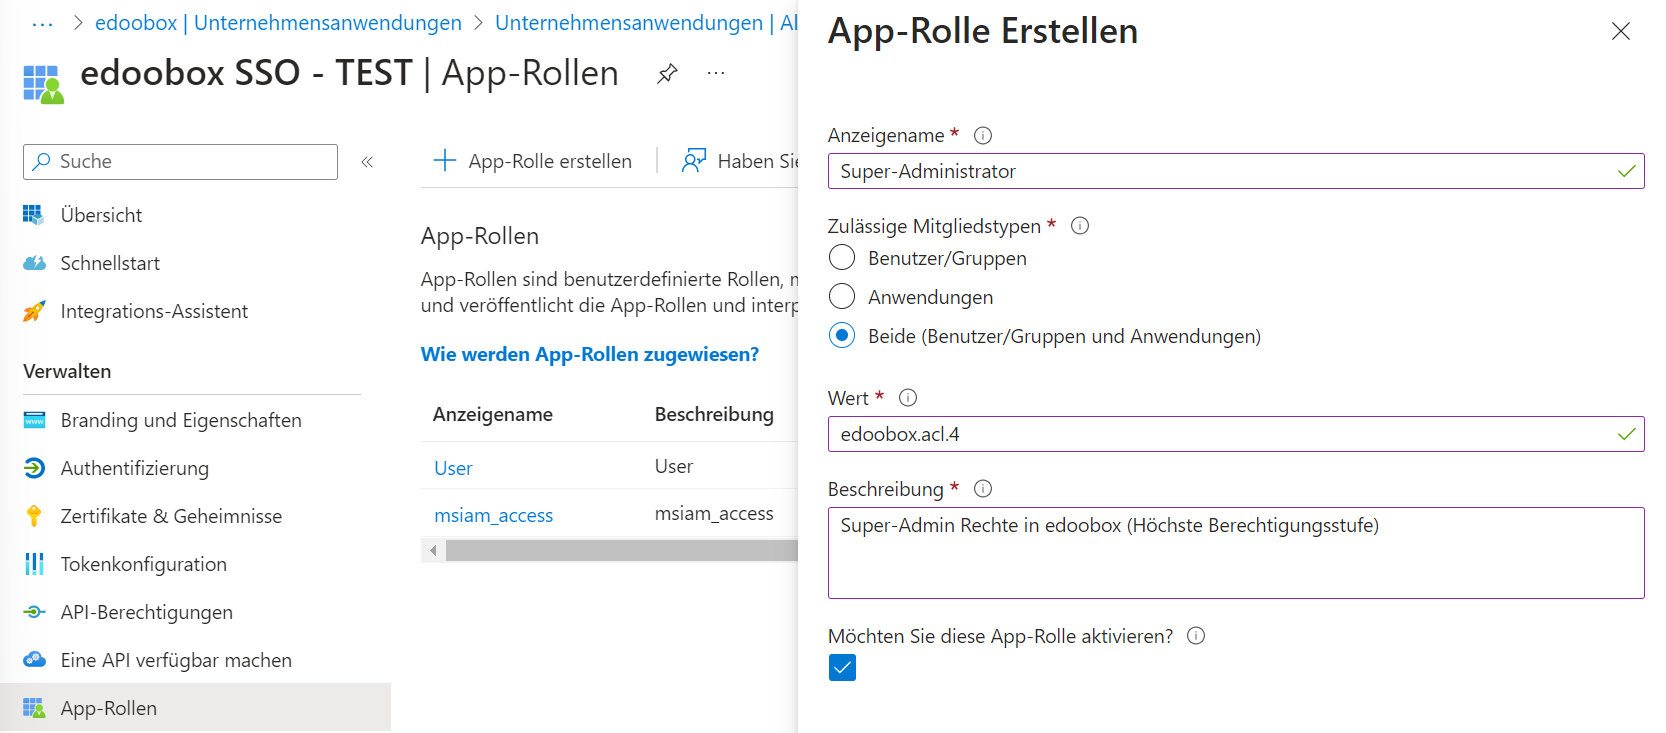
Create App Role: Capture edoobox Roles in Azure
4. Assign edoobox ACL Rights to Groups and Users (optional)
-
Afterwards, navigate back to the Azure portal, select the created "Enterprise applications", and then select "Users and groups" from the left-hand menu.
-
Click the "Add user/group" button.
-
Enter the required information for the user or group object, such as the name, email address, or group name.
-
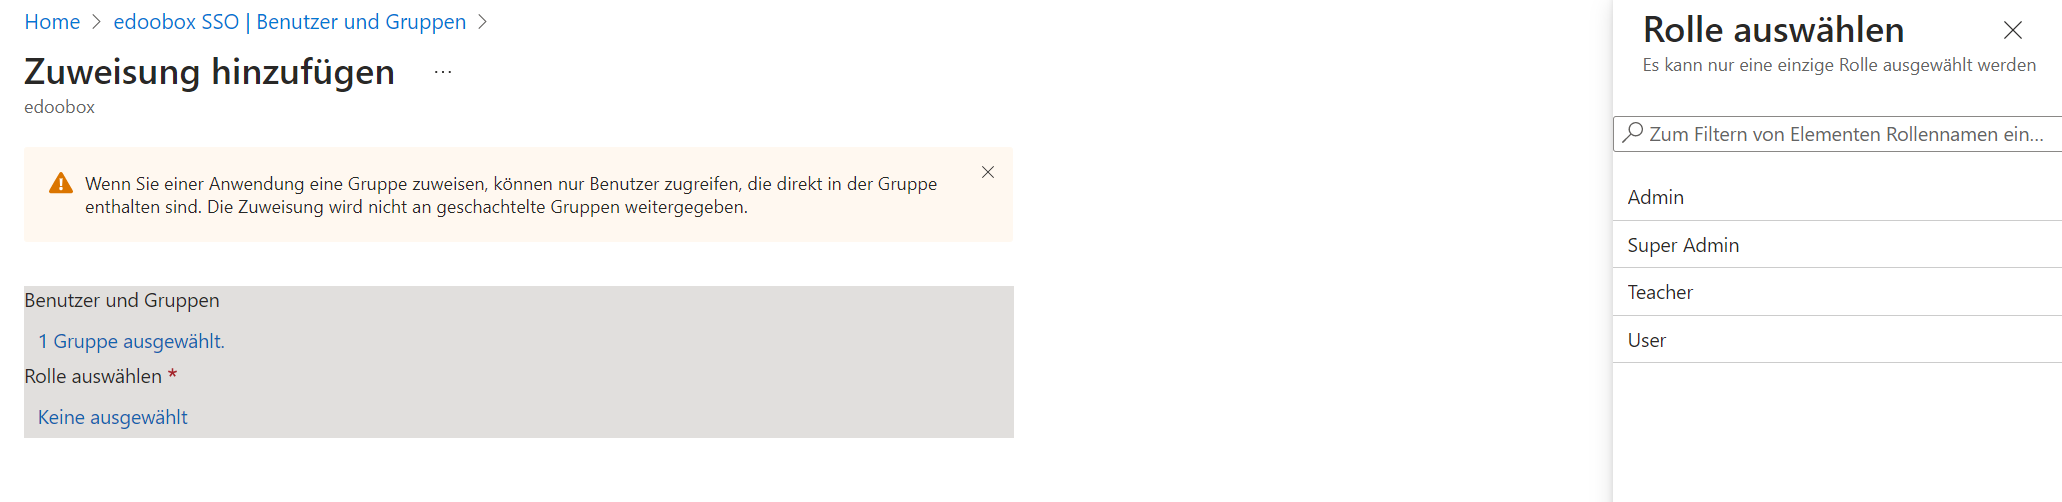
Add users or groups to your Enterprise application by assigning them.
-
Select the role you want to assign to the user or group, and then click "Assign".
5. Activate SSO in edoobox
The exact activation process is explained in the following documentation: Activate Single Sign On via SAML in edoobox
6. SSO Activation
Verify that the login functions by logging in at the following URLs:
edoobox V1 login URL: https://app2.edoobox.com/login/sso/IHR-EDOOBOX-KÜRZEL/
edoobox V2 login URL: https://app2.edoobox.com/ed-admin/pages/sso/IHR-EDOOBOX-KÜRZEL/
Note: Redirect to SSO
If an admin is logged in with SSO and logs out or is automatically logged out by edoobox, the logged-out admin will be automatically redirected to the SSO login page and not to the regular login page. For this to function, the admin must have logged in at least once previously.
Related Guides
Keywords for this guide
SSO ¦ SAML ¦ Enterprise Application ¦ Azure AD