When publishing offers with edoobox, the offer tree plays a crucial role in organizing and efficiently managing your listings. The offer tree allows you to create a file-system-like structure, enabling you to establish main categories and, if necessary, subcategories, under which you can place your offers. This facilitates optimal offer management and streamlines targeted categorization for presentation on your website.
Before creating an offer, you must first establish a suitable category. All categories and offers within the offer tree can be flexibly rearranged using drag-and-drop to adapt the structure to your evolving requirements.
Creating a New Category
Two options are available for creating new categories within your edoobox account:
Option 1: Via the Offer Tree
-
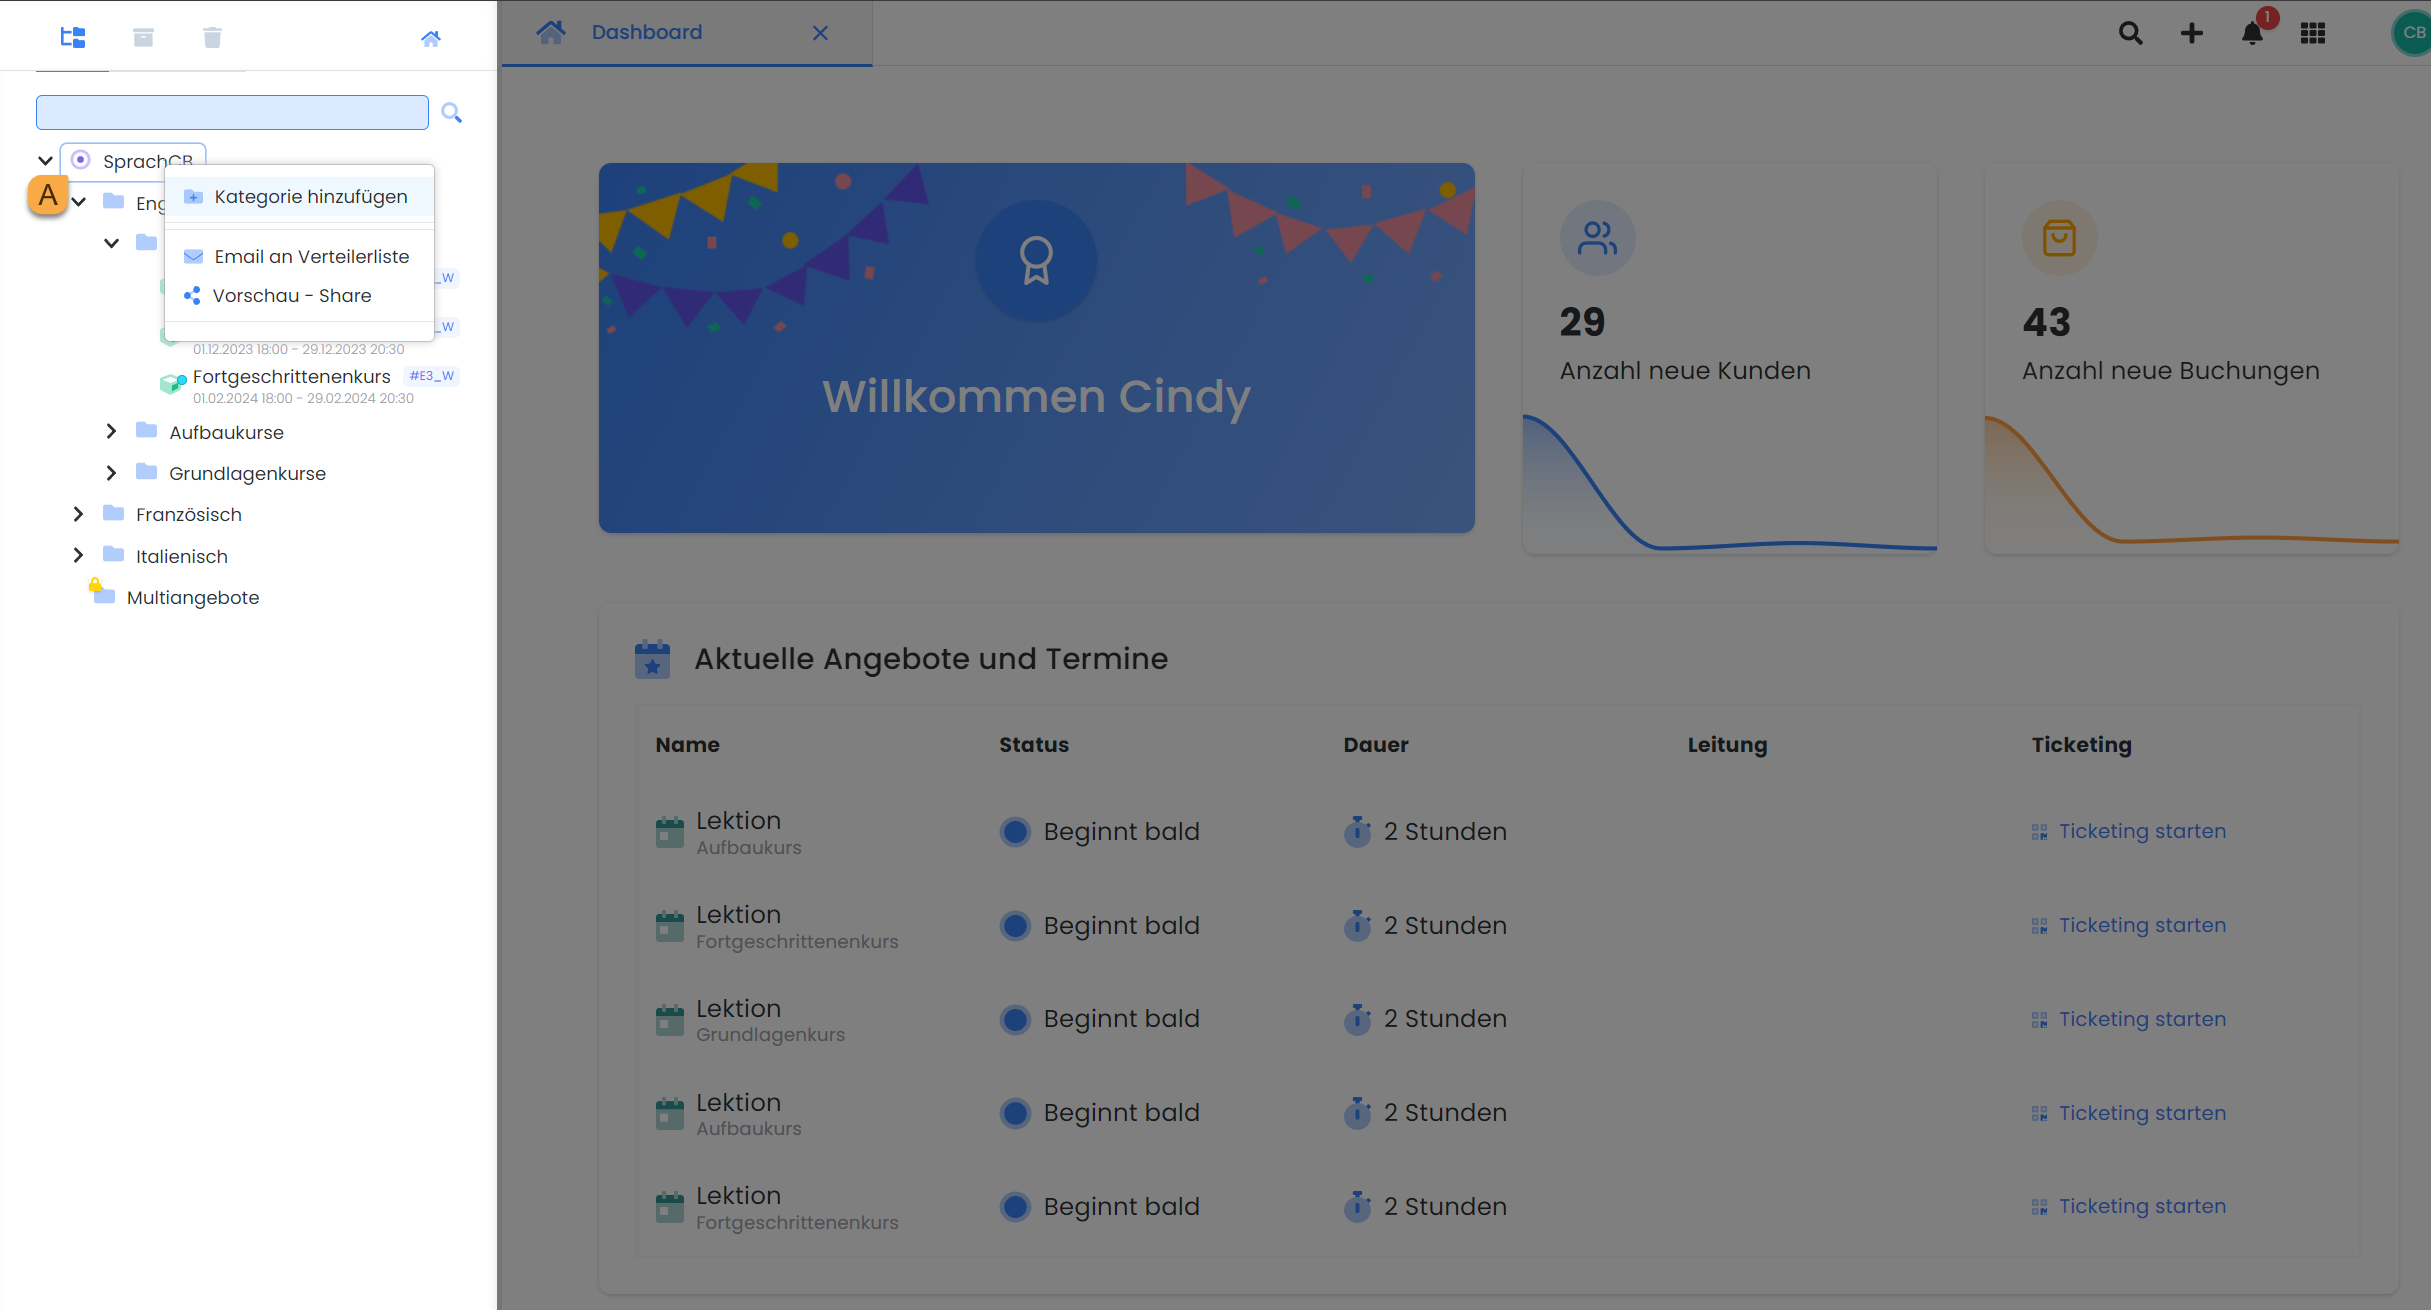
Navigate to the offer tree within your edoobox account.
-
Right-click on the account shortcut A or an existing category within the offer tree, under which you intend to create the new category.
-
From the context menu, select the «Add Category» option.
-
Enter the name for the new category and confirm its creation by clicking «Add». Ensure that each category name is unique to prevent potential display errors.
The newly created category will now appear in the offer tree.
Option 2: Via the Main Navigation
-
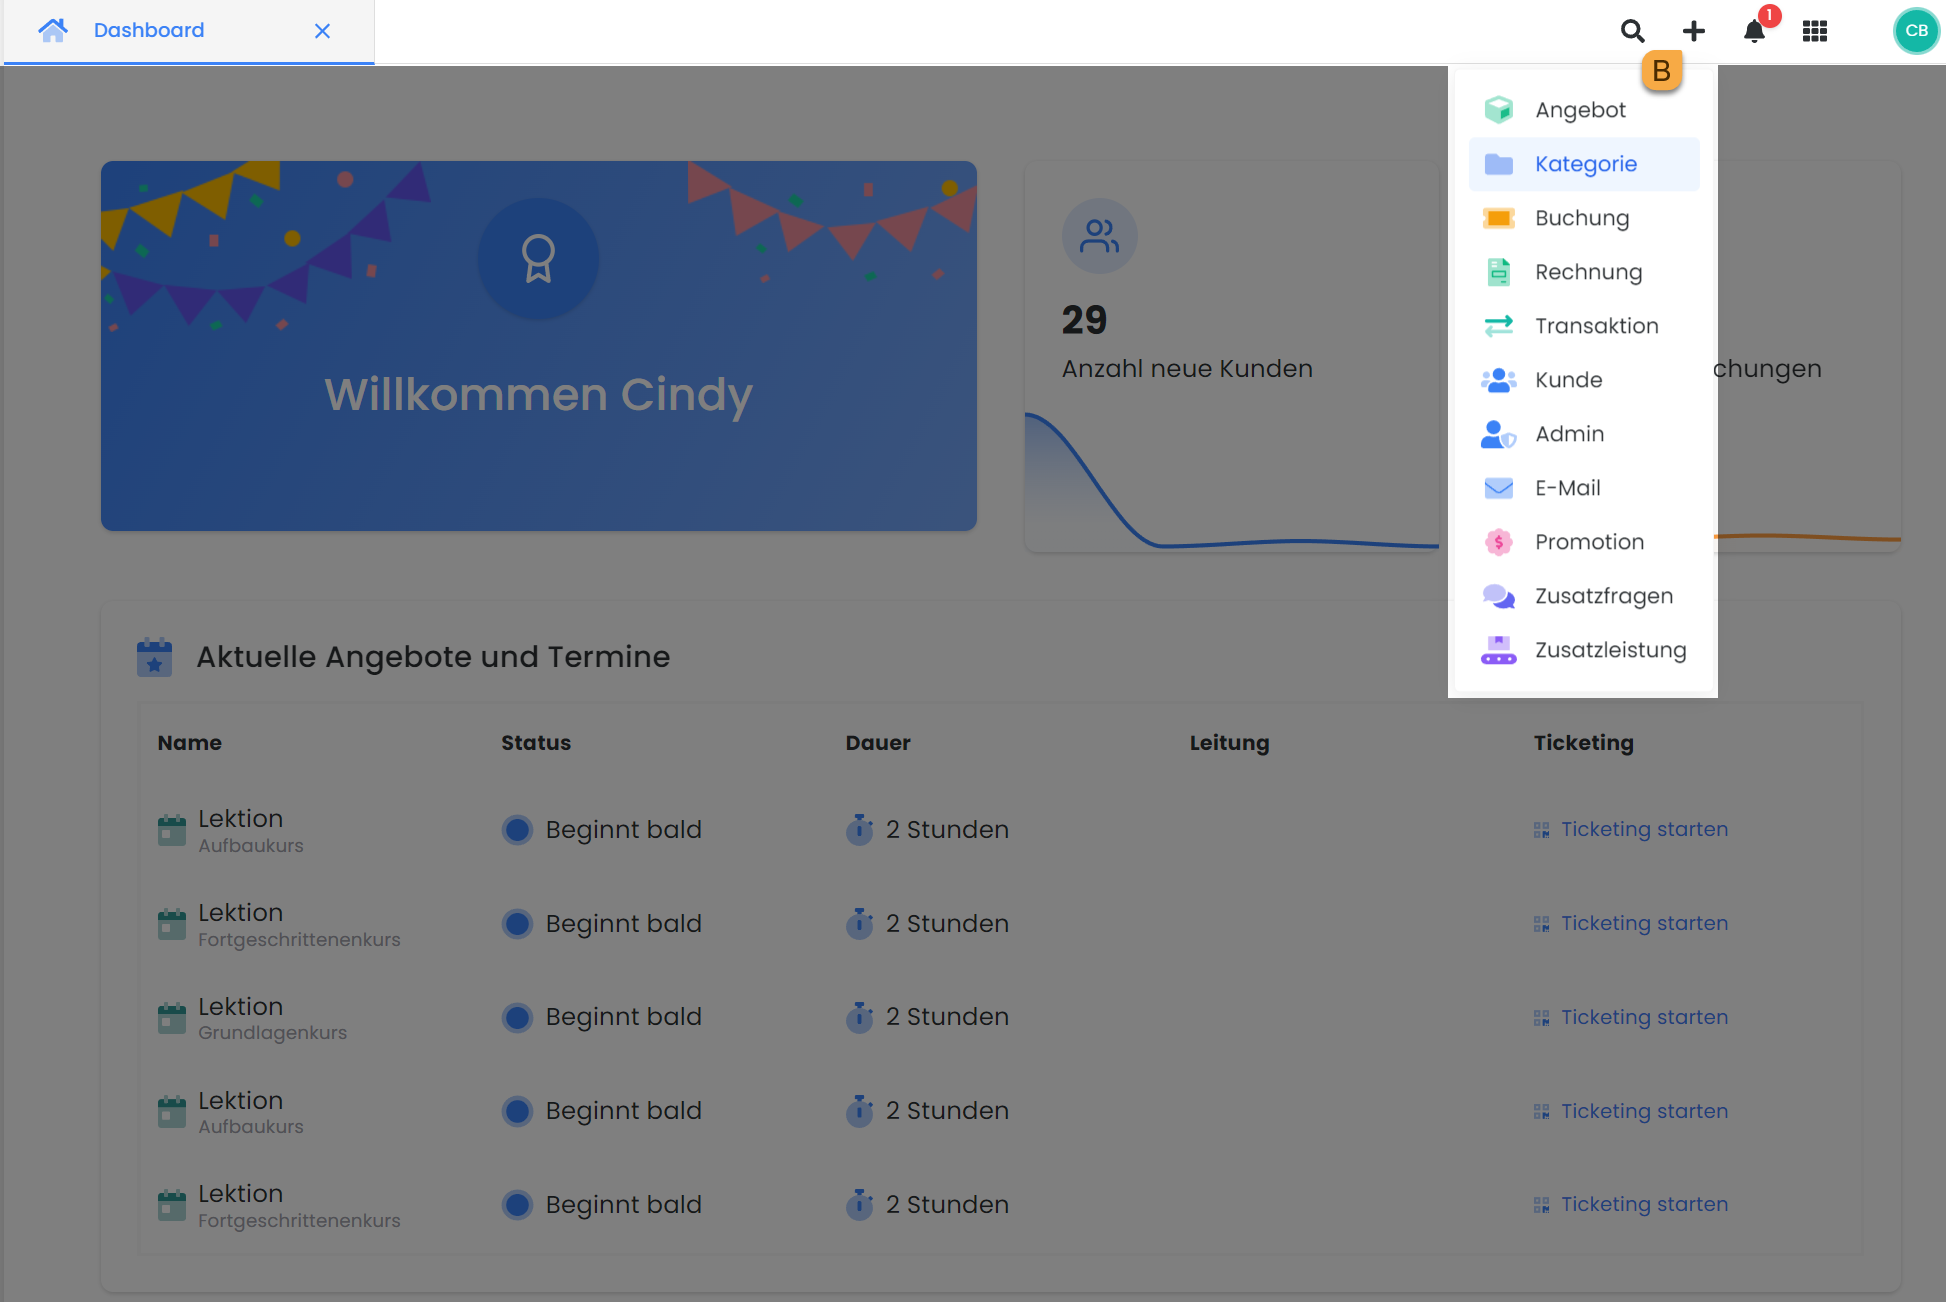
In the main navigation of your edoobox account, click the quick menu (plus icon) B.
-
From the dropdown menu, select the 'Category' option.
-
Enter the name for the new category and select the level (e.g., account abbreviation) within the offer tree where you wish to place this new category. Ensure that each category name is unique to prevent display errors.
-
Confirm the creation by clicking 'Add'.
The newly created category will now appear in the offer tree.
Tip: Main Categories and Subcategories
You can create both main and subcategories as needed to optimally organize and categorize your offers.
Creating a New Offer
To create a new offer in edoobox, follow steps similar to those for creating a category. The key distinction within the offer tree is that for new offers, you will always right-click on the specific category where you intend to place the offer, rather than on the account abbreviation.
In the main navigation, select 'Offer' from the Quick Menu instead of 'Category' to create a new offer. Within the newly created offer, you can then immediately input the required information and publish it for booking.
Copying an Offer
To save time and avoid creating similar offers from scratch, the offer tree allows you to copy existing offers. To do this, proceed as follows:
-
Navigate to the Offer Tree
-
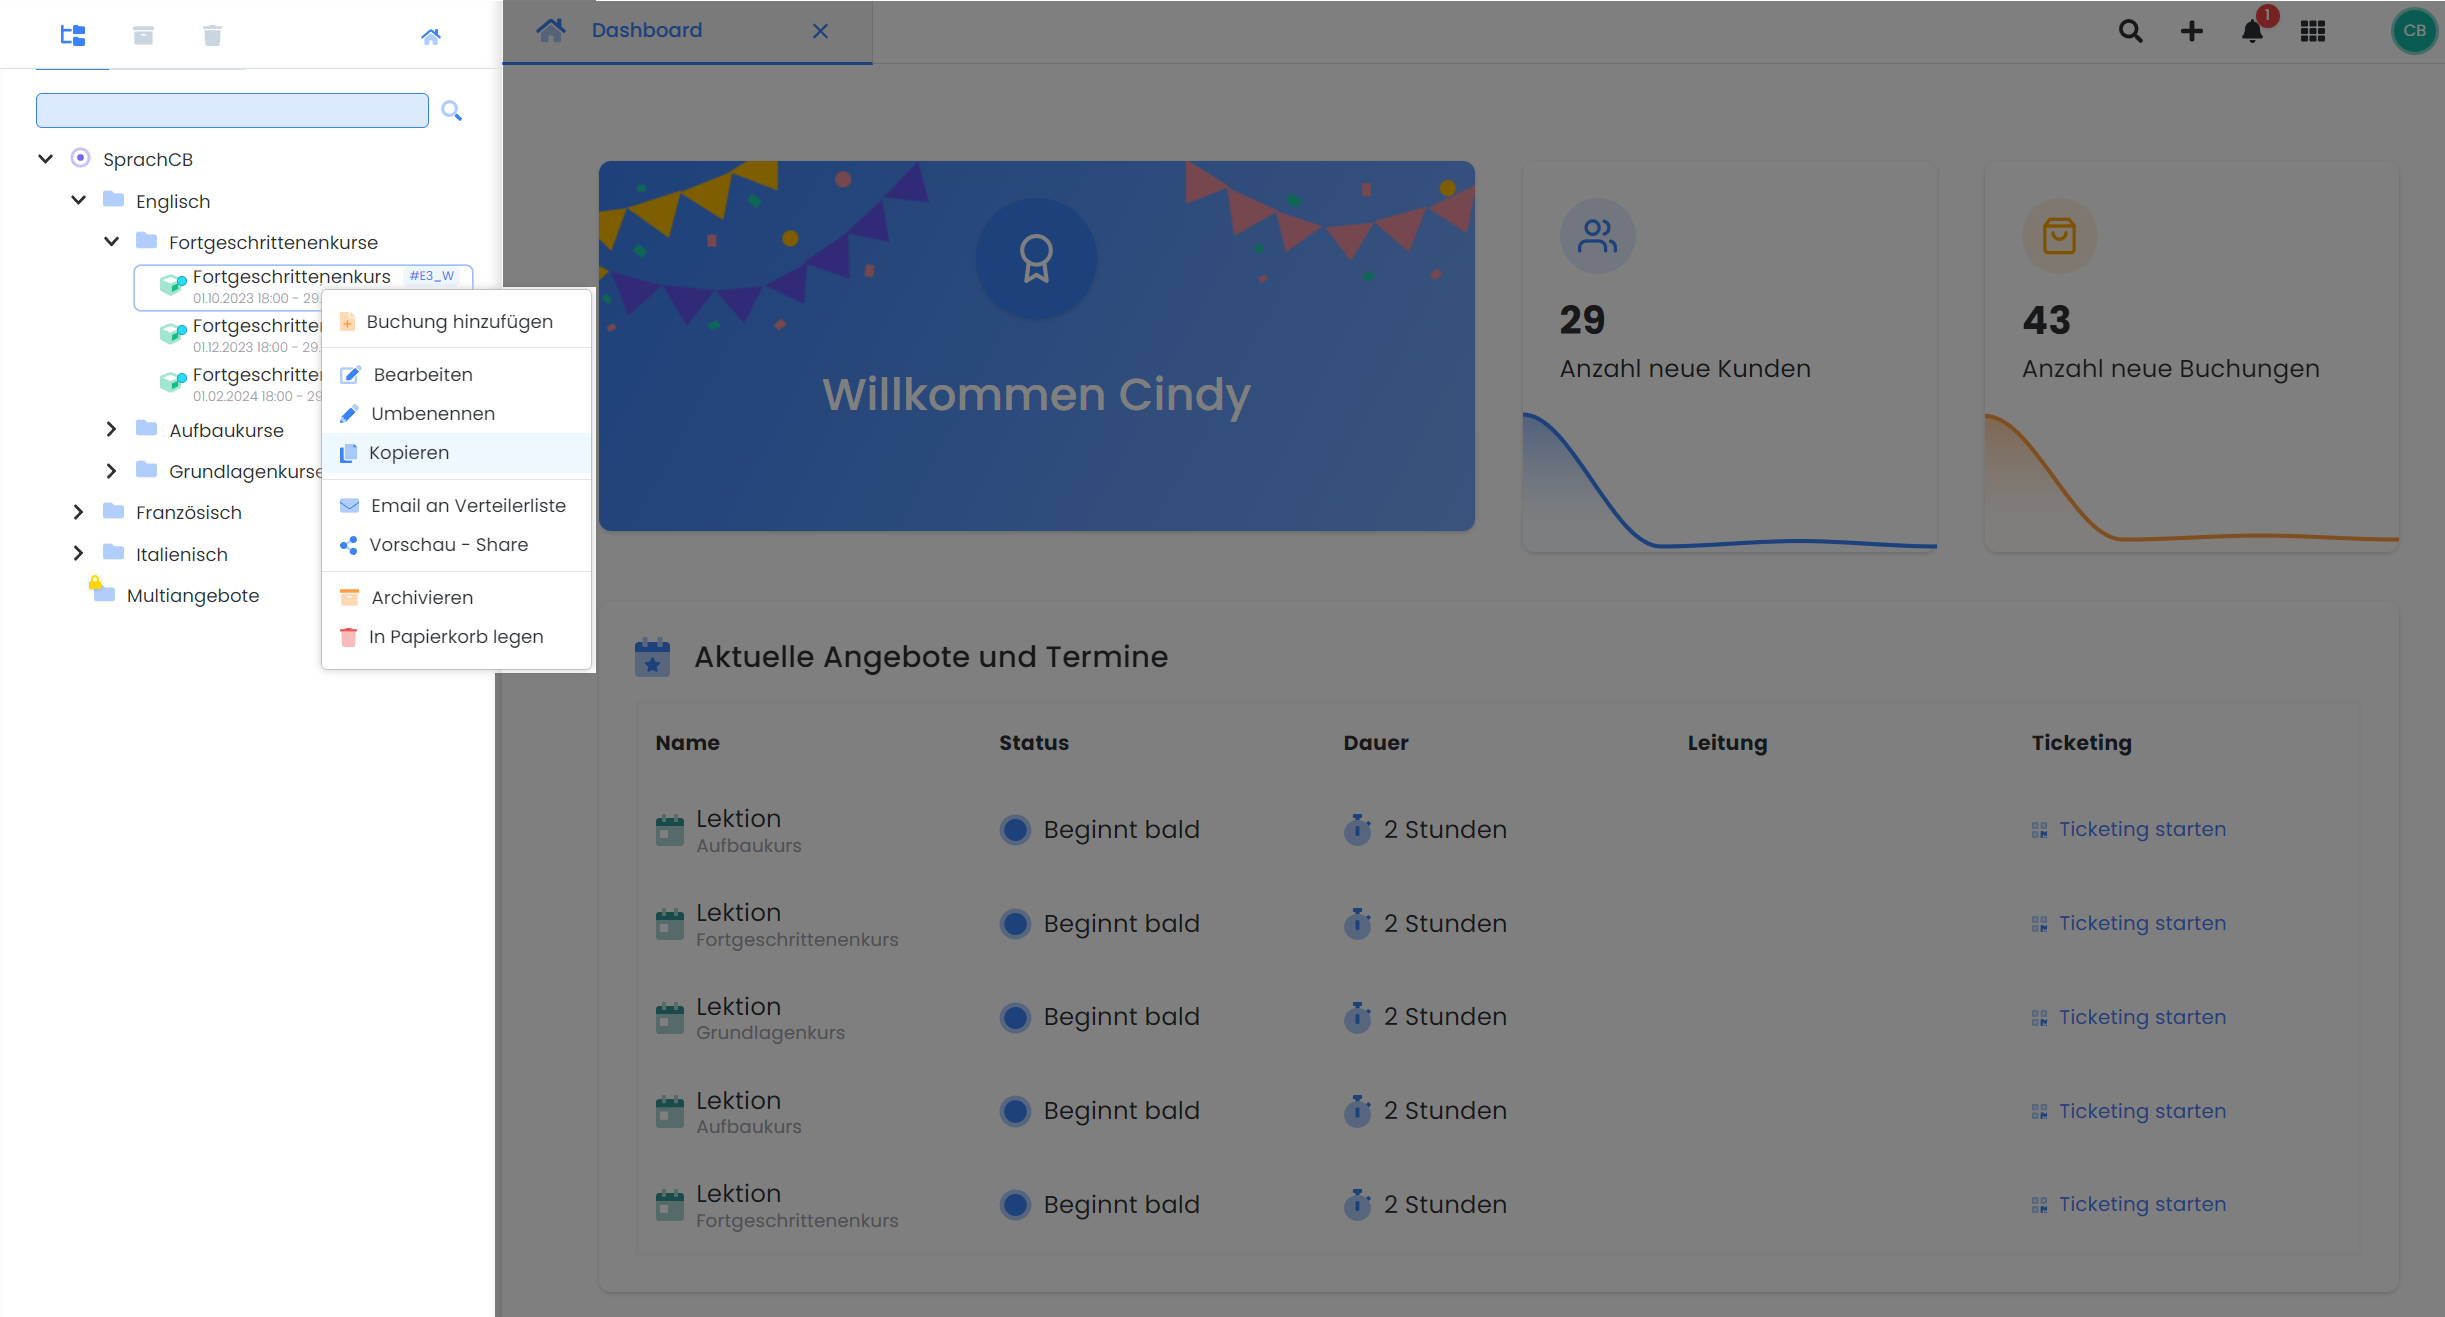
Right-click on the offer you wish to copy.
-
From the context menu, select the 'Copy' option.
You will now be prompted to set the start date for the copied offer. The dates of the copied offer, including start and end dates, registration deadline, and appointments, will be recalculated based on the original offer's settings. The created copy is an exact replica of the existing offer, encompassing all descriptions and configurations.
Related Guides
Keywords for this guide
Category ¦ Offer ¦ Overview ¦ Internal Code ¦ Design ¦ Multiple Bookings