Participant data fields play a central role in edoobox. They not only enable optimal management of your participants in the backend but also the targeted collection of relevant information in your registration forms. The data fields are flexibly adaptable and expandable, as you can create up to 30 additional custom data fields beyond the ten predefined ones.
Existing Data Fields
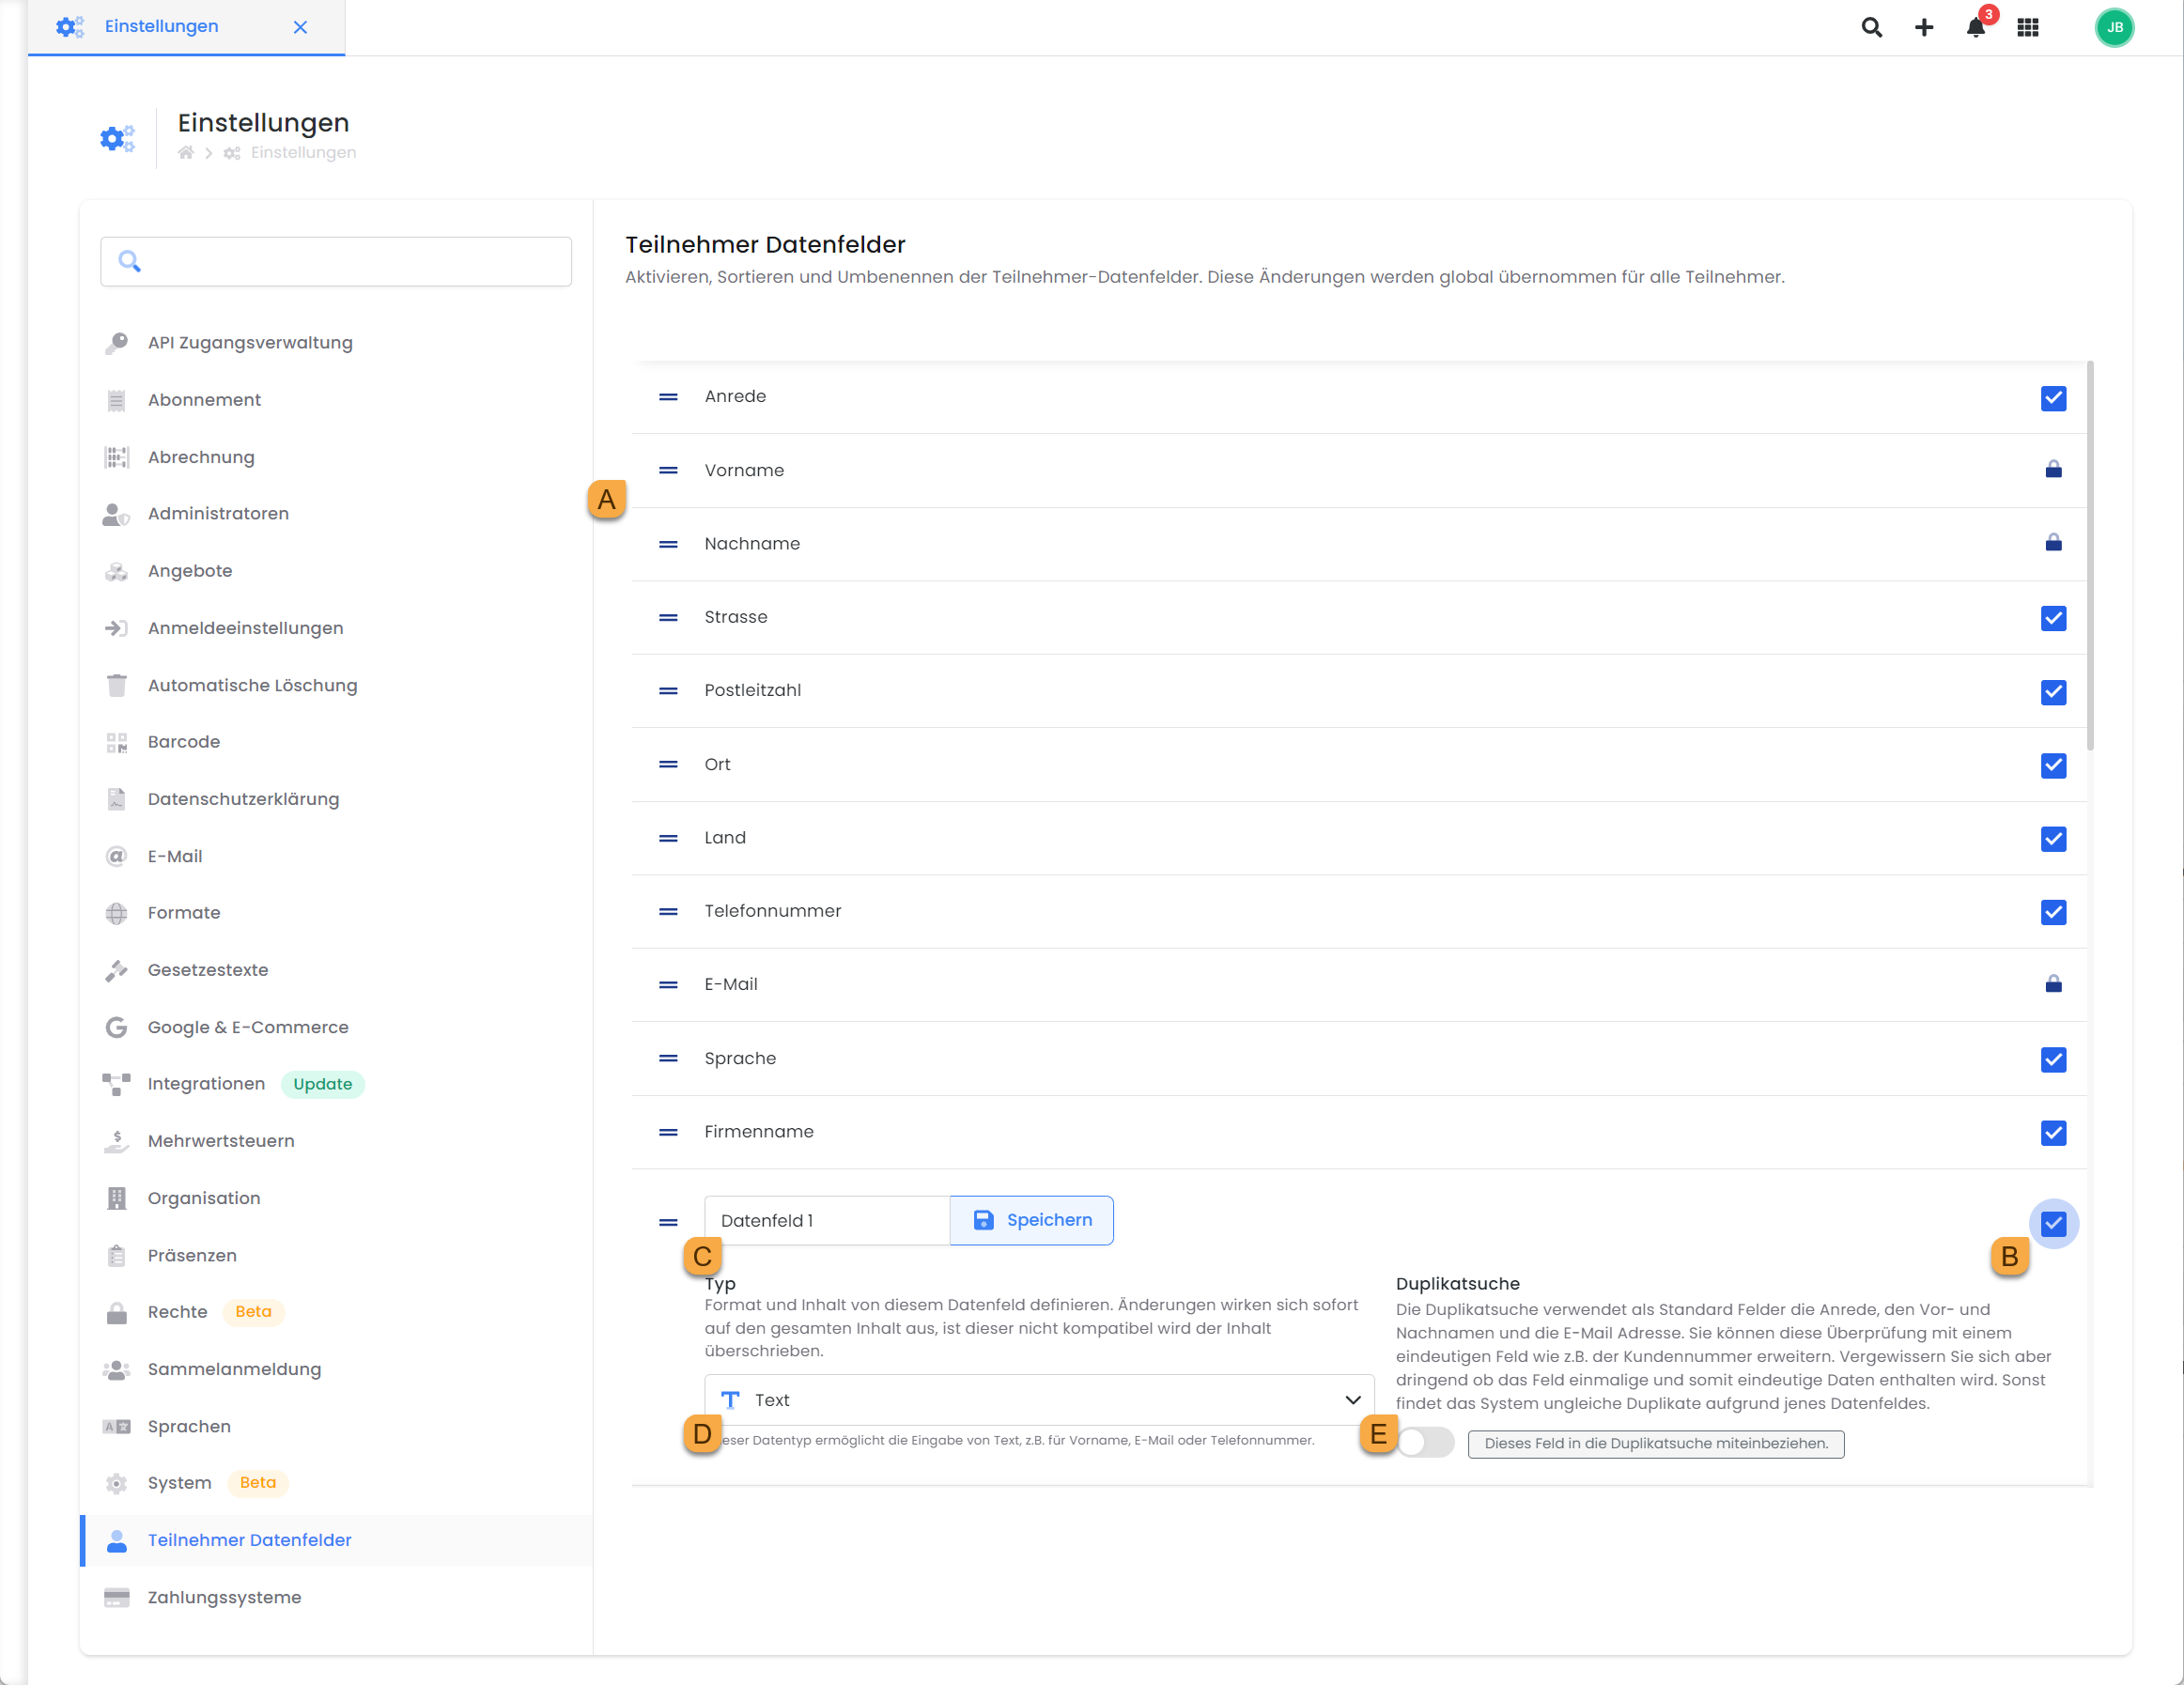
In the app menu, under the "Settings" menu item, you can view and edit all data fields by clicking on "Participant Data Fields." These data fields can be enabled or disabled as needed, with the exception of required fields such as first name, last name, and email address, which must be requested for every booking. The existing data fields cannot be edited.
The following data fields are available by default:
|
Data Field |
Remarks |
|---|---|
|
Salutation |
Can be deactivated and replaced by a custom data field if it does not fully meet the requirements. |
|
First Name |
Mandatory Field |
|
Last Name |
Mandatory Field |
|
Street |
|
|
Zip Code |
|
|
Location |
|
|
Country |
Can be used for GeoDynamic VAT. |
|
Phone Number |
Can be used for Double Opt-in. |
|
|
Required field, can be used for Double Opt-in. |
|
Language |
Enables selection of active system languages and controls correspondence with individual participants. |
|
Company Name |
|
Create a new data field.
If the standard data fields do not fully meet your requirements, you have the option to create up to 30 additional data fields. These can be created in the App menu under 'Settings', specifically under 'Participant Data Fields'.
-
To create a new data field, please check the box next to an unused data field (e.g., Data Field 1) B.
-
Click on the name of the data field and give it a meaningful name without special characters.
-
Select the data field type. The available options are Date, File, or Text.
-
Decide whether you want to include the data field in the duplicate check.
Important: Only unique data fields, such as a member number, should be allowed for the duplicate check. If you are unsure, leave this setting set to Inactive E. -
To adjust the order of data fields in the backend, you can now drag and drop them into the desired sequence. This order will be reflected in the individual participant dashboards.
-
You have now created the desired data fields. If you wish to integrate these into one or more registration forms, enabling your customers to provide the necessary data during registration, please follow these instructions: Design Manager – Registration Form.
Data Fields in Email Templates.
For all standard and custom-created data fields in edoobox, the system automatically generates placeholders that can be utilized in email templates. If special characters or umlauts were used during the creation of custom data fields, these will be removed by the system. For instance, 'Datum Fahrprüfung' will result in the placeholder ##UserDatumFahrprfung##.
Example: Replacing the Salutation Data Field.
If the standard 'Salutation' data field does not meet your requirements, you can deactivate it and create a custom data field. Within this custom field, all available selection options can be stored across all active languages. Subsequently, you can integrate the new salutation placeholder (##UserAnrede##) into your email templates, thereby replacing the existing standard salutation placeholder (##UserTitle##).
Related Guides
Keywords for this guide
Participants ¦ Data Fields ¦ Design Manager ¦ Type ¦ Duplicate Search ¦ Registration Form.