The customized attendance list provides the flexibility to design an attendance record precisely to your specifications. You can incorporate custom participant data fields, integrate a dedicated signature field, or augment the attendance list with essential attachments to optimize it for your specific requirements.
Use the main navigation bar and select the "Settings" menu item to access the "Attendance Lists" section. In this section , you will find the "PDF Template" tab, where you can begin creating your custom attendance list.
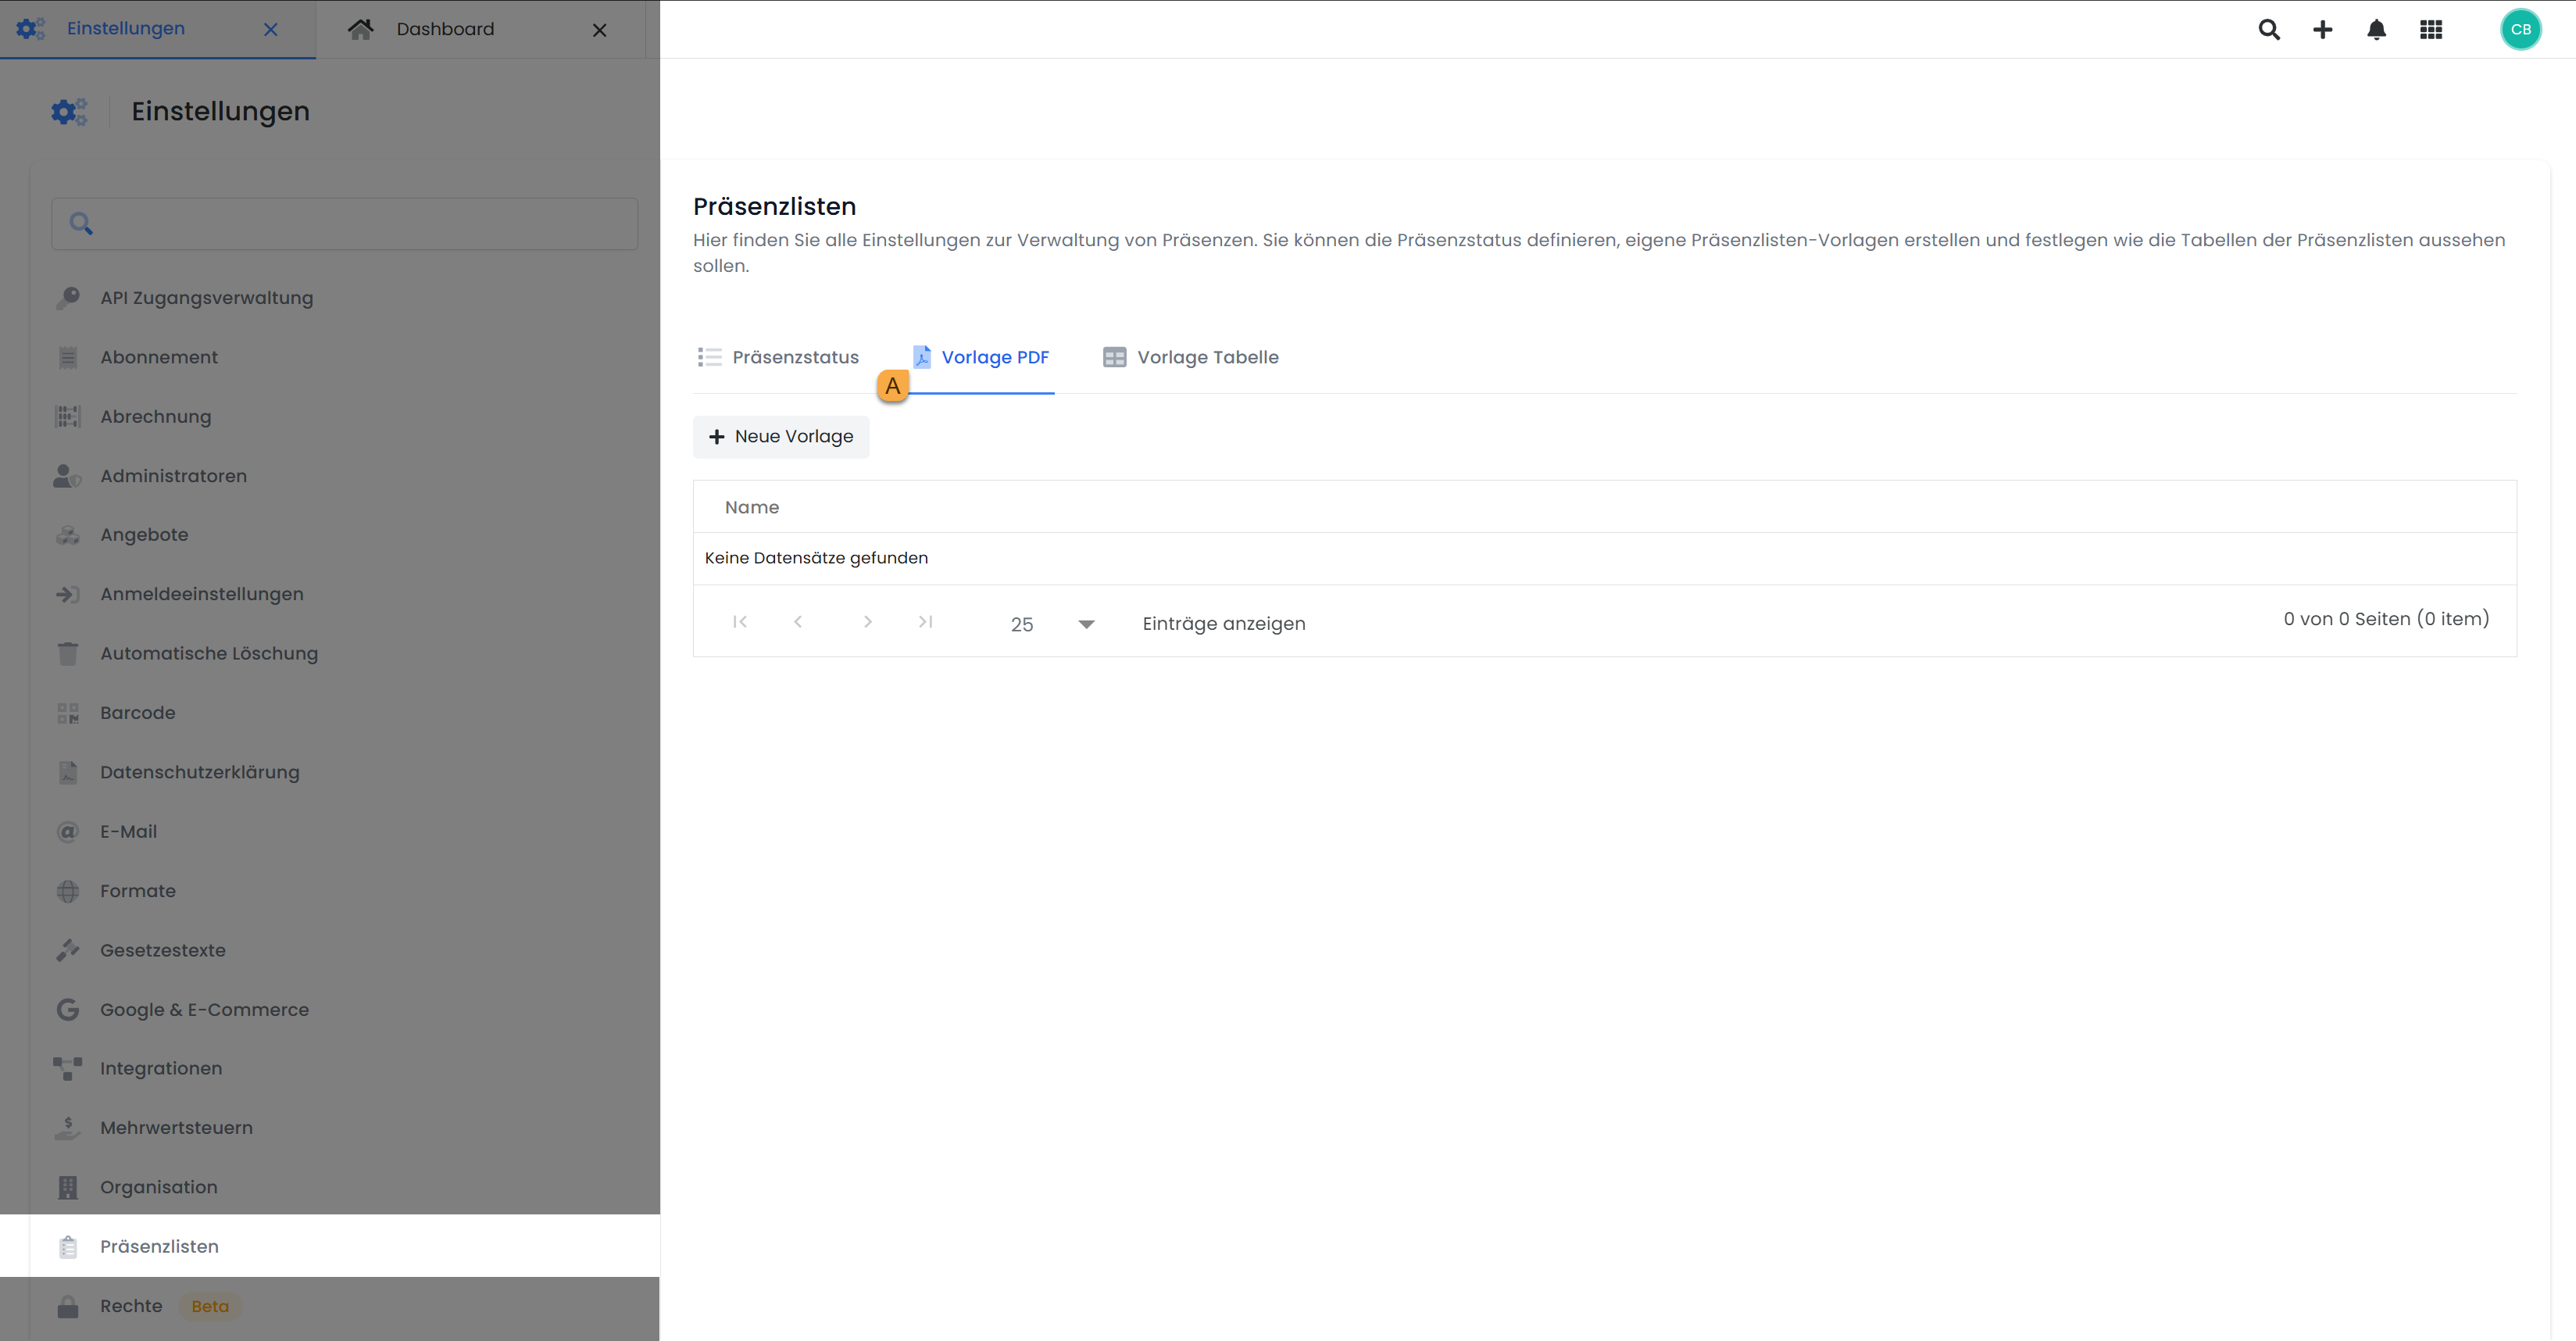
Create PDF Template
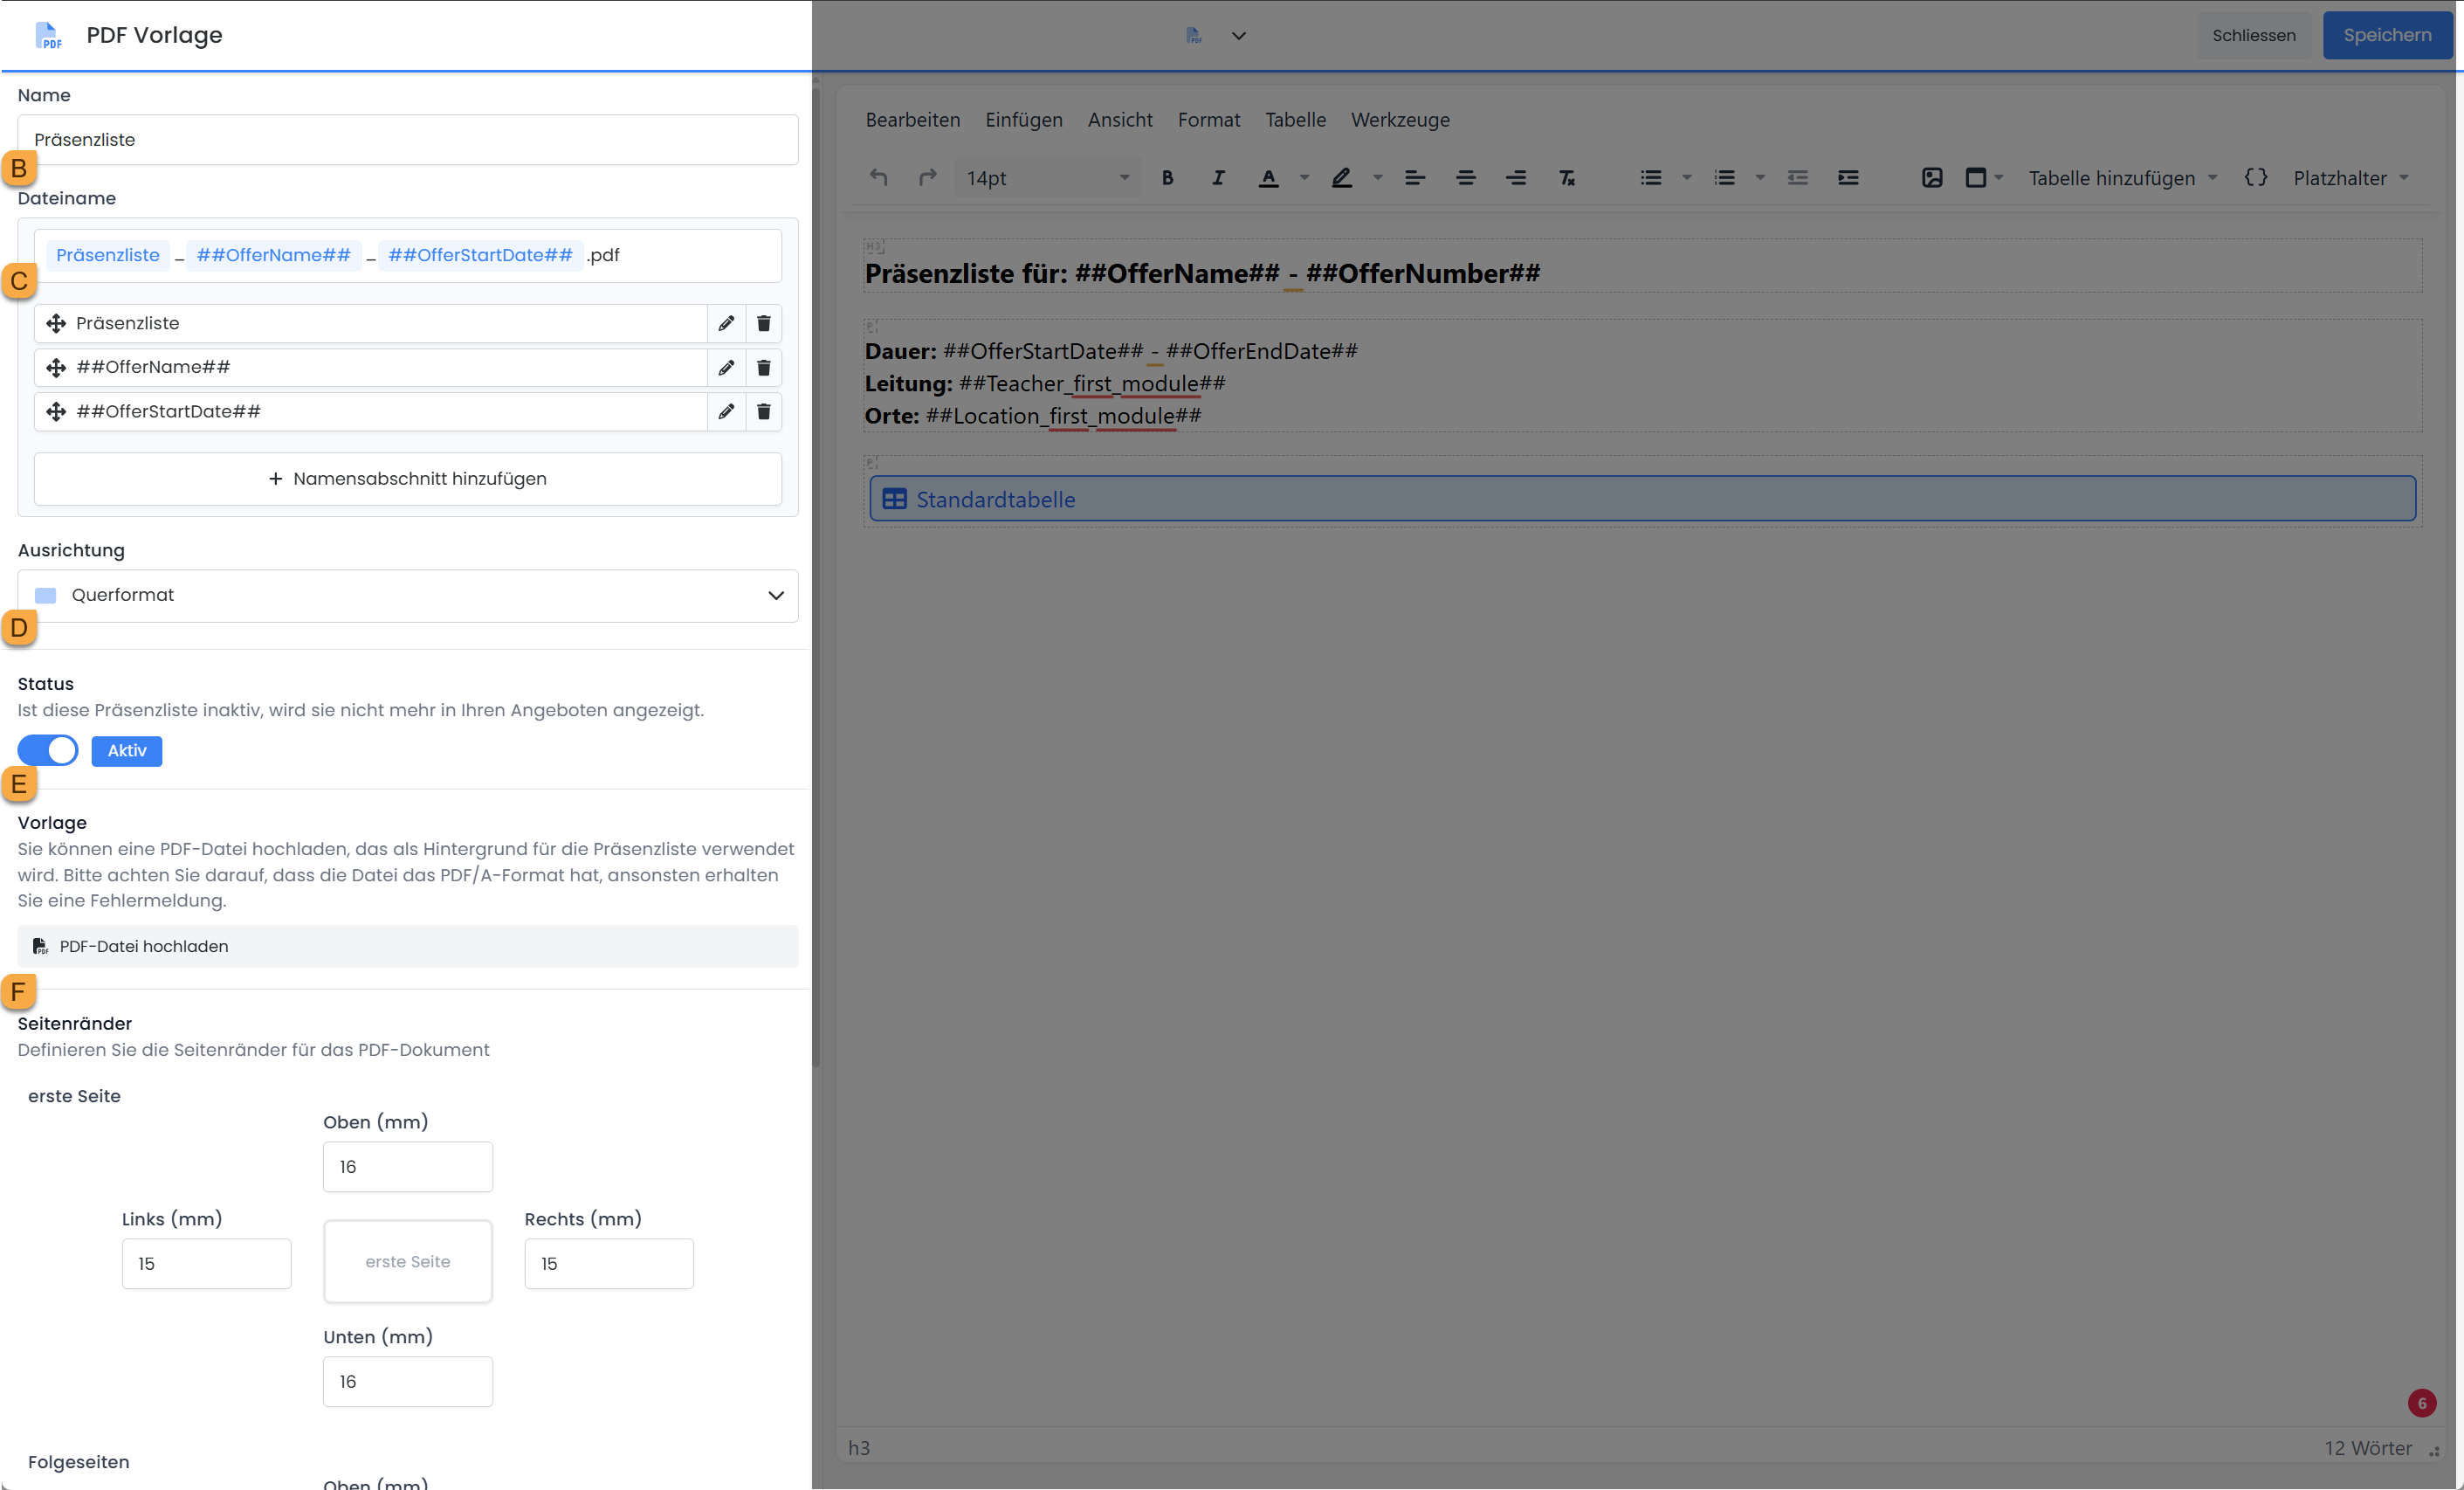
To create a new attendance list in edoobox, first click the «+ New Template» button. Then, assign a unique name B to the newly created template. This name is solely for internal differentiation of your individual attendance lists within edoobox and is not visible to external parties.
The filename C, however, is used for the exported PDF file. The default filename for a new template consists of the text field Attendance List and the placeholders ##OfferName## (Course Name) and ##OfferStartDate## (Course Start Date). You can customize this filename. Additionally, the placeholders ##OfferNumber## (Course Number) and ##WeekNumber## (Calendar Week) are available. The existing text field Attendance List can be modified or removed. You also have the option to add further text fields to make the filename more specific. Use the «+ Add Name Section» button to insert supplementary text or one of the four available placeholders.
In the next step, you define the orientation D of the PDF template for the attendance list by choosing between portrait and landscape format.
By default, the newly created template is active. However, you can deactivate the template at any time without having to delete it.
Upload a PDF template F to be used as the background for your custom attendance list.
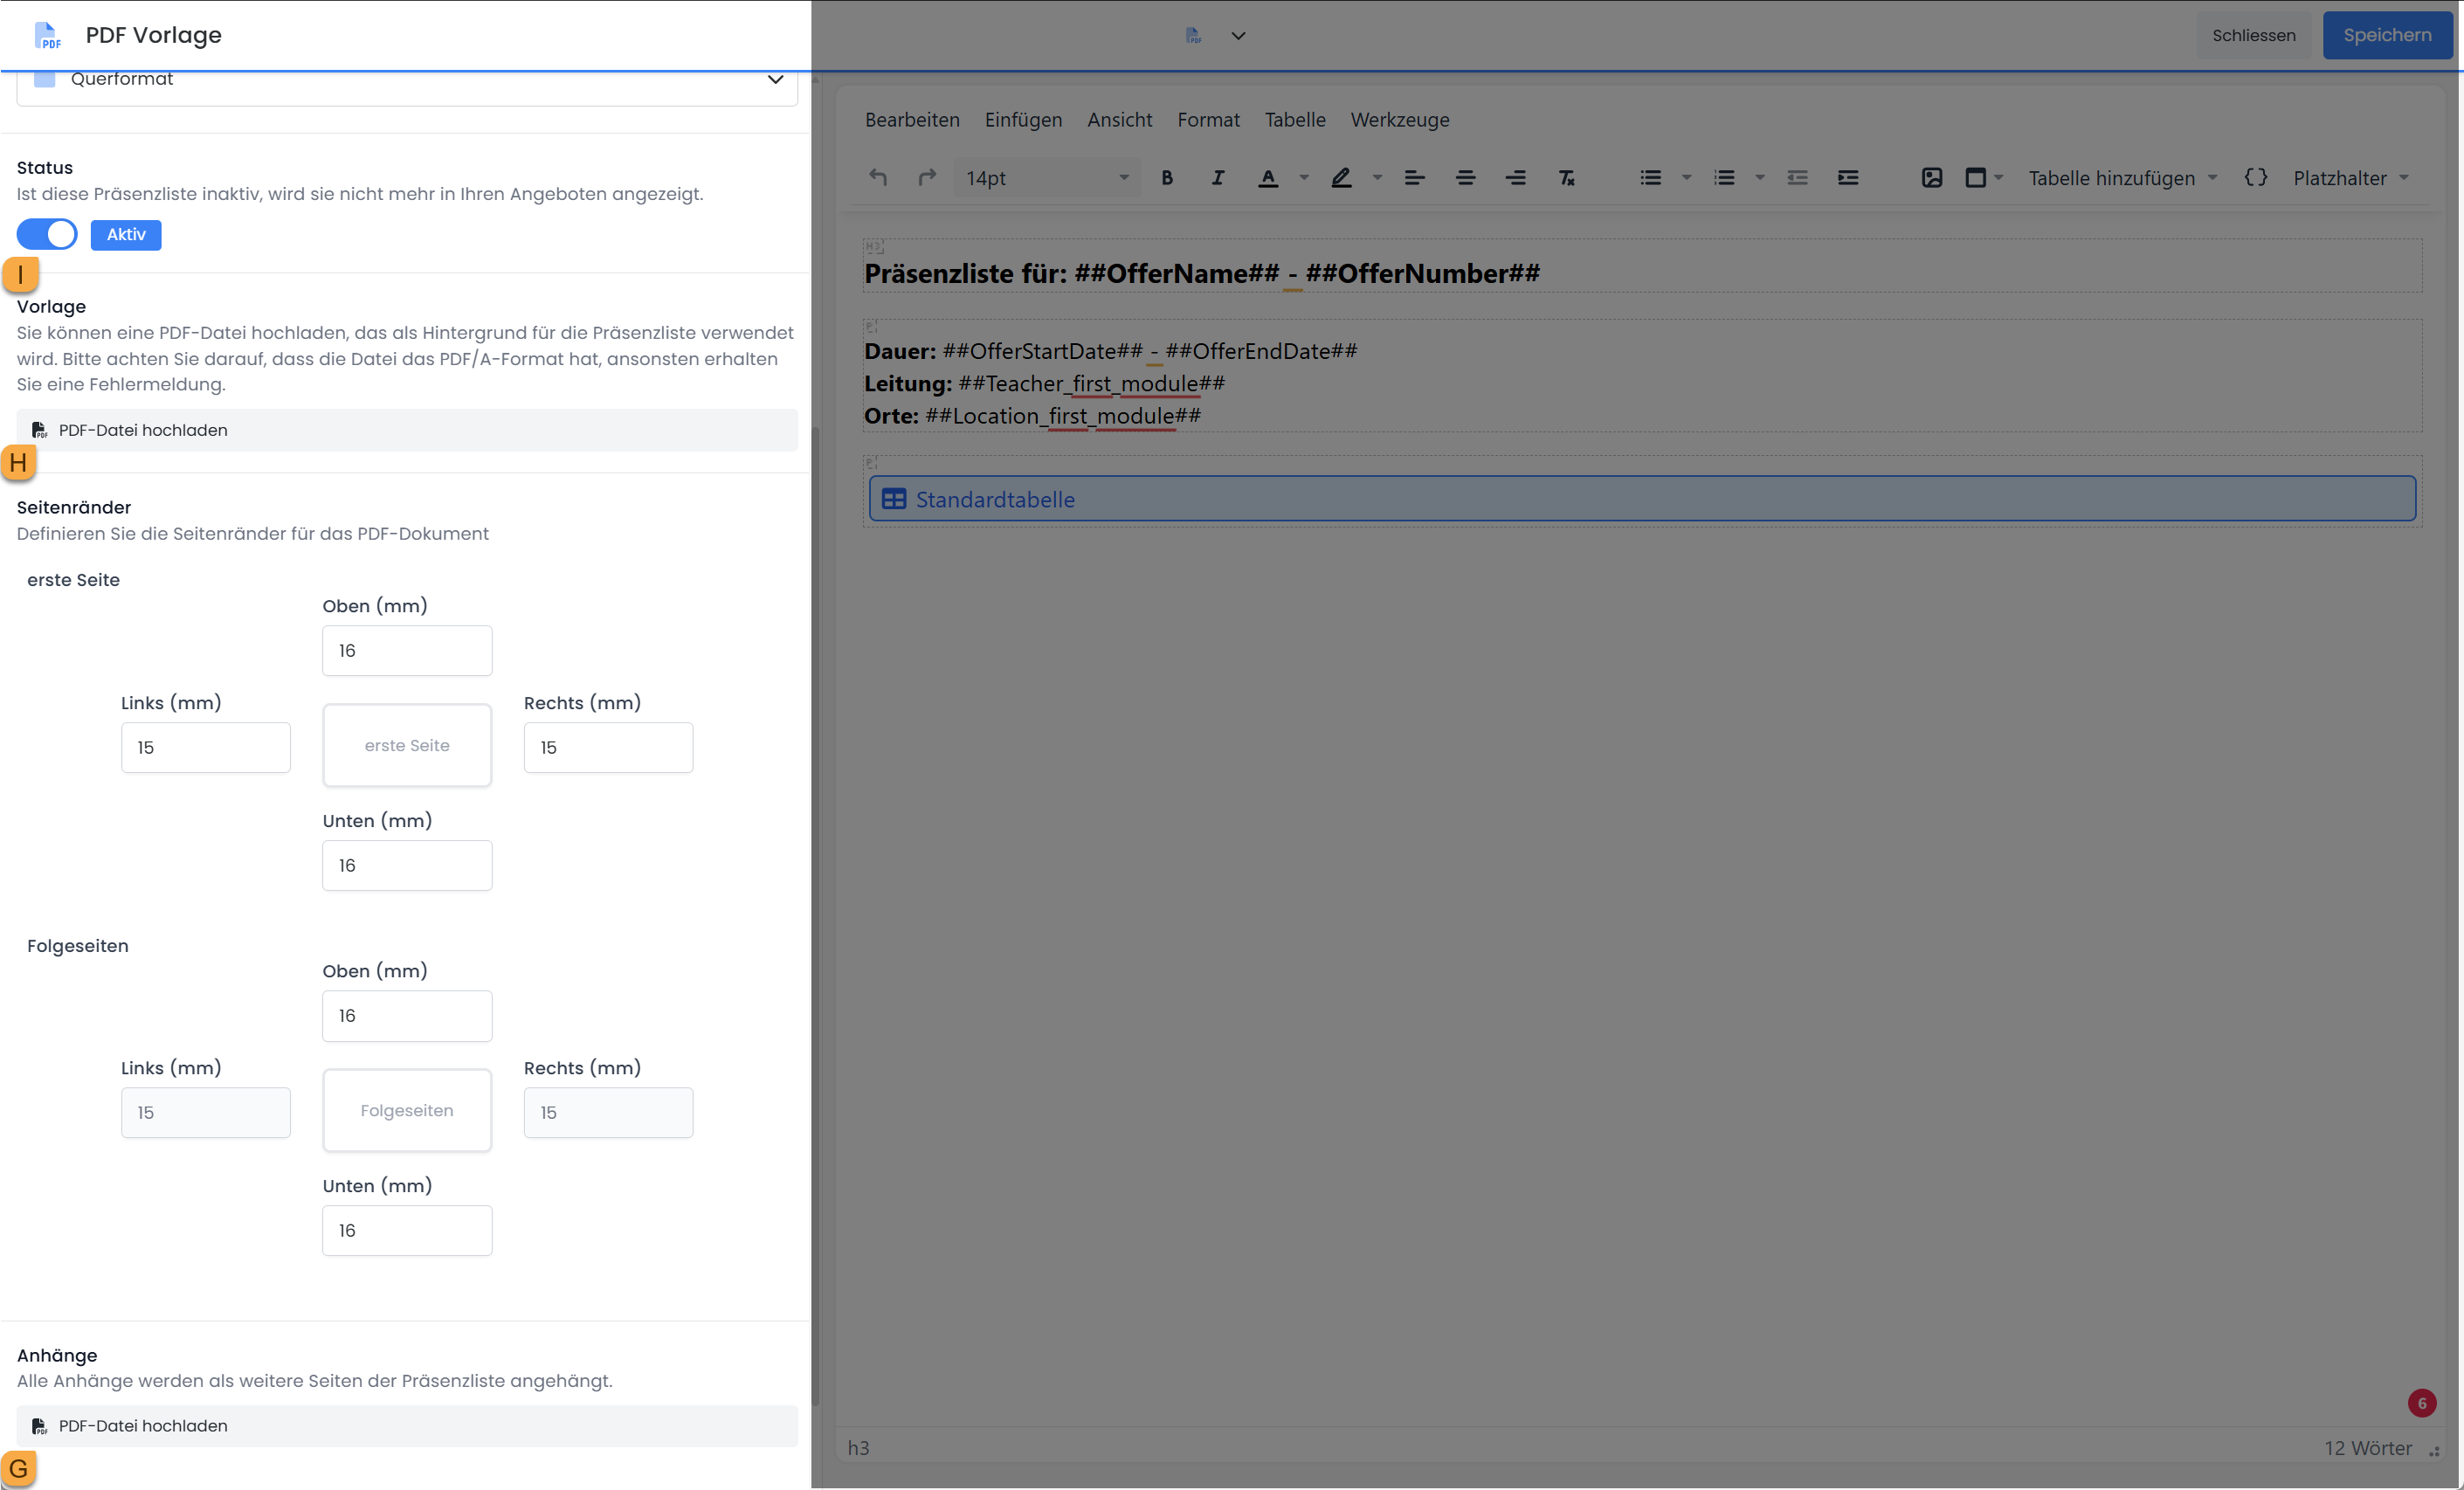
Additionally, you can add further attachments G in the form of PDF documents to the attendance list. All uploaded files will be appended as additional pages to the attendance list. This allows, for example, integrating your General Terms and Conditions (GTCs) as part of the attendance list, so they are automatically accepted with the participants' signatures on the attendance list.
Furthermore, individual page margins H can be defined. Vertical spacing (top/bottom) can be set separately for the first page and all subsequent pages. Horizontal margins (left/right) apply uniformly to all pages. This allows for flexible implementation of layout requirements, such as additional space for a logo.
By selecting the status I, you determine whether an attendance list should be displayed in the offers.
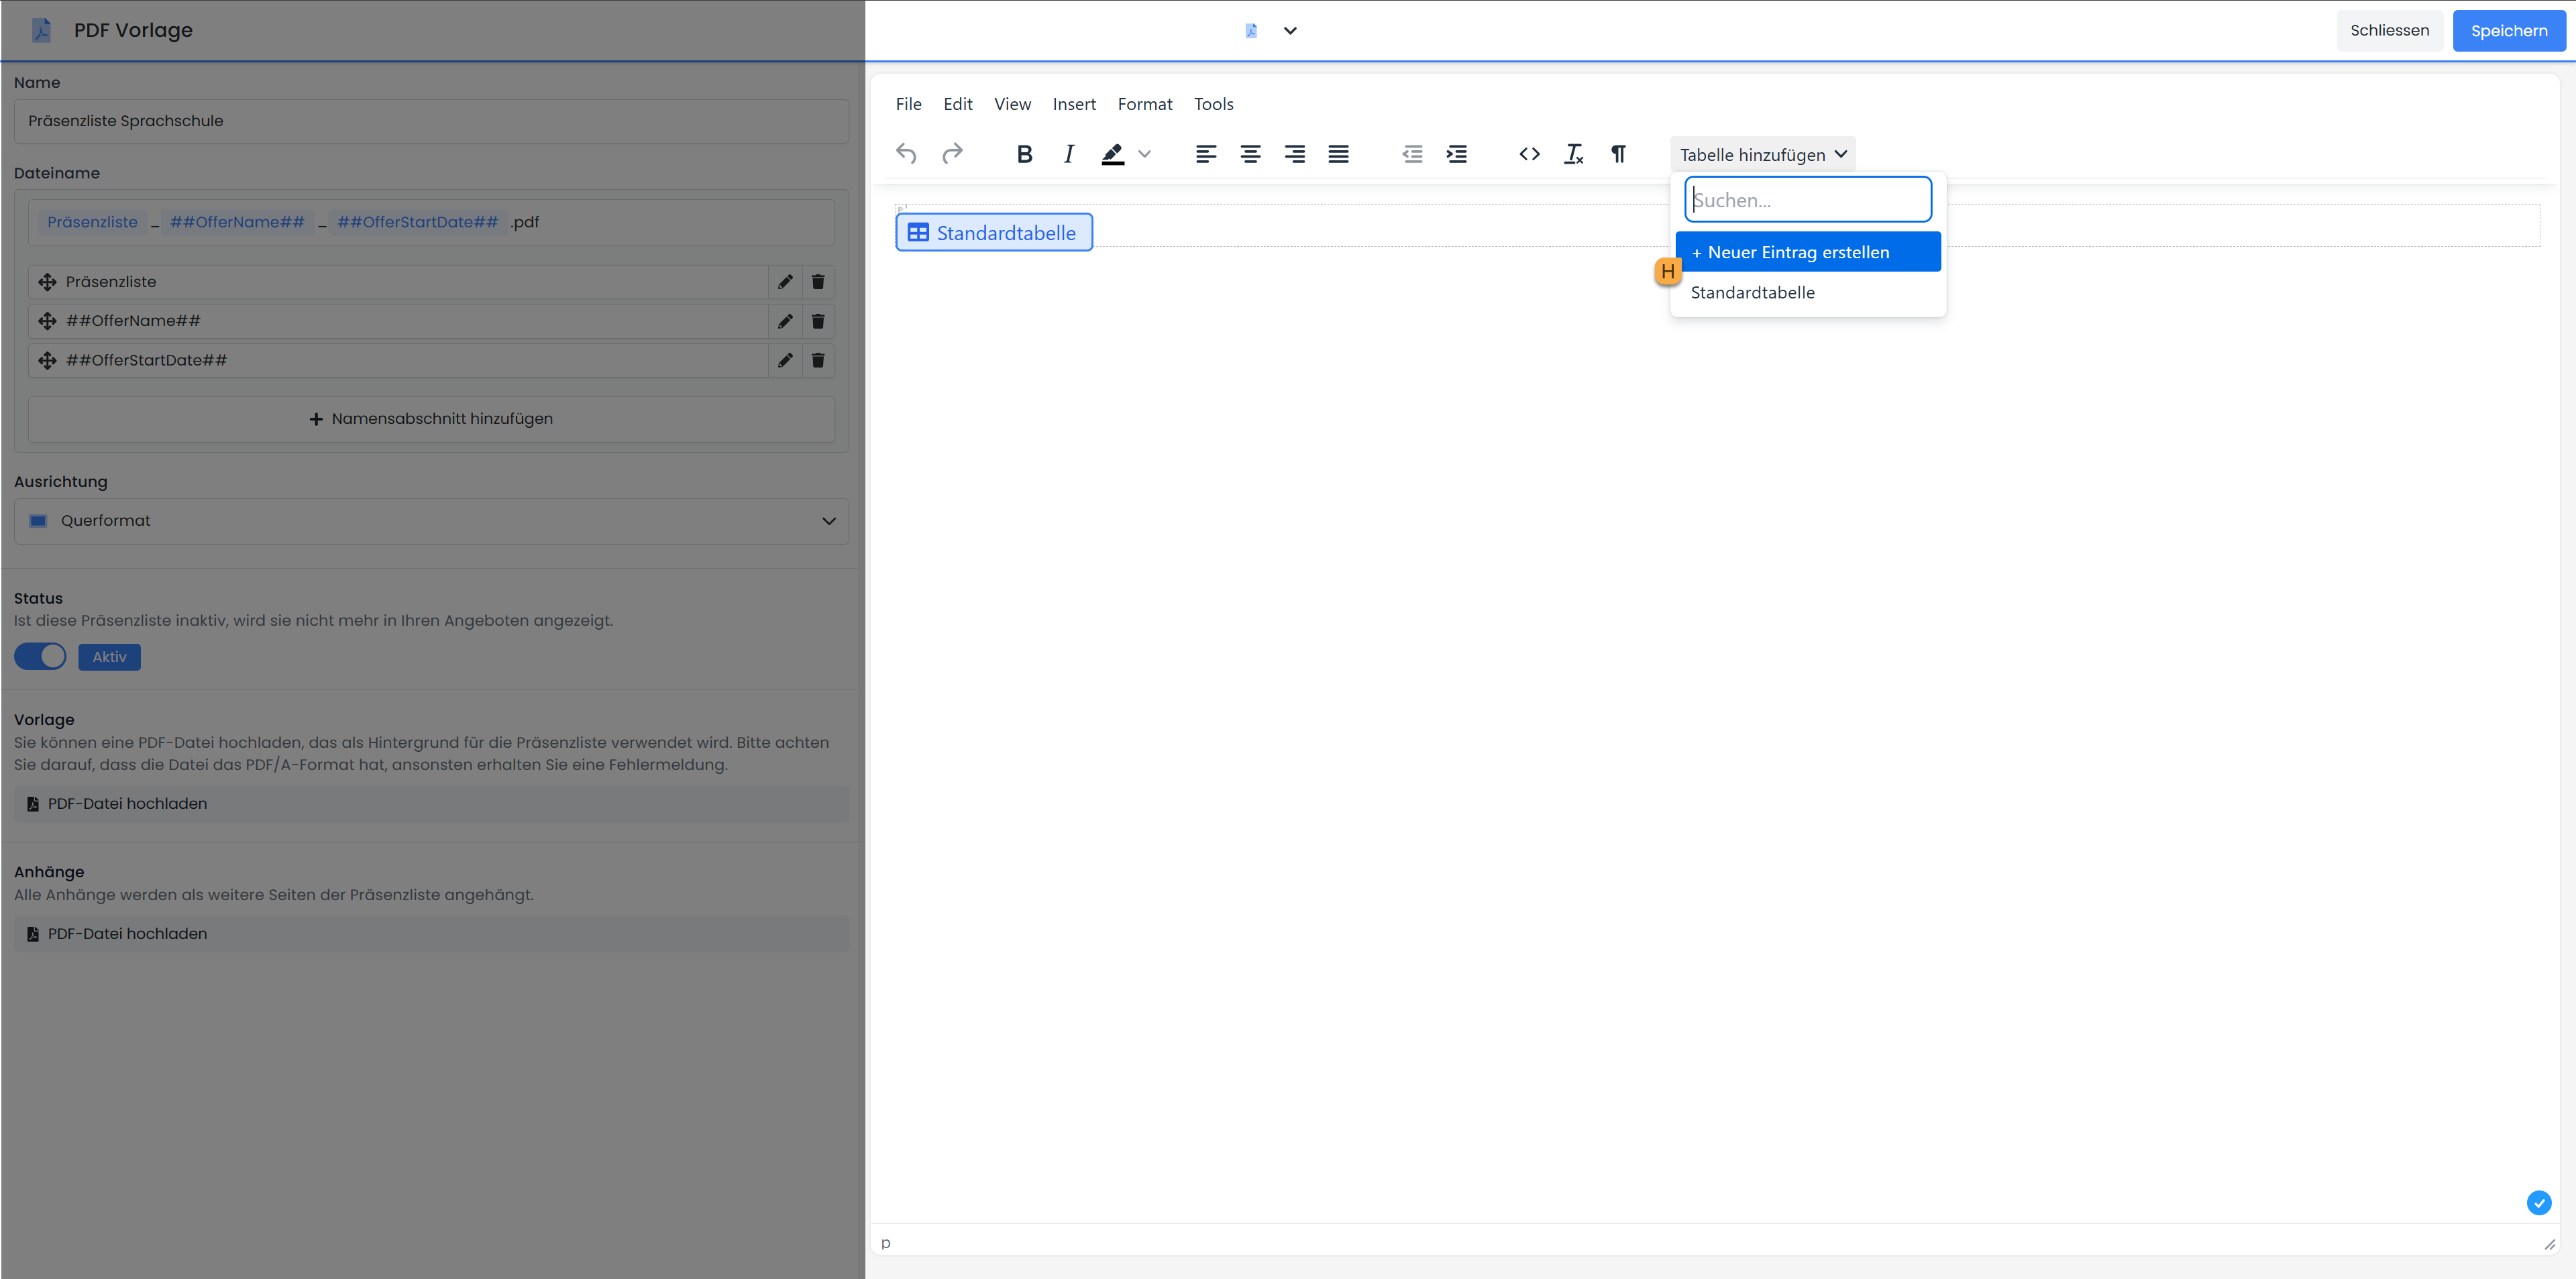
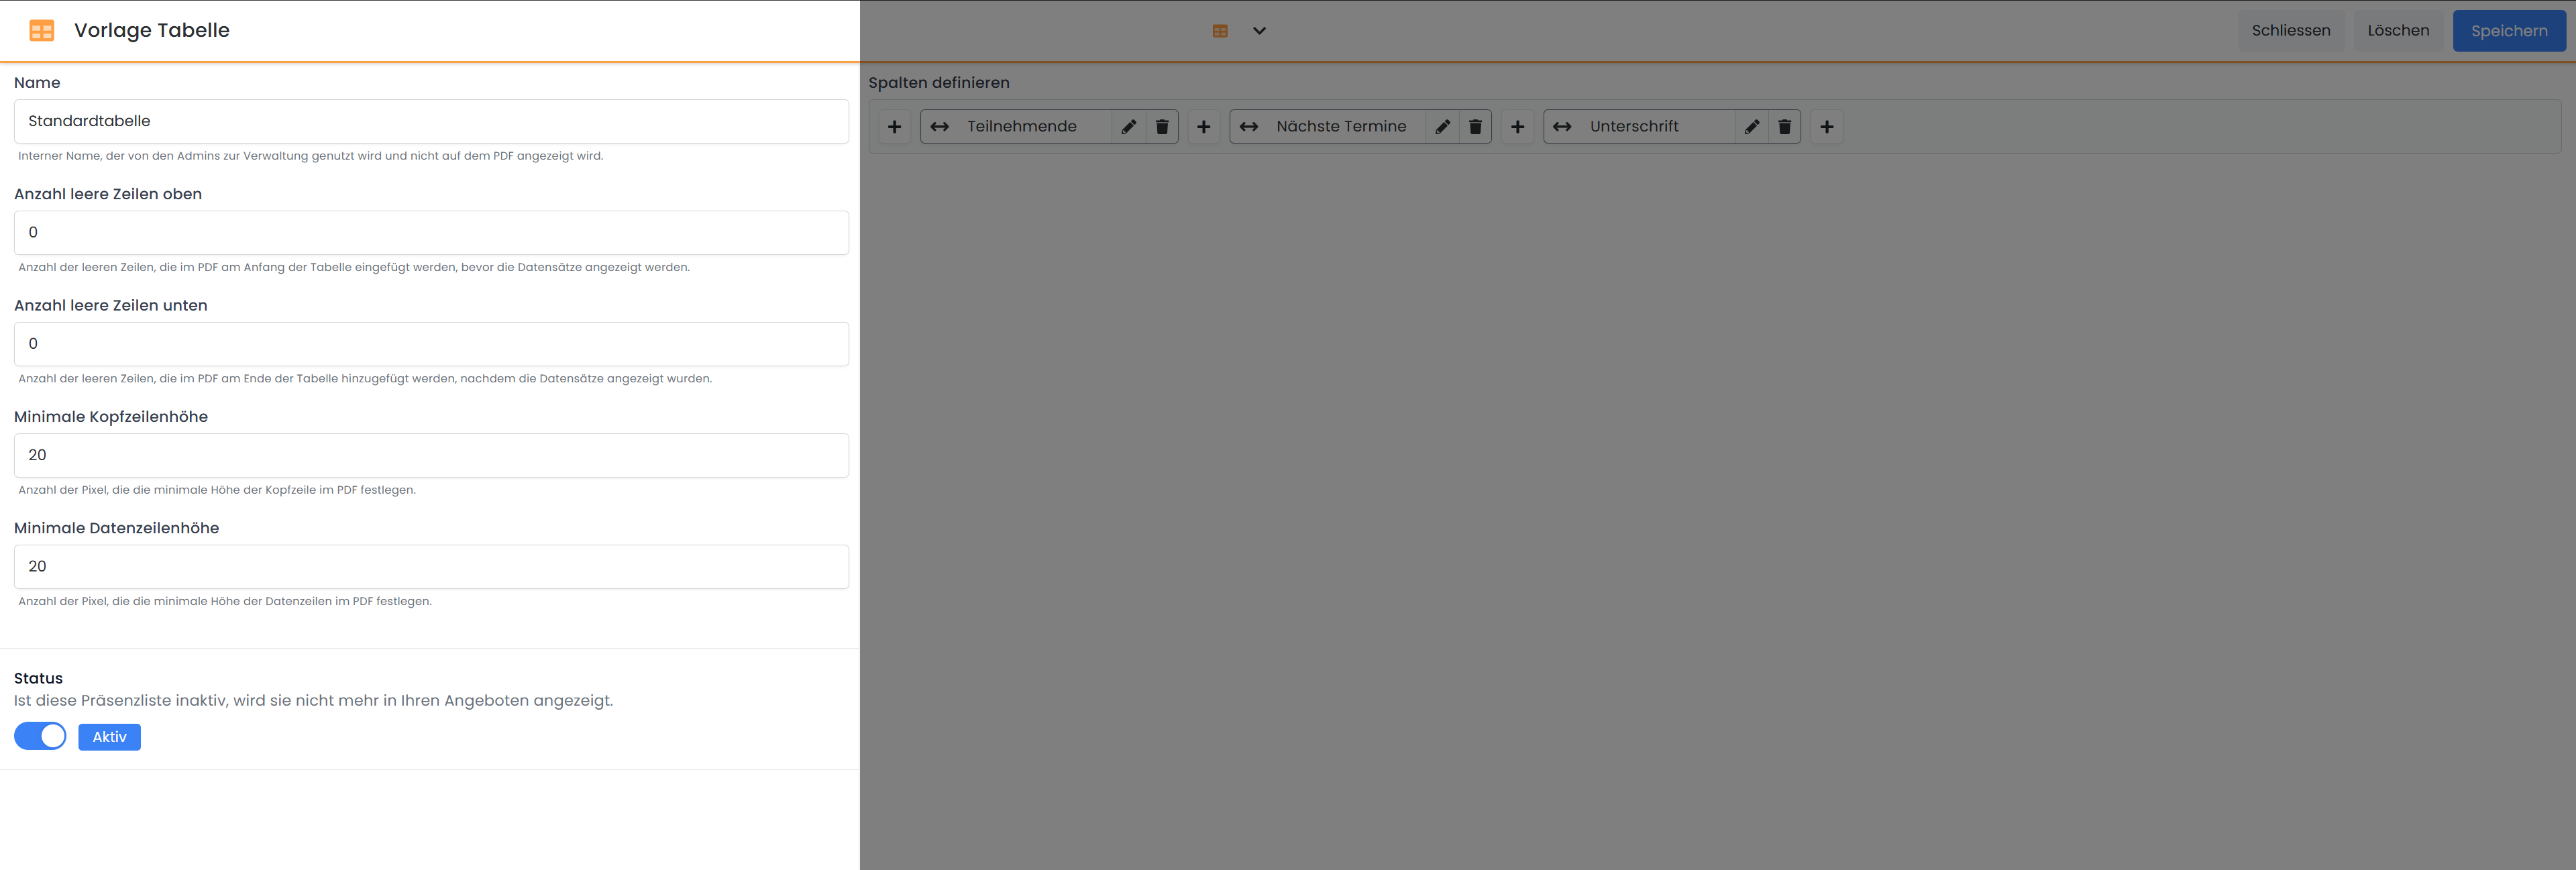
Create Table
In the editor on the right, you can now customize the attendance list. You can either use the default table that is already inserted or create your own table. In a custom table, you have the freedom to define your own columns, add participant data fields, or include freely definable fields. To create a new table, click “Add Table” in the editor and then click “+ Create New Entry” H.
A new window will open, where you can first configure the basic table settings on the left side.
Add Custom Column
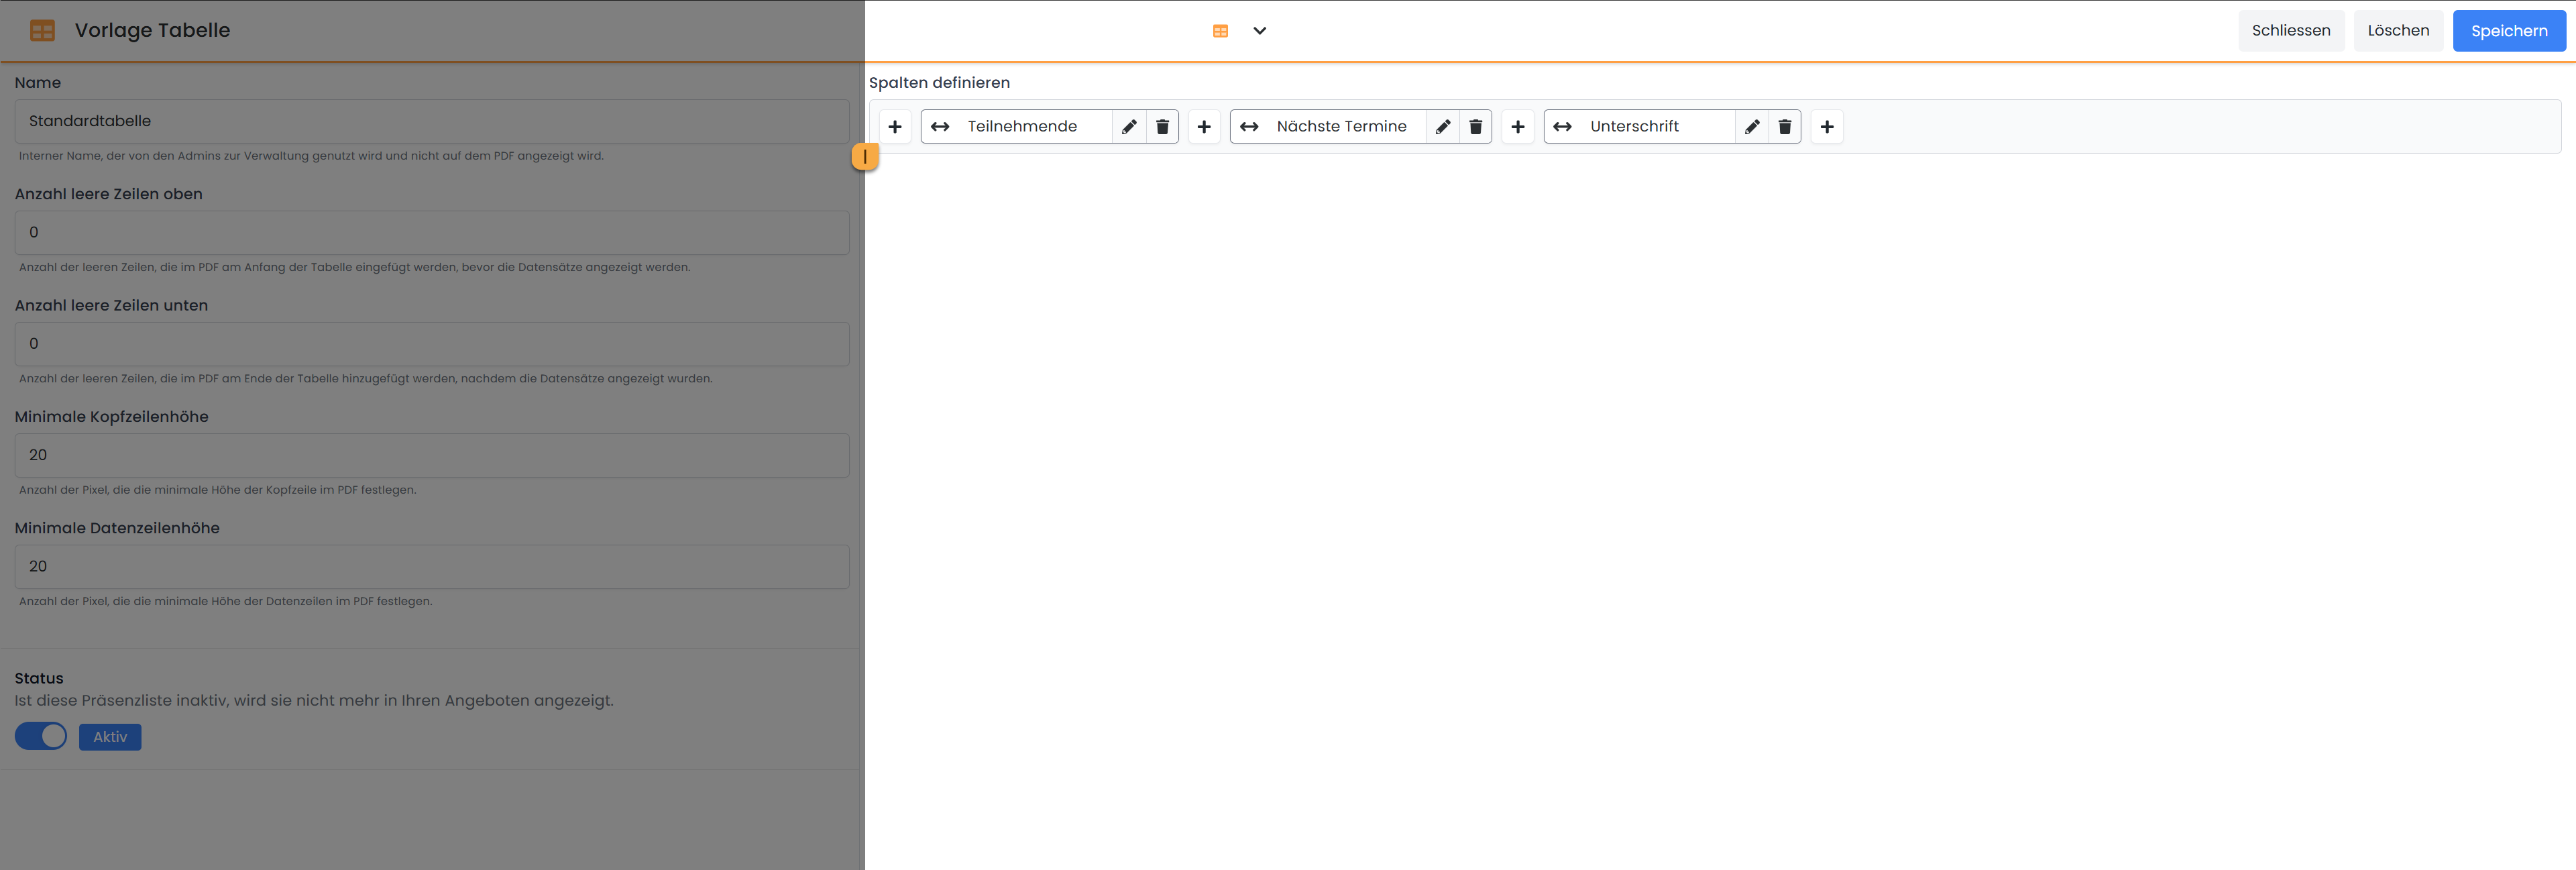
To add a custom column to the table, click the + symbol I at the desired position where the column should be inserted.
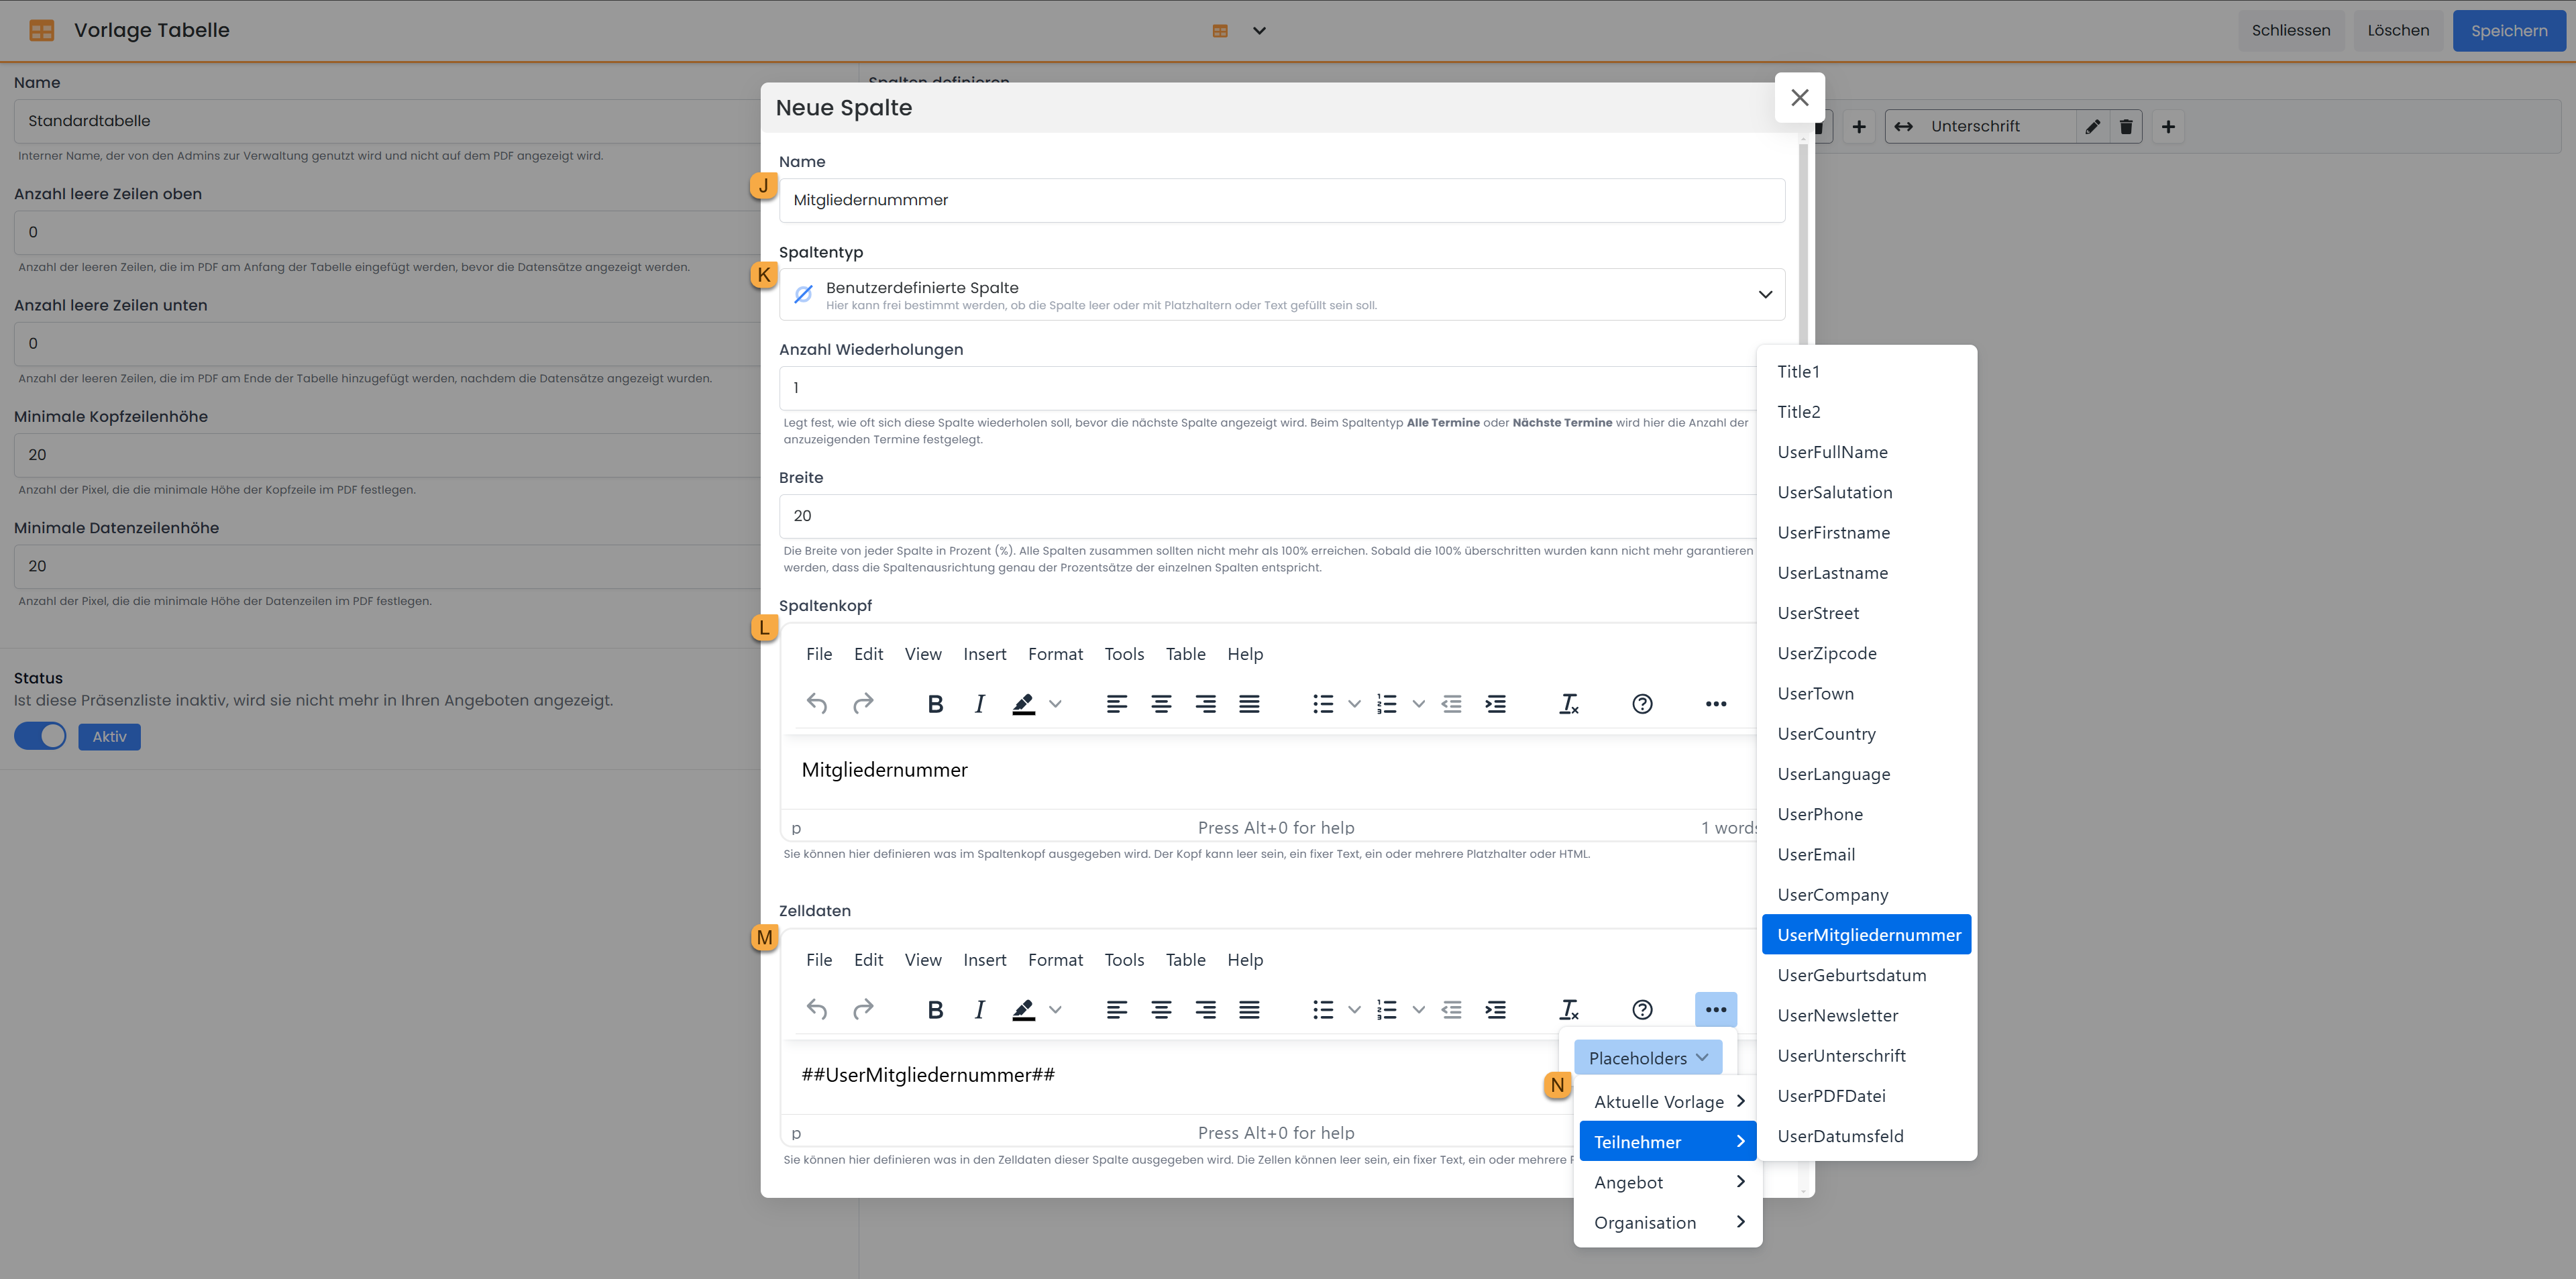
Then, assign a name J for the column, which serves to clearly identify it within the table template. In the next step, select the Column Type K «Custom Column». The Column Header L will be displayed in the table as the column's label. In this example, the static text «Membership Number» is used. Alternatively, you can select a placeholder from the available placeholder list to integrate dynamic content. For the Cell Data M, similar options are available. In this example, the placeholder for a custom participant data field, ##UserMitgliedernummer##, is selected from the placeholder list N.
Clicking «Save» closes the window, and the new column is added to the table. The added column can subsequently be repositioned via drag & drop to the desired location.
Once all desired columns have been added to the table, save the created table using the «Save» button in the top right corner. The window will close automatically, returning you to the PDF template. Here, you can now remove the default table and insert your custom table.
Tip: Highlight Participant Balance
Do you also display the participant balance on the attendance list? With IF Conditions , you have the option to highlight the balance with color based on its status: Red if it is negative, and Green if it is positive. Use the following IF Condition for this purpose:
{IF?UserBalance >= 0}<span style='color:green;'>##UserBalance## ##OfferCurrency##</span>{ELSE}<span style='color:red;'>##UserBalance## ##OfferCurrency##</span>{ENDIF}
Tip: Display Page Numbers on PDFs
You can easily insert page numbers automatically into your PDF templates with the following text:
Page {PAGENO} of {nbpg}
Related Guides
Keywords for this guide
Attendance List | Placeholders | Custom Attendance List | Participant Data Fields