Please note that free support for this subject area is limited. If you require more extensive support, we are happy to offer you paid services.
With Zapier, you can quickly and easily send participant data, bookings, invoices, etc., from edoobox to a specific third-party system, without requiring development expertise.
Use Case: Newsletter Registration
For example, if a user registers for one of your courses, the participant data is immediately synchronized with the newsletter system, allowing you to subsequently send marketing emails to the customer.
Using edoobox with Zapier
To do this, you’ll first need to create an account on zapier.com so you can set up the connection. Zapier is a user-friendly web service that allows you to automate actions between the web applications you use every day. This makes it easier to work with edoobox and various other apps.
With Zapier, you can quickly and easily connect edoobox to another software solution—no development knowledge required.
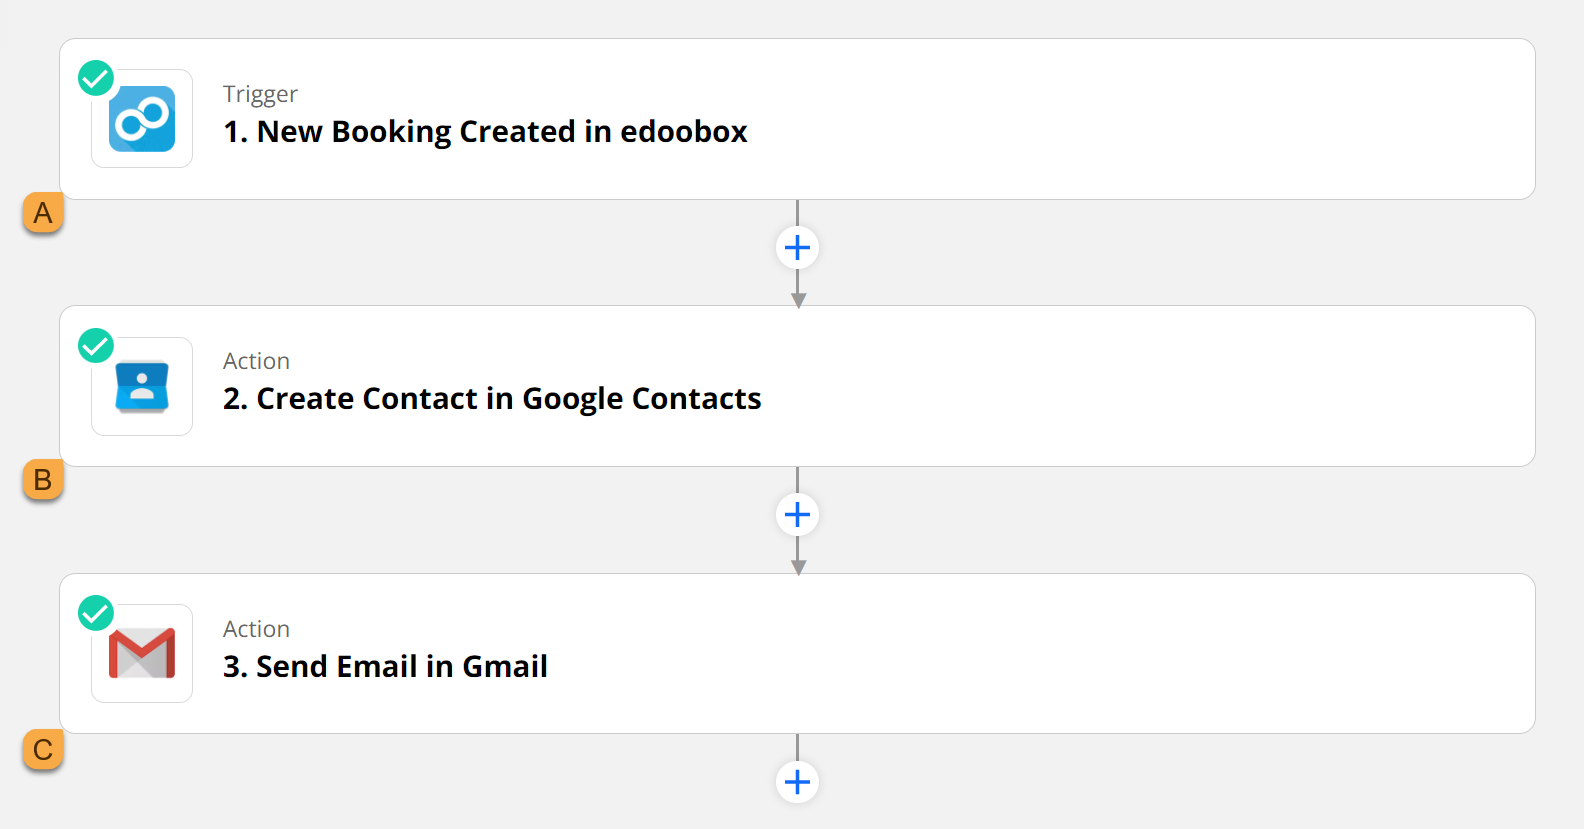
Example: New Participant
When a new participant signs up ( A), a new Google contact (B) should be created (if one does not already exist), and an informational email ( C) should be sent to you.
Creating the First Zap
Create Zap for New Participants
What should happen as soon as a new participant registers on your edoobox account? Should their contact details be saved directly as a new Google Contact? Do you want to be notified by email? You decide what task should be created.
First, link your edoobox account with Zapier.
In Zapier, under "My Apps," search for the edoobox app. After clicking " Connect ," a separate window will appear where you can enter the edoobox API keys (Public Key D and Secret Key E ).
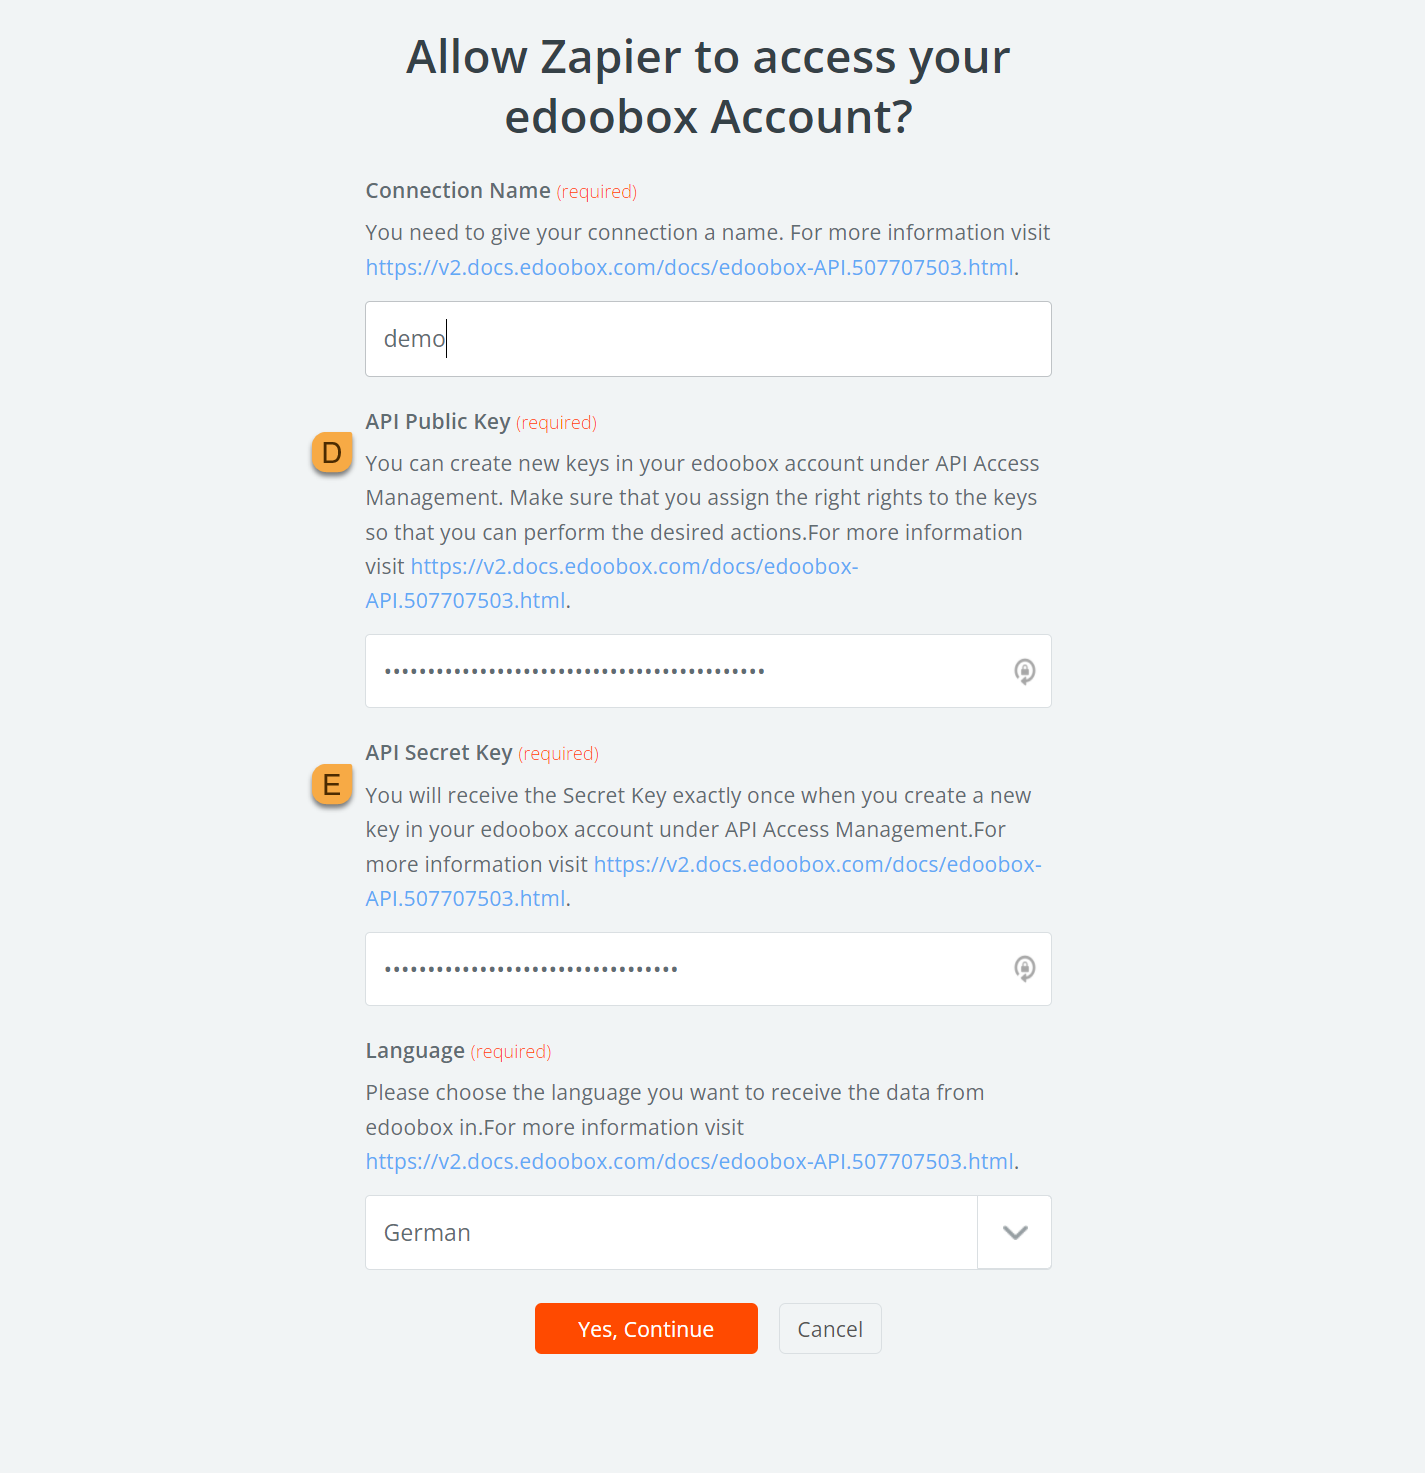
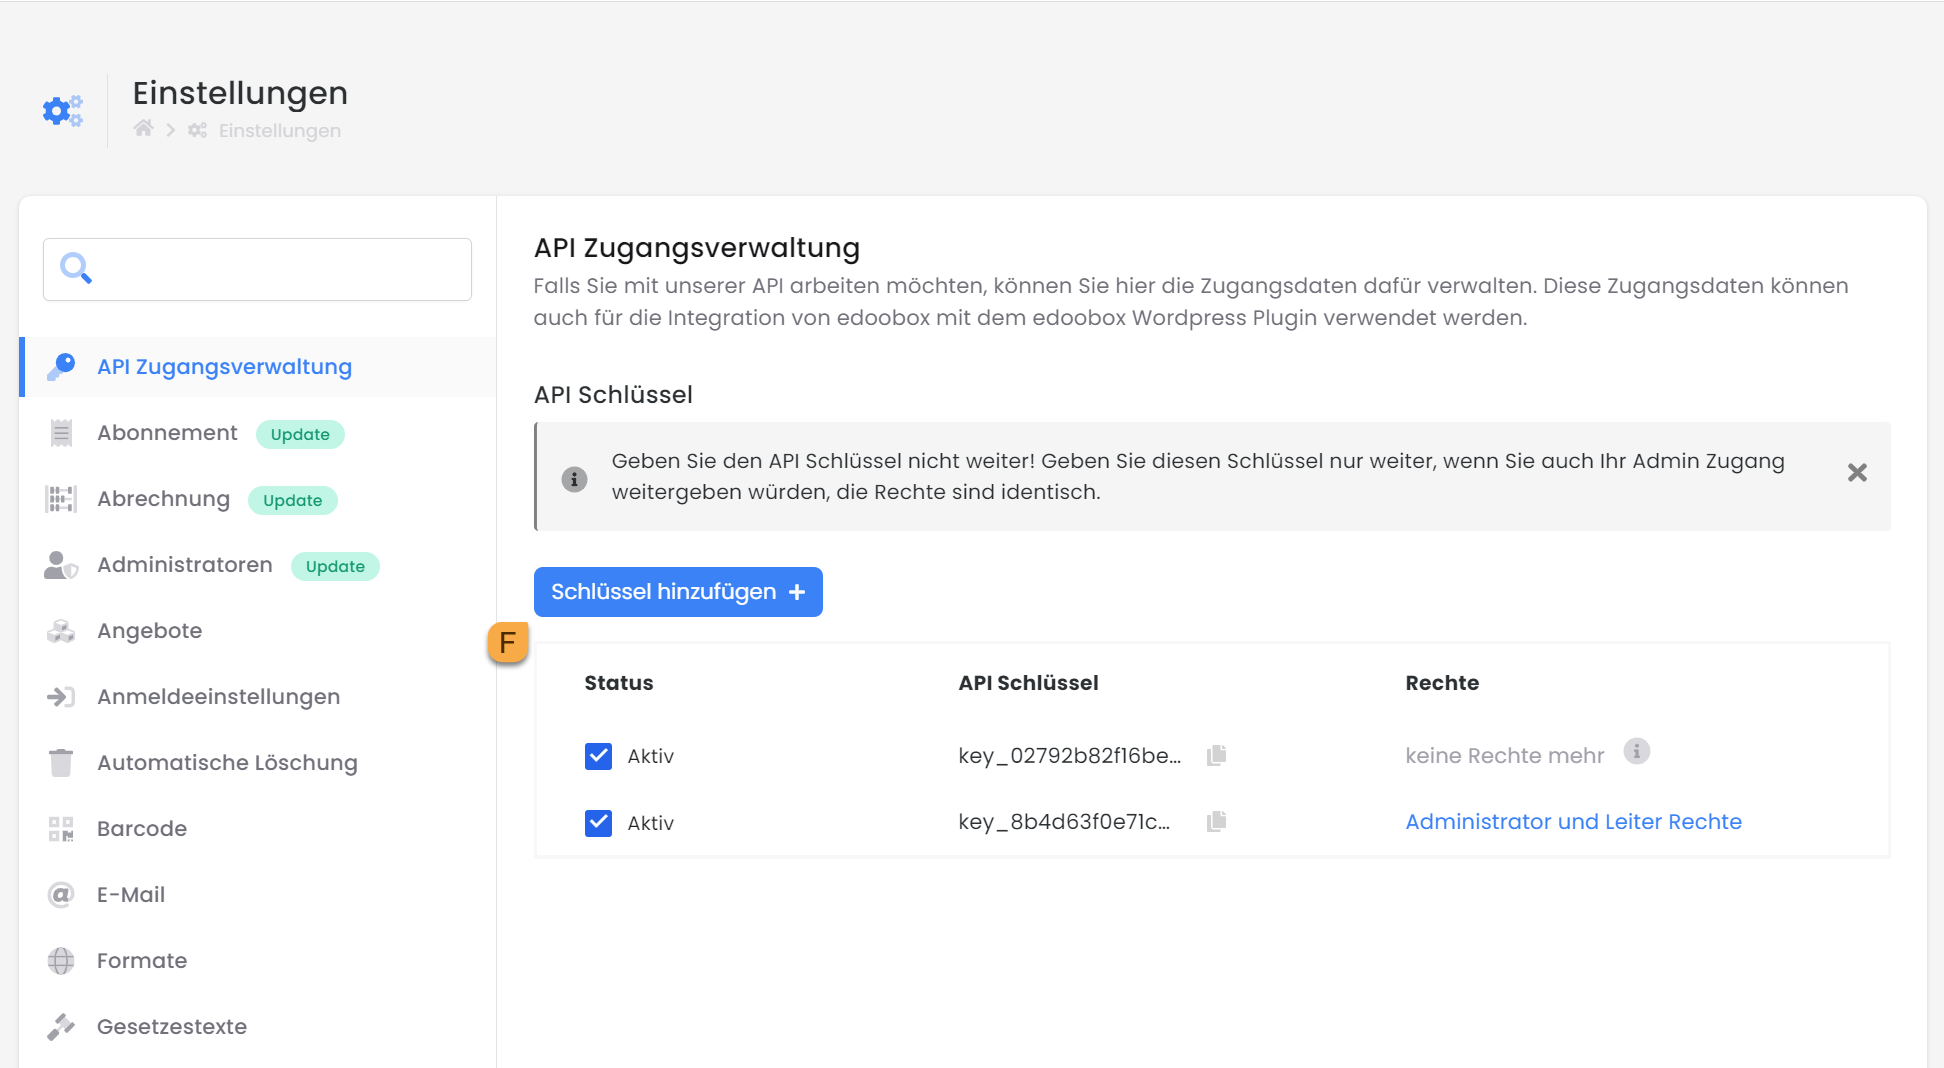
You can find the «API Access Management» in the edoobox settings within your edoobox Account V2. Here, API Keys can be generated. Click on «Add Key» F and select the Zapier permission under Rights. After clicking «Add», a Public and a Secret Key will be displayed in a window. Copy both keys to your clipboard and save them in a secure location. The Secret Key is only displayed once! You can find more information under edoobox API.
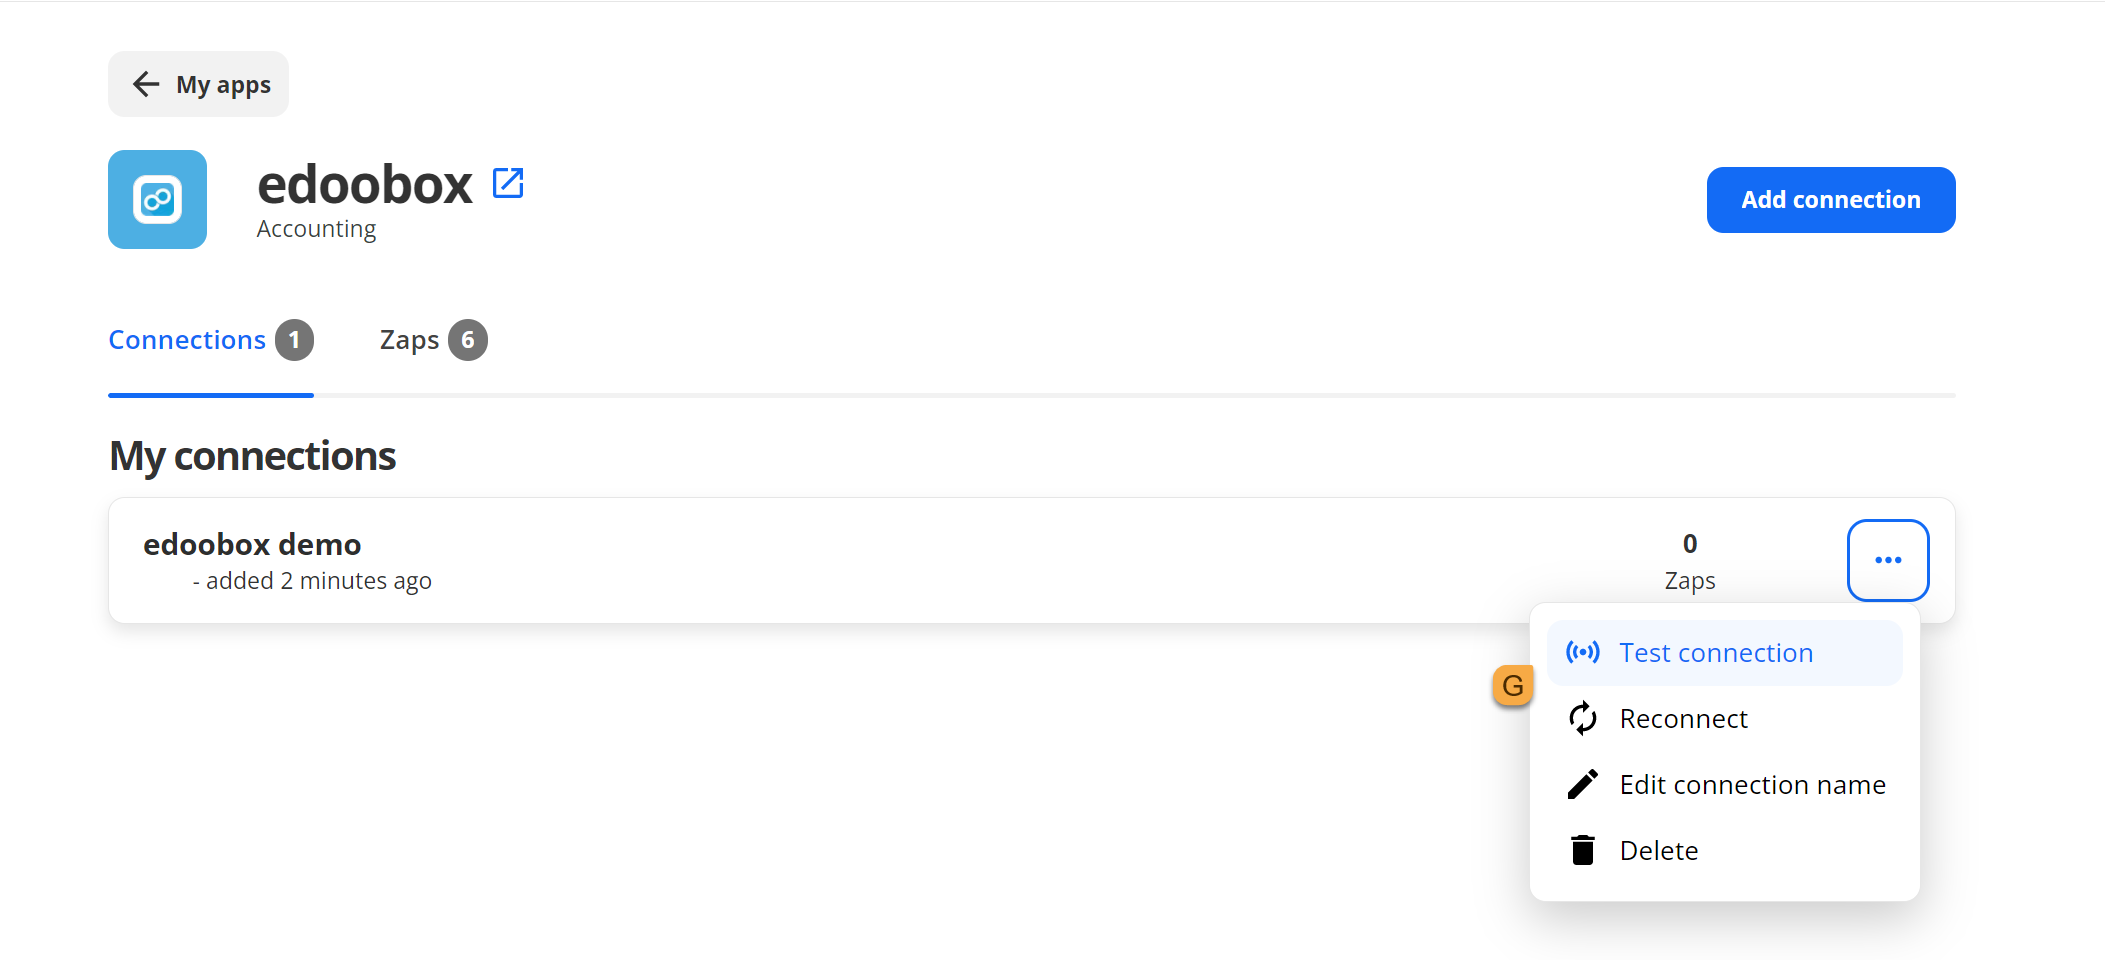
Once you've linked your edoobox account, you can test the connection G. After a successful test, you can start creating your first Zap.
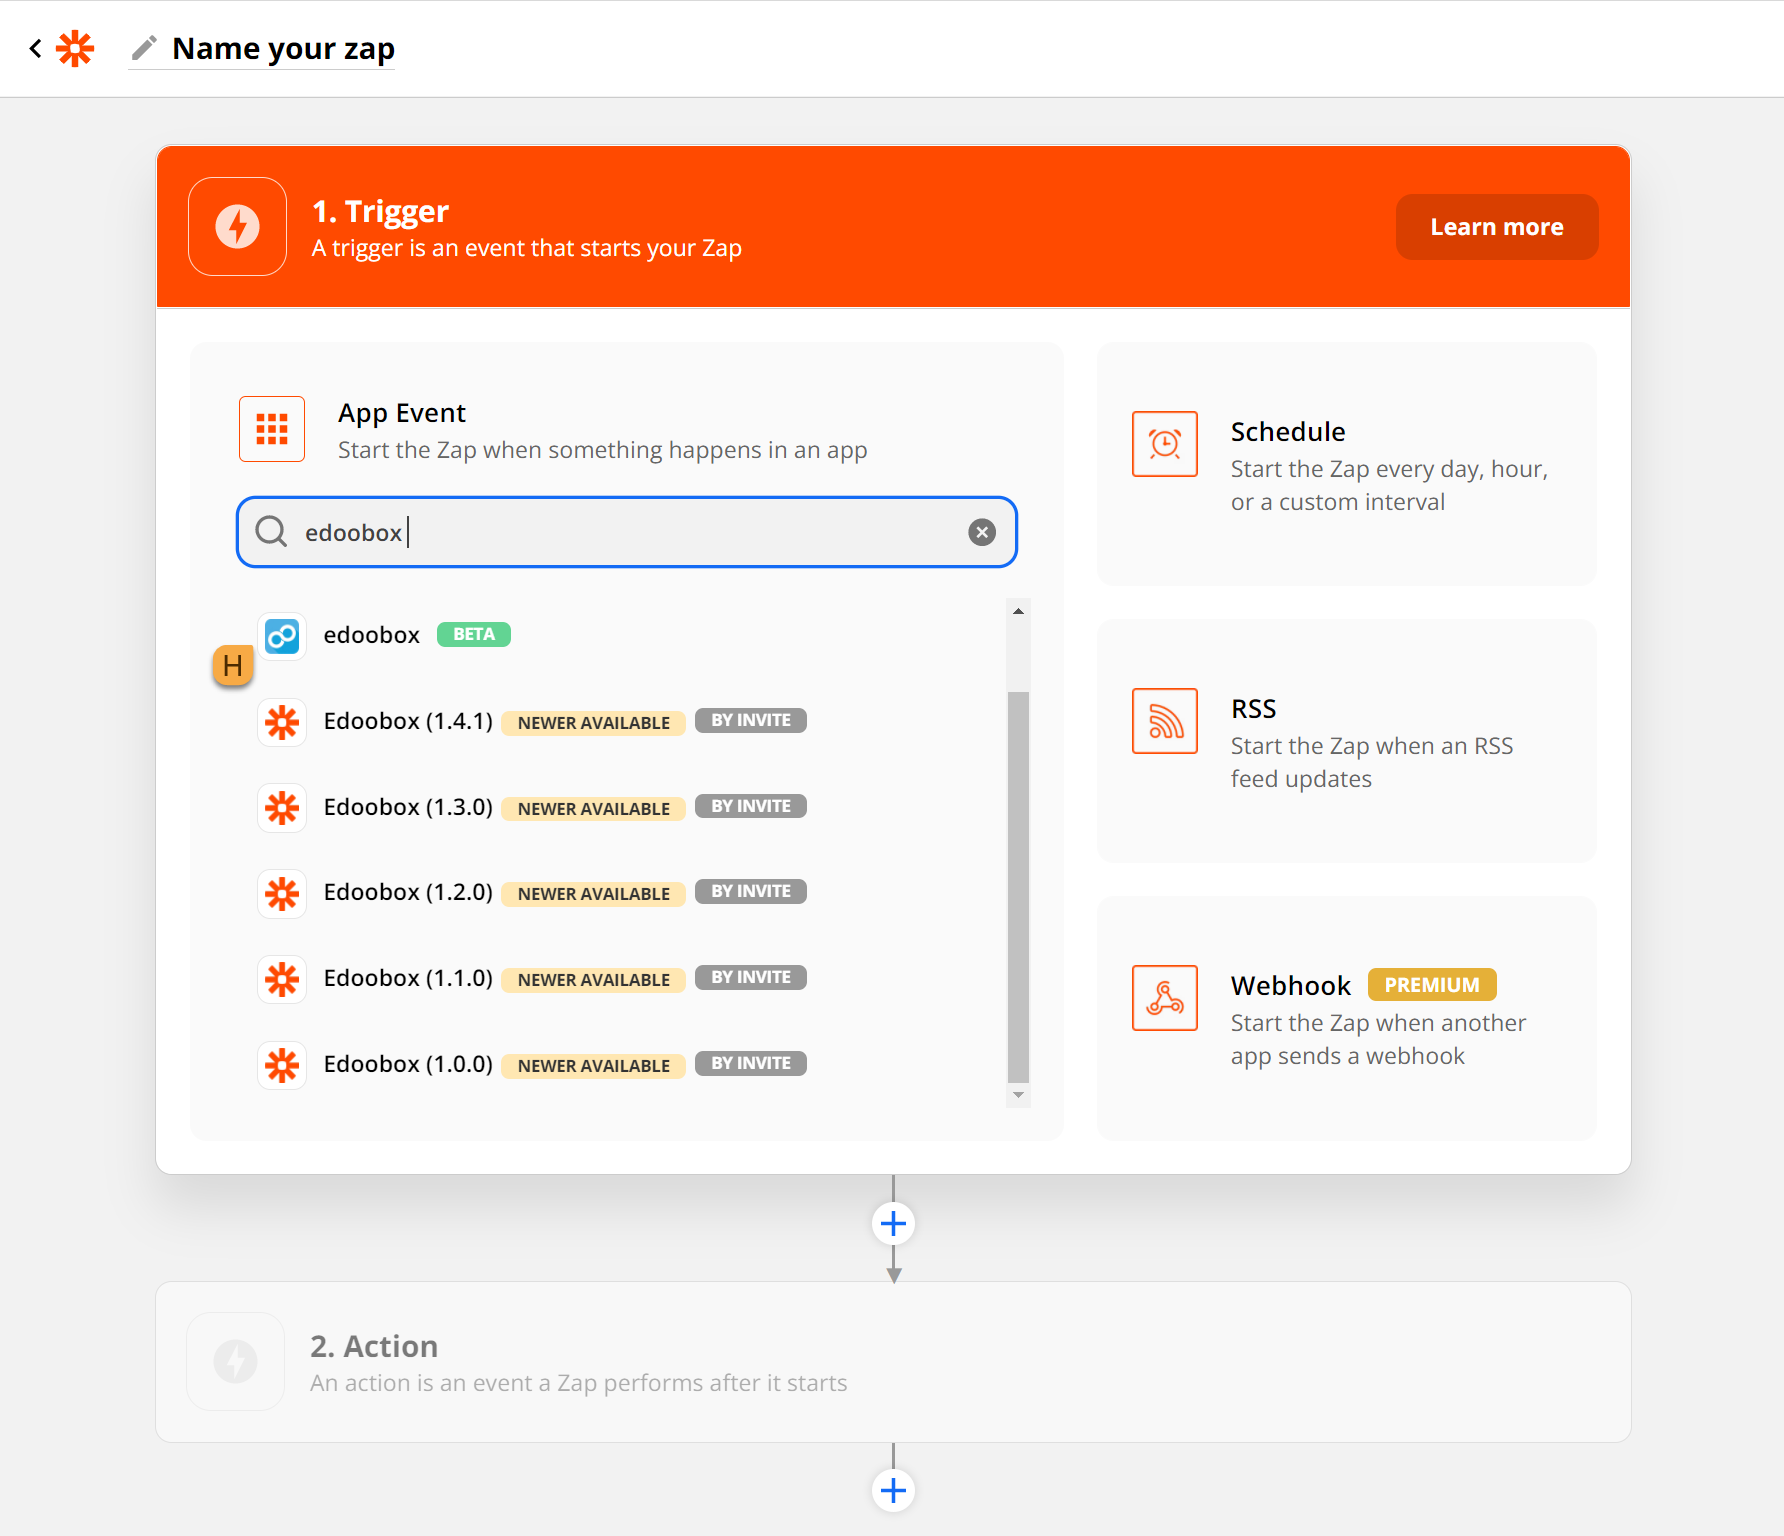
Via «Create Zap», you will directly access the first trigger, for which you now select the edoobox App H.
Note: Trigger usage is limited
The same Instant Trigger can be used a maximum of twice per account. This means, for example, you can use the «New User Created» trigger for a maximum of two Zaps.
After selecting the app, choose an event for the trigger. In this example, we’ll choose “New User Created.” This trigger is activated when a new user signs up.
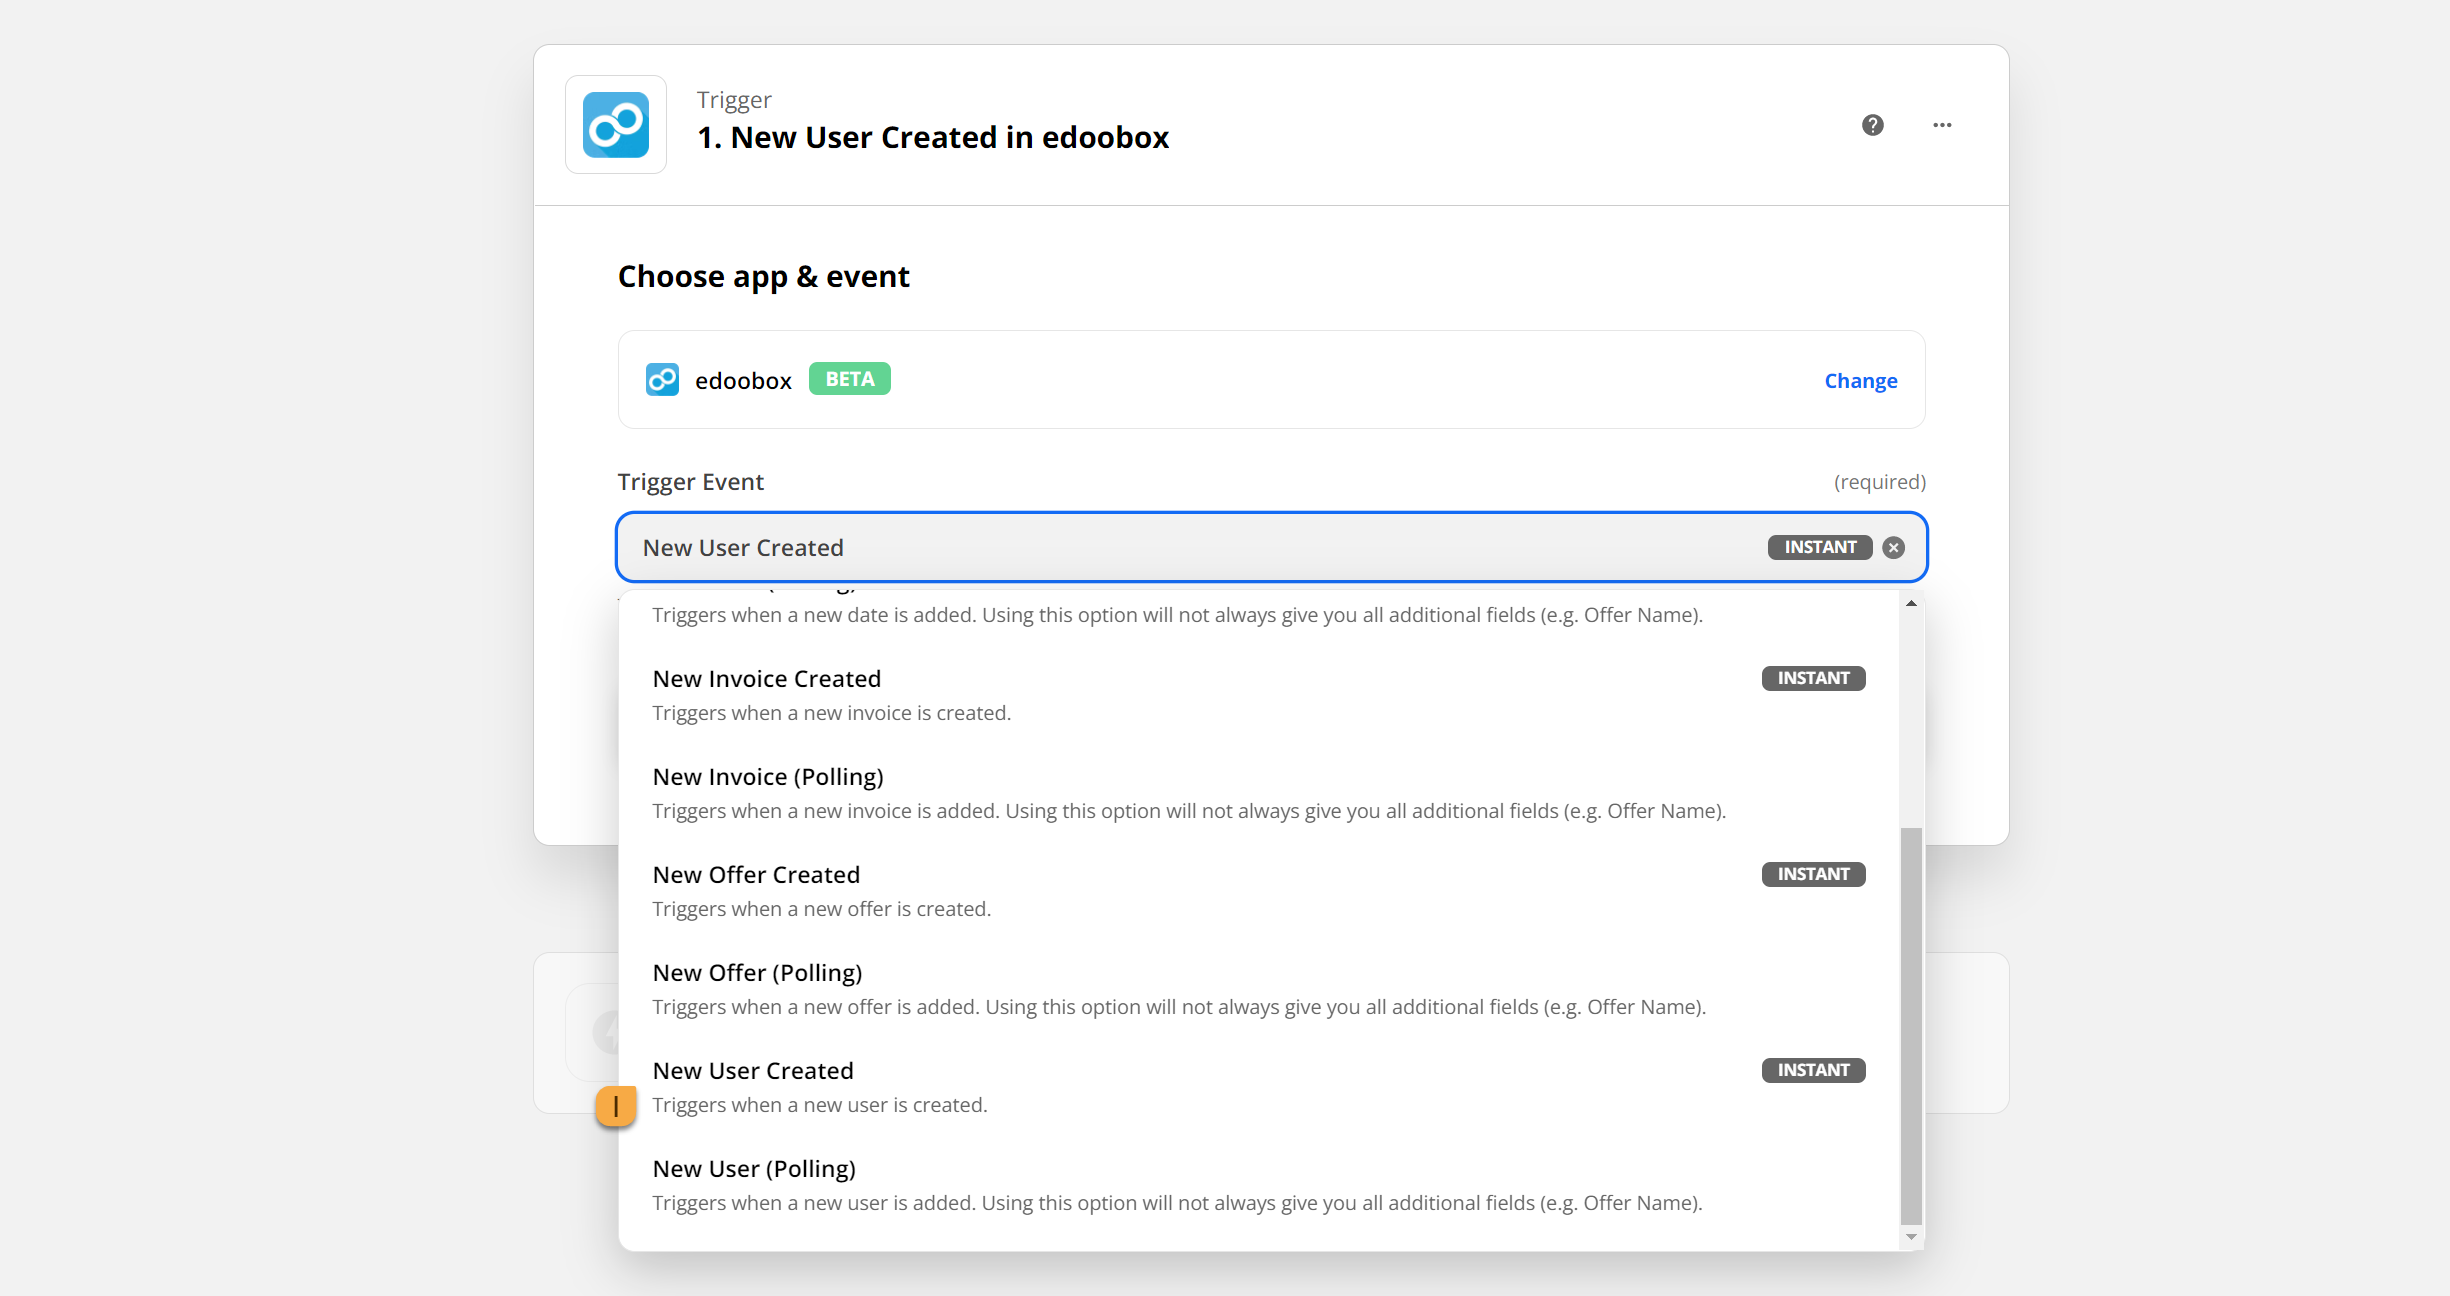
Info: Instant & Polling
The distinction between Instant and Polling is as follows: With Instant, the request is executed only when a new participant has actually registered. With Polling, a query is performed every 5 minutes to check if a new participant has registered. Additionally, Polling does not provide all supplementary fields.
Tip: Use Instant
We recommend using the Instant option whenever possible, especially considering that the Polling option may no longer be available in the future.
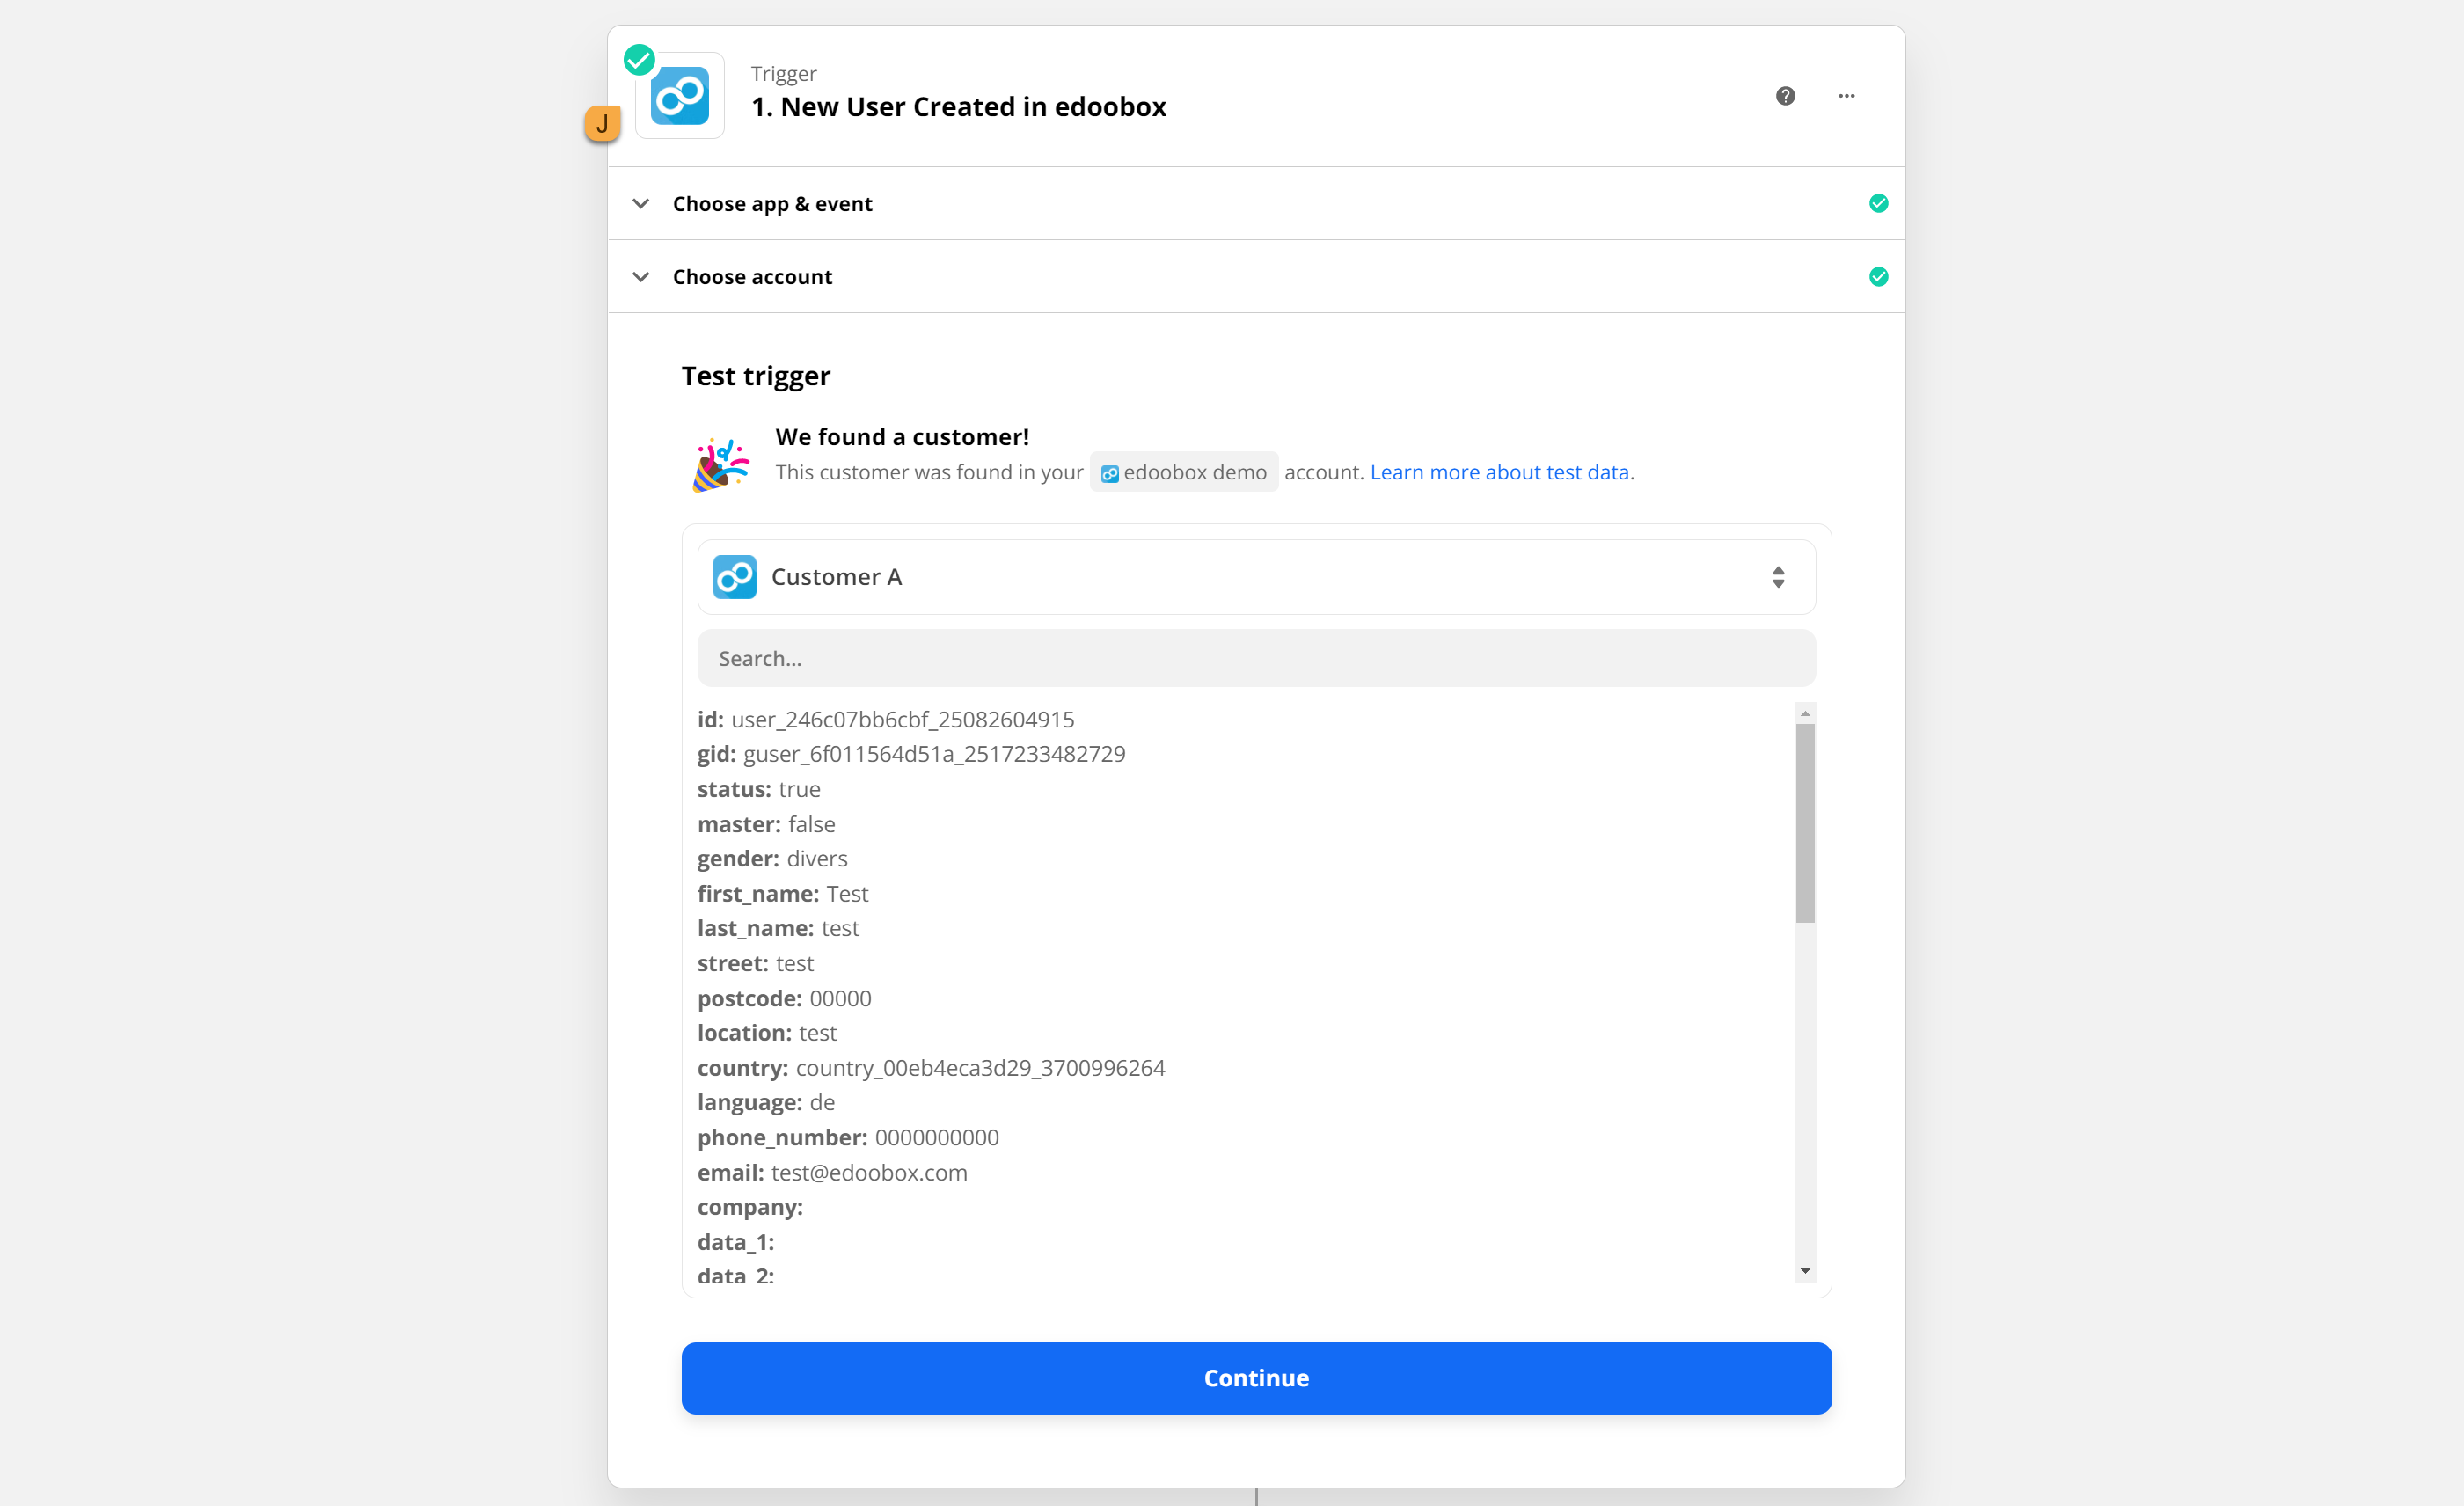
As the final step for the first trigger, select the edoobox account you previously connected. The connection can be re-verified at this point; if successful, the trigger will receive a checkmark J to confirm the connection.
After the trigger, the action is selected. To do this, search again in the search field for the corresponding app into which the participant should be imported. As an example, we use Gmail. If a new participant now registers for one of your courses, an email should be sent K from your Gmail account. However, the Gmail account must first be linked in the next step.
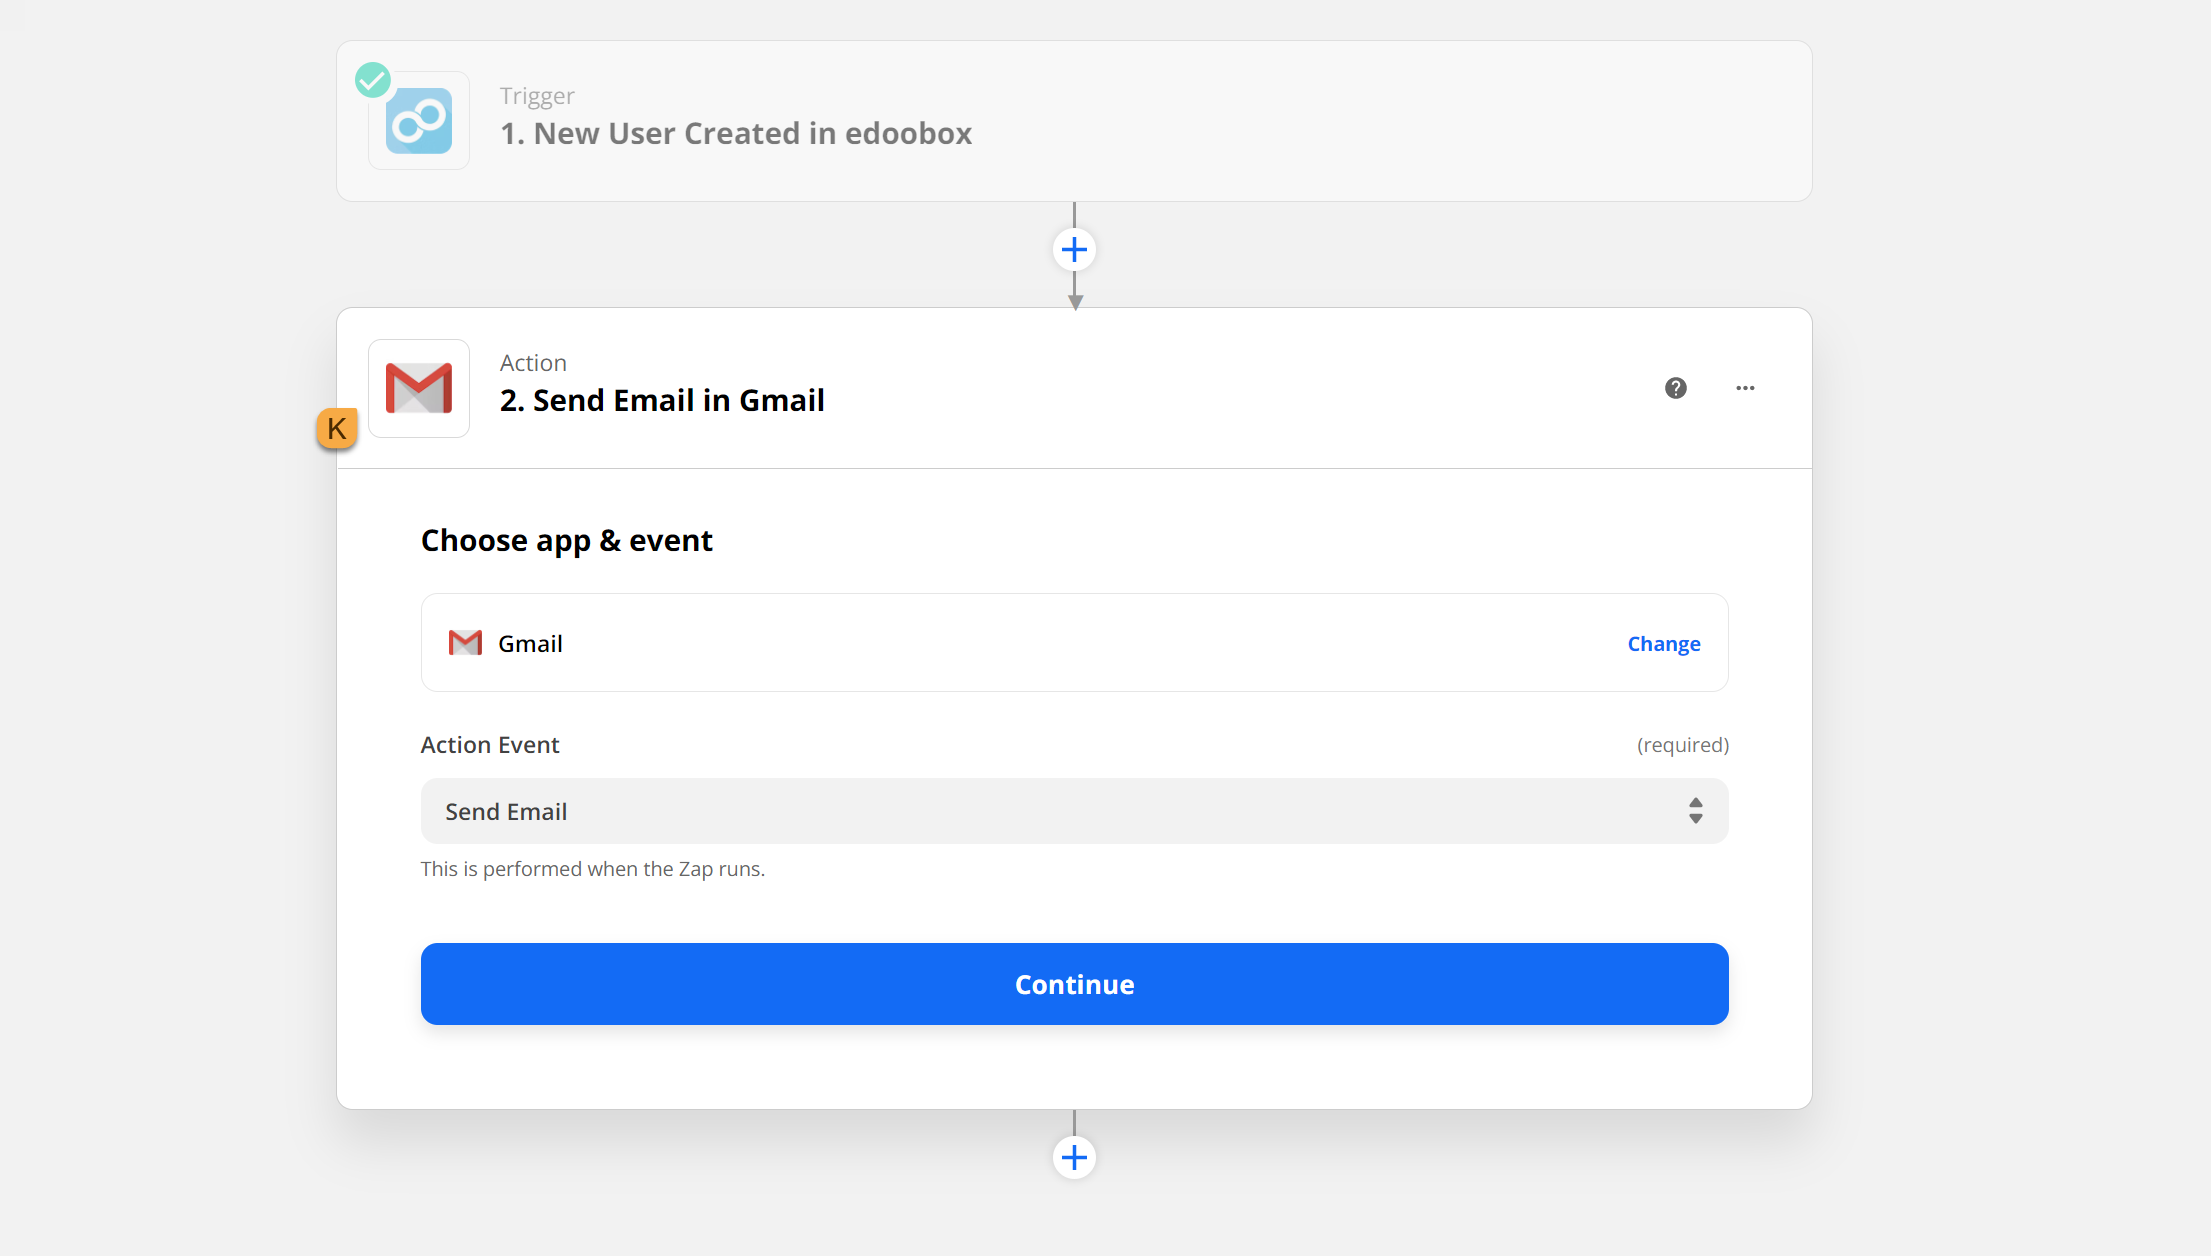
Afterward, individual specifications can be made, such as which email address(es) the emails should be sent to, defining a subject, body text, and much more.

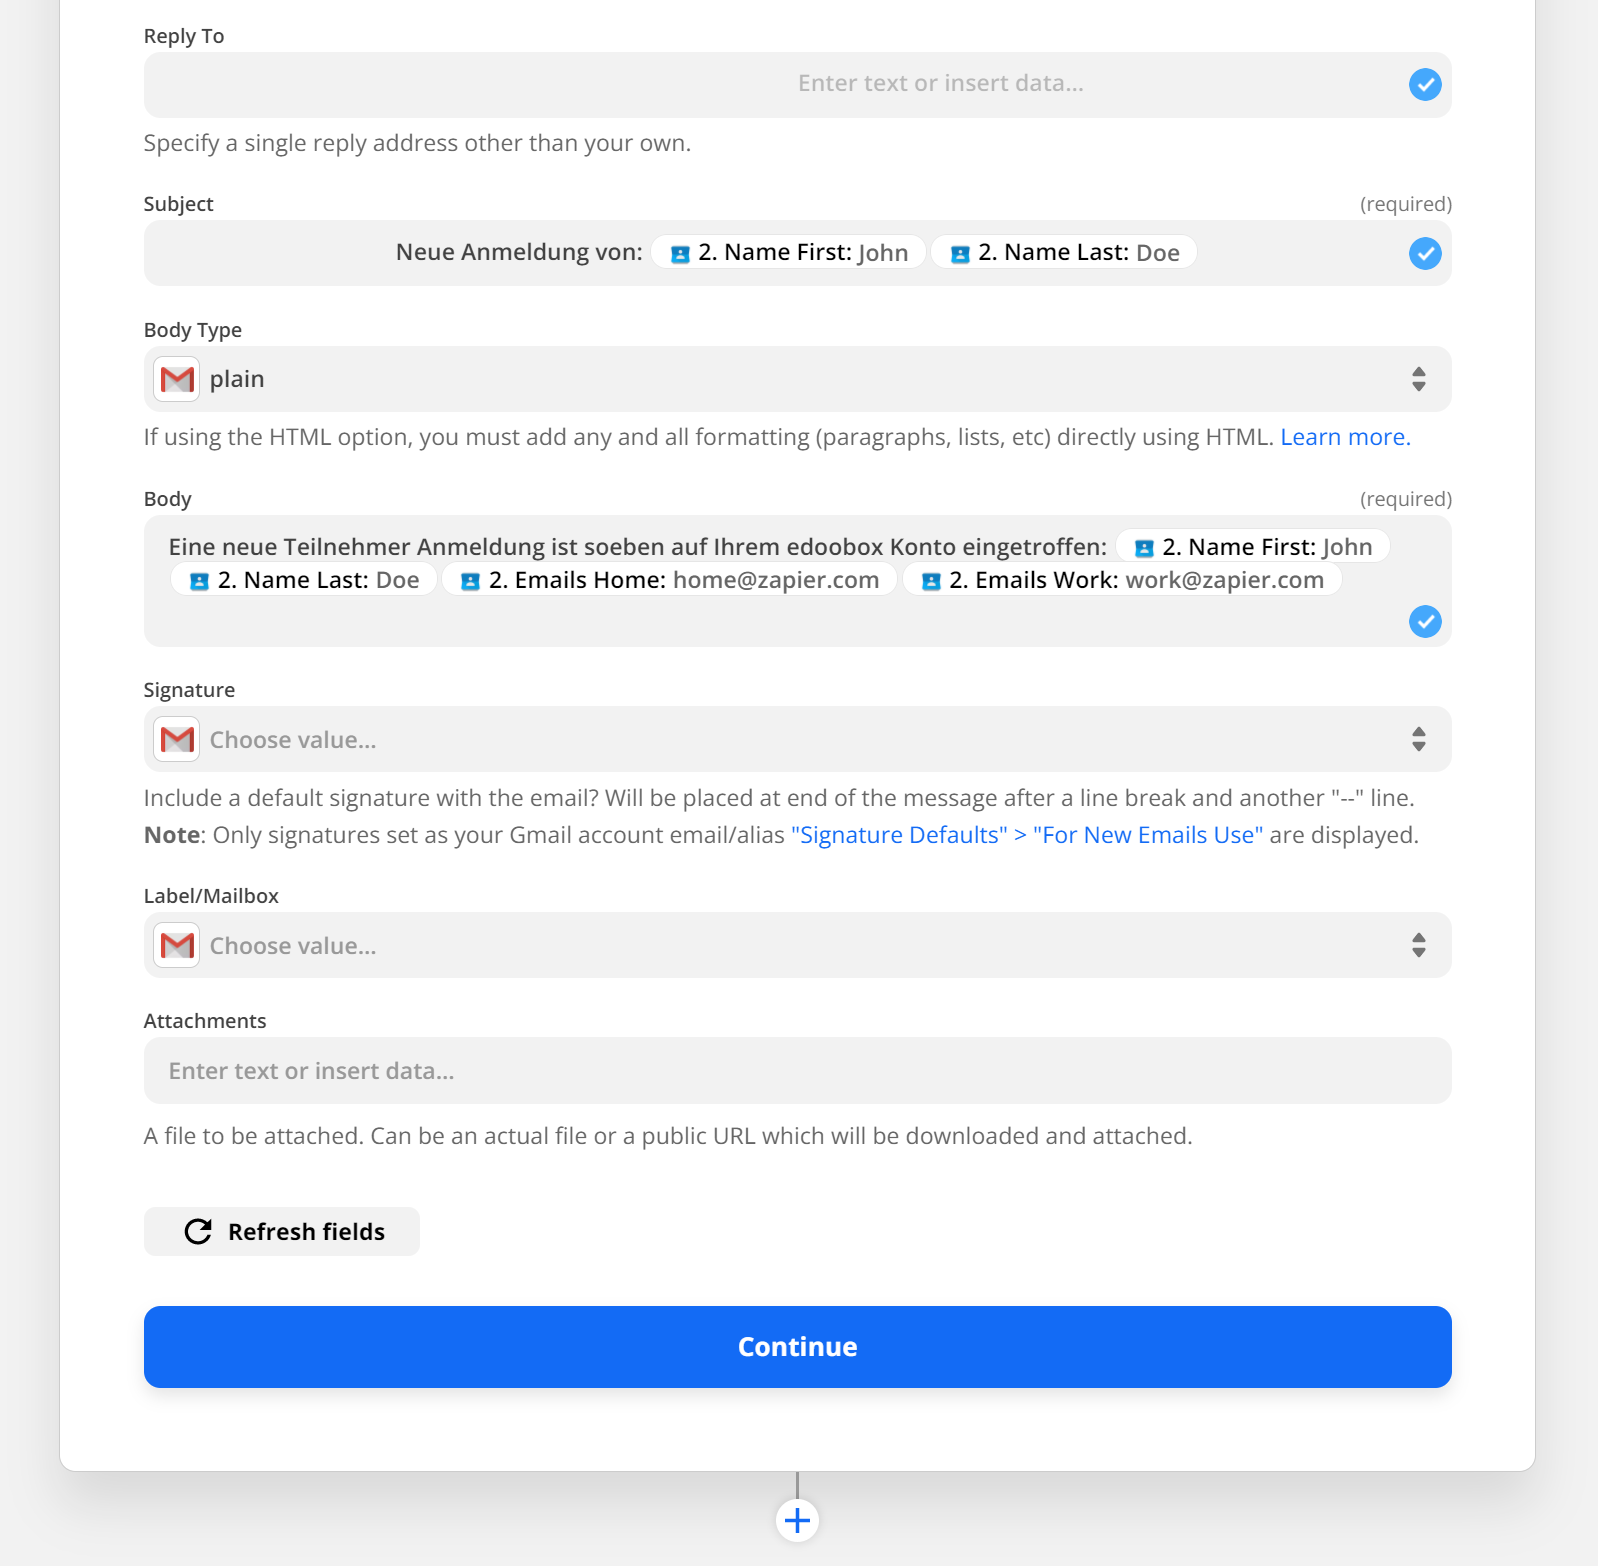
Here too, a test can be performed to ensure that the email is sent correctly and reaches the recipient.
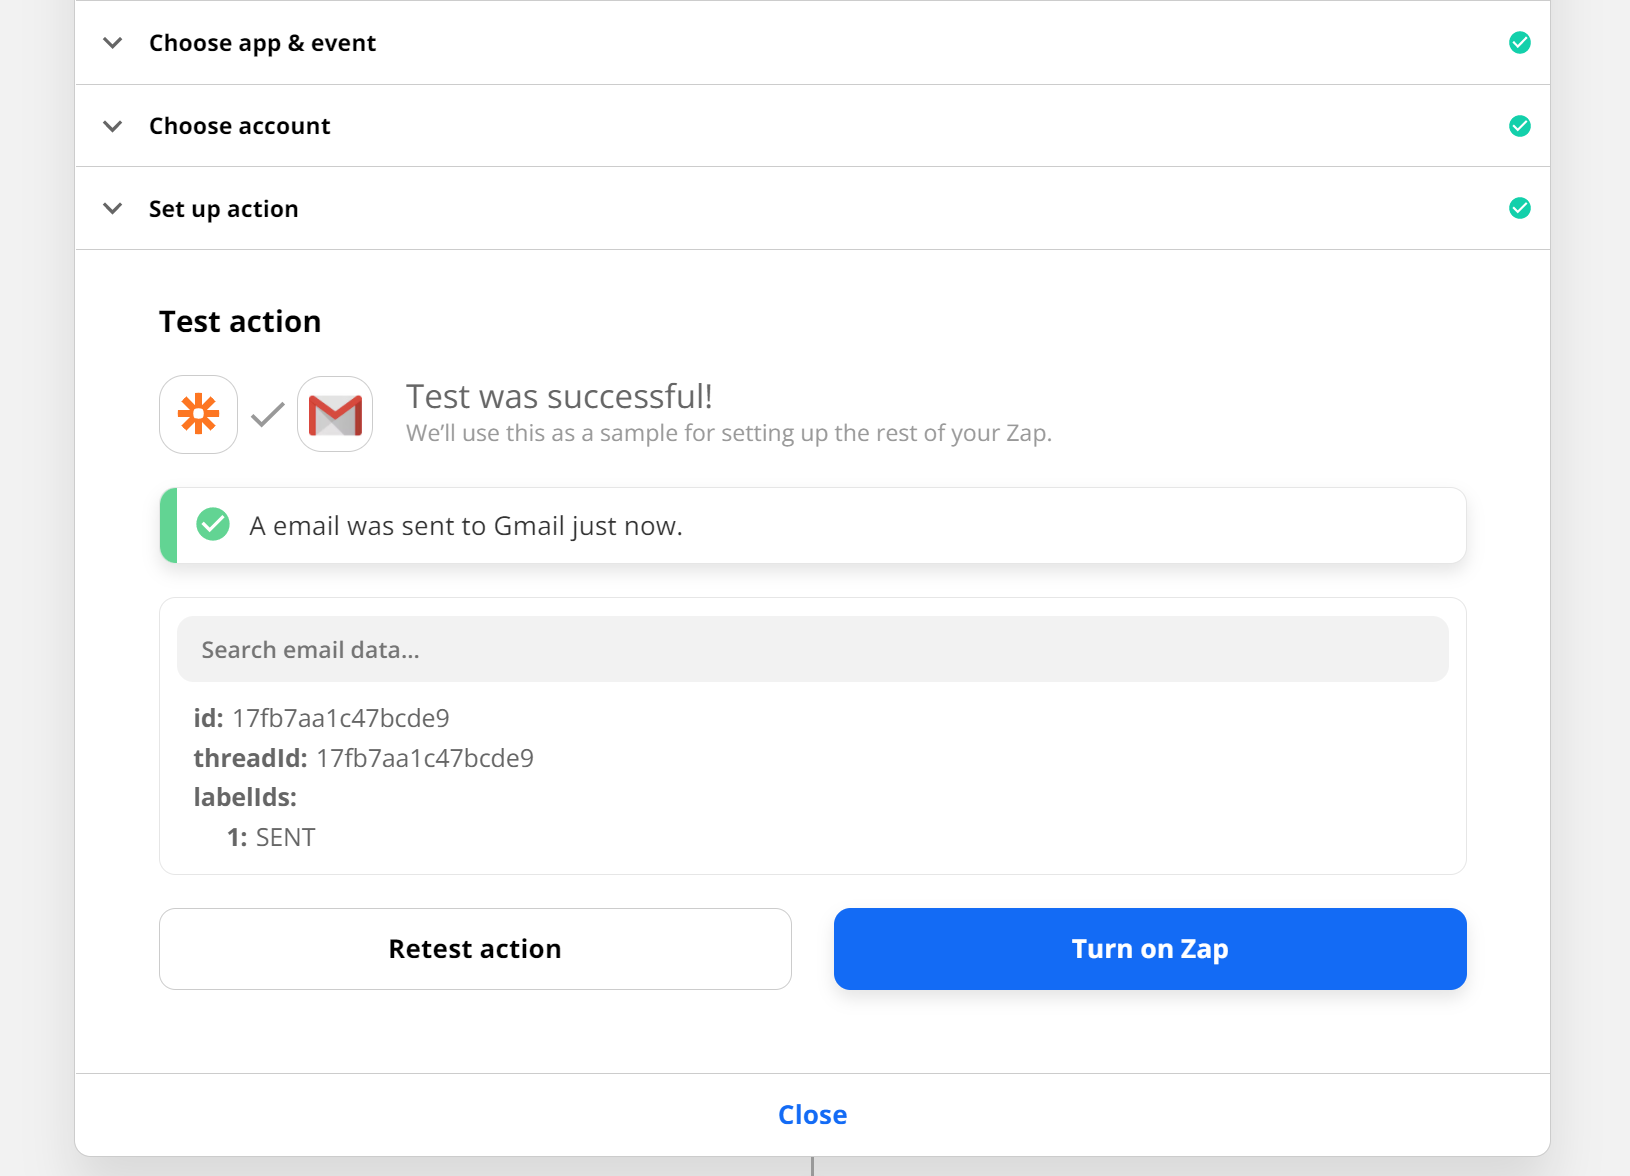
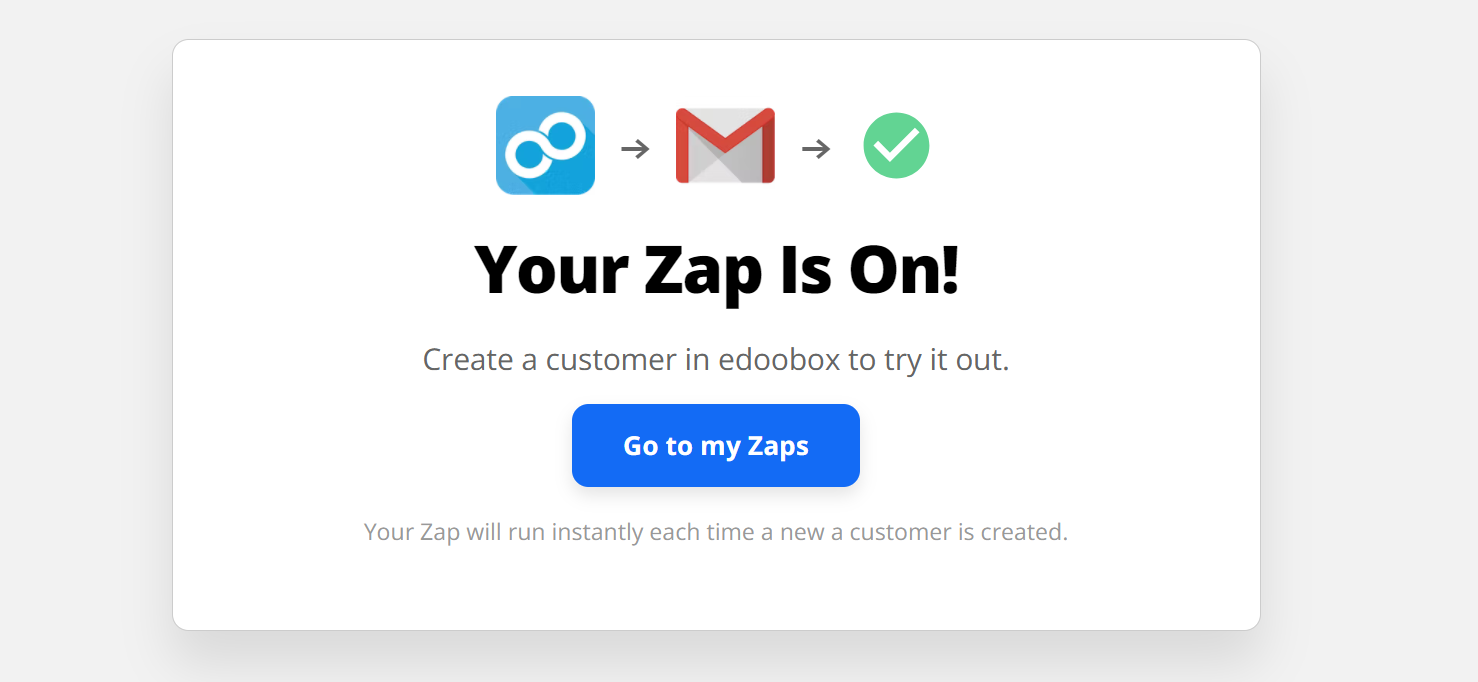
Finally, «Turn on Zap» and you're ready to go!
Note: Not all Zaps are possible on V1
Some Zaps are only available in V2. Here is a brief overview:
V1: New Booking | New Invoice | New User
V2: New Booking | New Invoice | New User | New Date | New Offer
Tip: Use Templates
Save time and use our templates to create a new Zap. Click here to view the edoobox app templates.
or
Check out a small selection of apps and ideas that can be used with edoobox.
Issue: Errors with a Zapier Zap
To diagnose the error within the Zap, edoobox Support requires the following information:
-
Which edoobox Zapier version is being used?
-
Error message from Zapier's history. Please send us the Zap history for a specific task so we can diagnose the error. A detailed guide is available in the video (starting at 50 seconds). https://help.zapier.com/hc/en-us/articles/8496291148685-View-and-manage-your-Zap-history
-
Share the Zap you are using with us: https://help.zapier.com/hc/en-us/articles/8496292155405-Share-a-copy-of-your-Zap#get-your-sharing-link-0-0
Related Guides
Keywords for this guide
Zapier ¦ Zap ¦ Trigger ¦ Action ¦ Gmail ¦ Google Contacts ¦ Google Calendar