With edoobox, the online booking system, on-site access control can be performed using handheld scanners or turnstiles. This enables efficient and straightforward entry scanning at medium and large-scale events.
Info: Ordering Handheld Scanners or Turnstiles
Handheld scanners or turnstiles can be rented from Dinaco for your events, conferences, or seminars. Dinaco will gladly provide you with a suitable access solution for your event. https://www.dinaco.io
1. Establishing the Connection between Dinaco and edoobox
After you have previously created the offers in your edoobox account, the next step is to link the edoobox account with Dinaco.
-
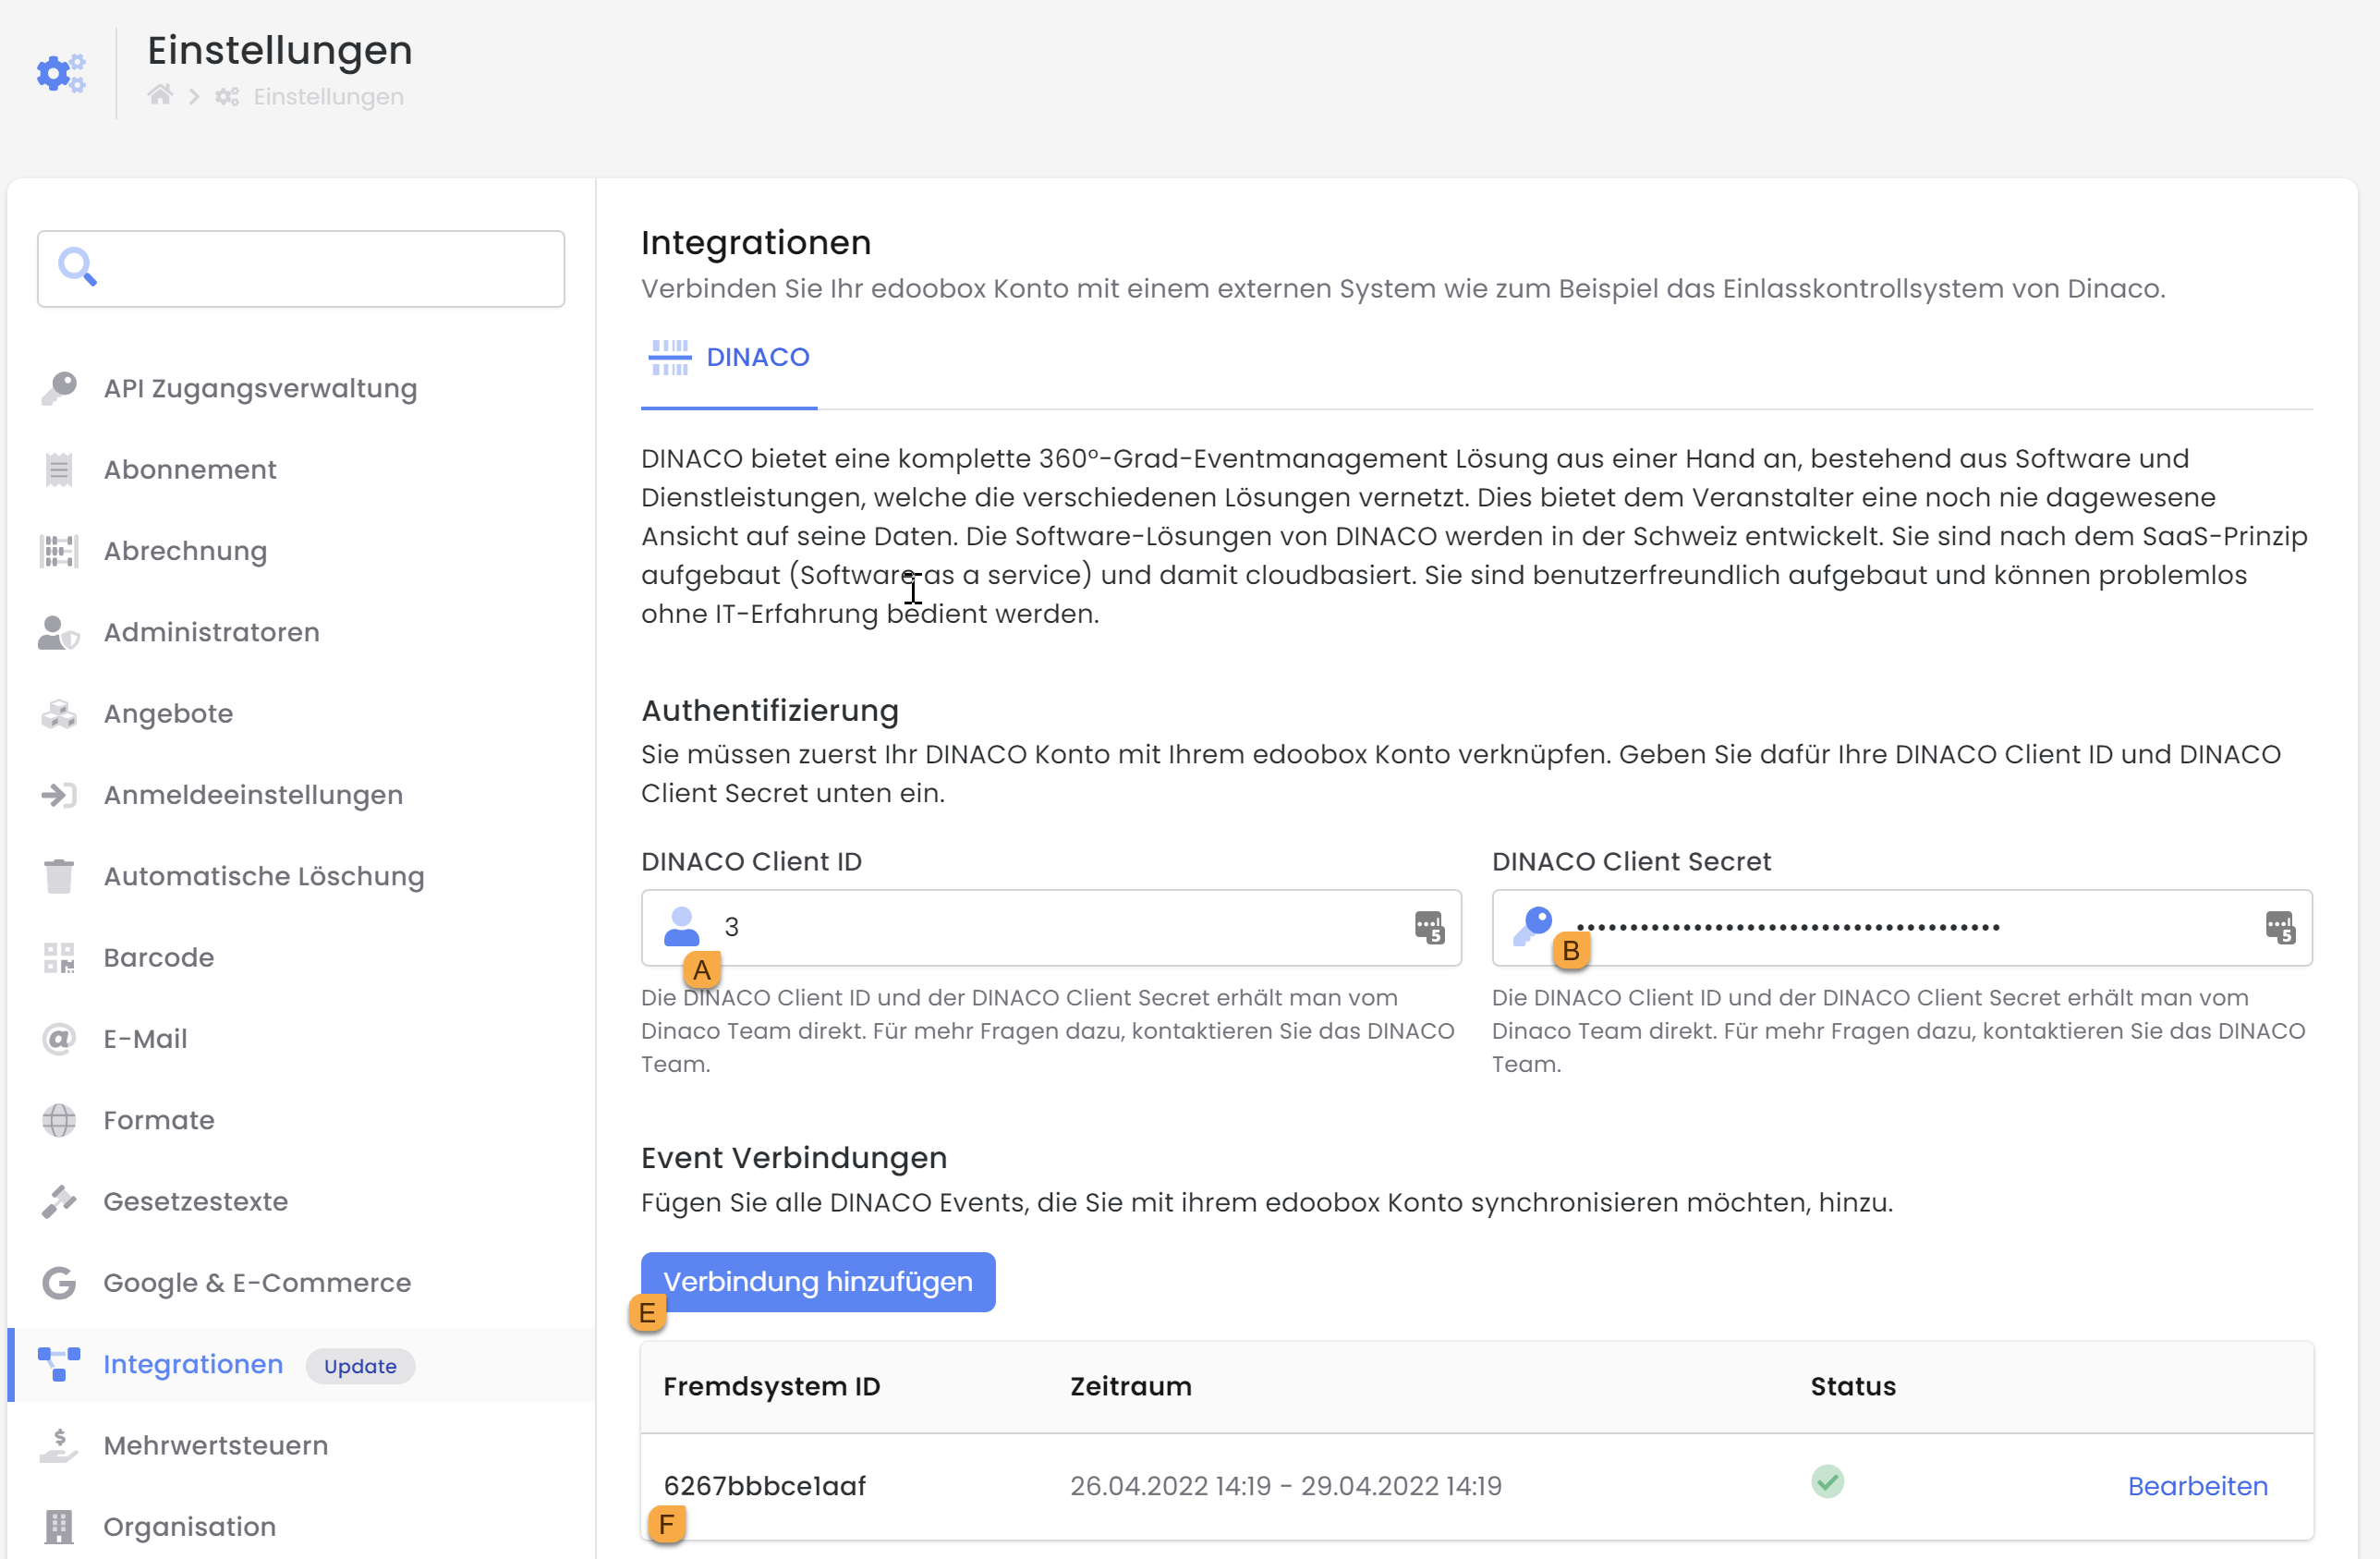
In edoobox, navigate to Global Settings and select 'Integrations'.
-
Authentication: Enter the DINACO Client ID A and DINACO Client Secret B to establish a connection to Dinaco. These credentials are provided by edoobox Support.
-
Event Connections: Not all edoobox offers are synchronized with Dinaco. The start and end dates must be defined here.
-
In the Dinaco backend, create a new Event C with a time limit and set its status to "Active."
-
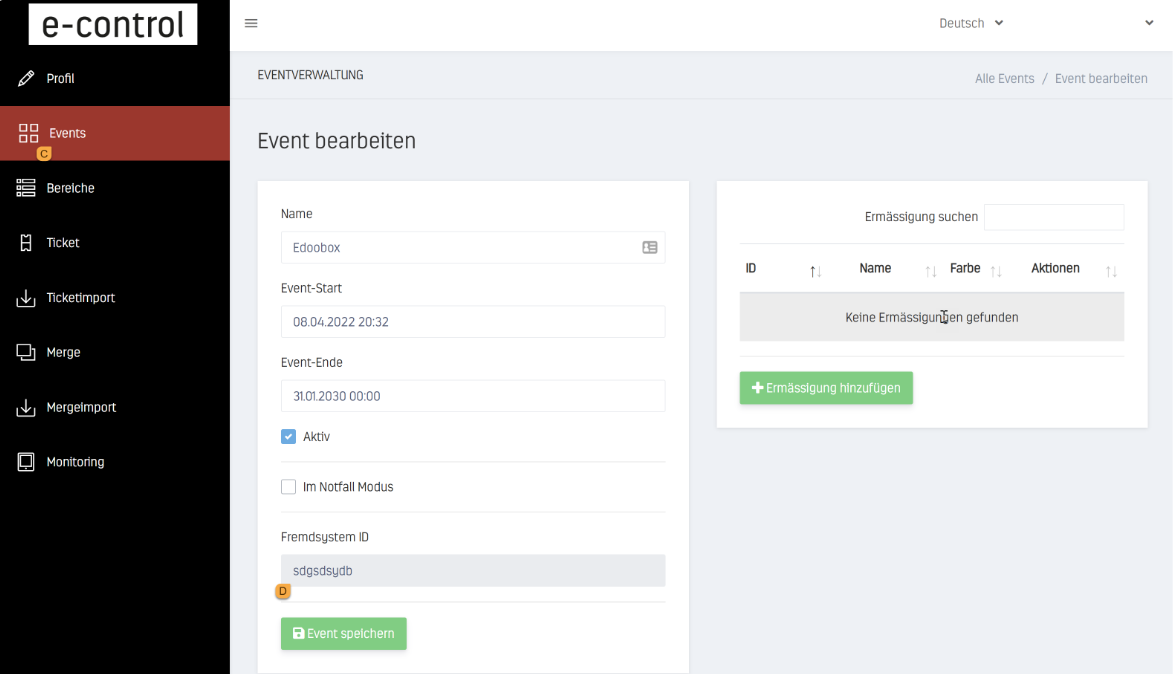
Copy the generated external system ID D
-
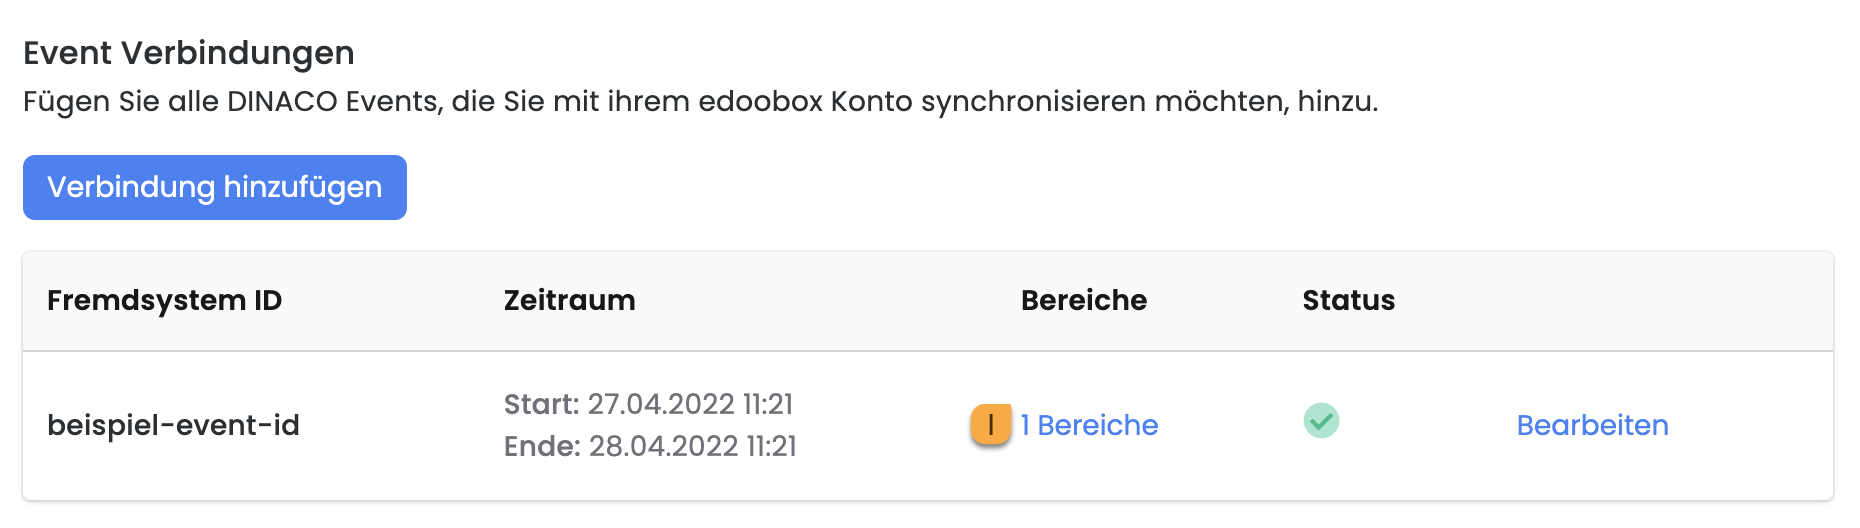
In your edoobox account, go to Settings > Integrations > DINACO and create a new event connection E (Figure 1). The external system ID F (Figure 1) must match exactly the external system ID that you copied from Dinaco's "Events" section!
-
2. Defining Entrances / Control Points
In the next step, define the entrances / control points. You can assign multiple offers to a single control point.
Example: Multiple Offers at One Control Point
At a conference, there is a checkpoint at the main entrance where all tickets are scanned and checked, including those for the sub-events. Admission checks for each individual event are then conducted again at the entrance to each sub-event.
Therefore, all events must be assigned to the main entrance. A separate entrance is created for each sub-event.
-
By clicking on 'Areas' I, various offers can be linked per event (defining areas/control points).
-
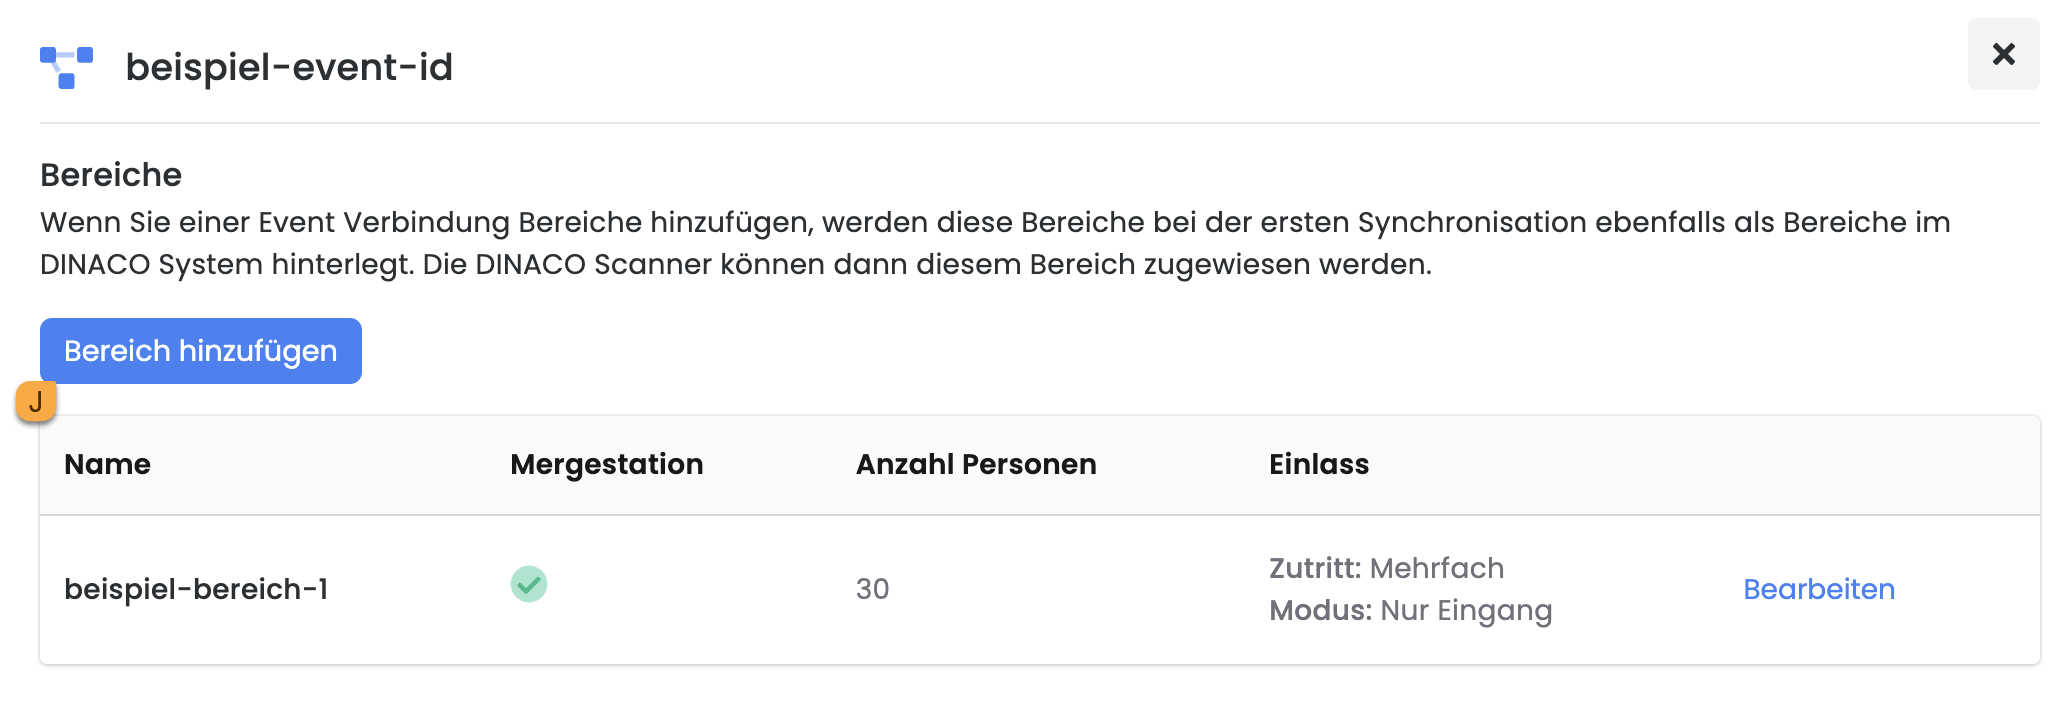
Add a new checkpoint/zone. J One zone must be added for each entrance.
-
Assign all edoobox offers to the area that should be granted access at this checkpoint.
In addition, various settings—such as entry and exit times or the maximum number of people allowed—can be defined for the area.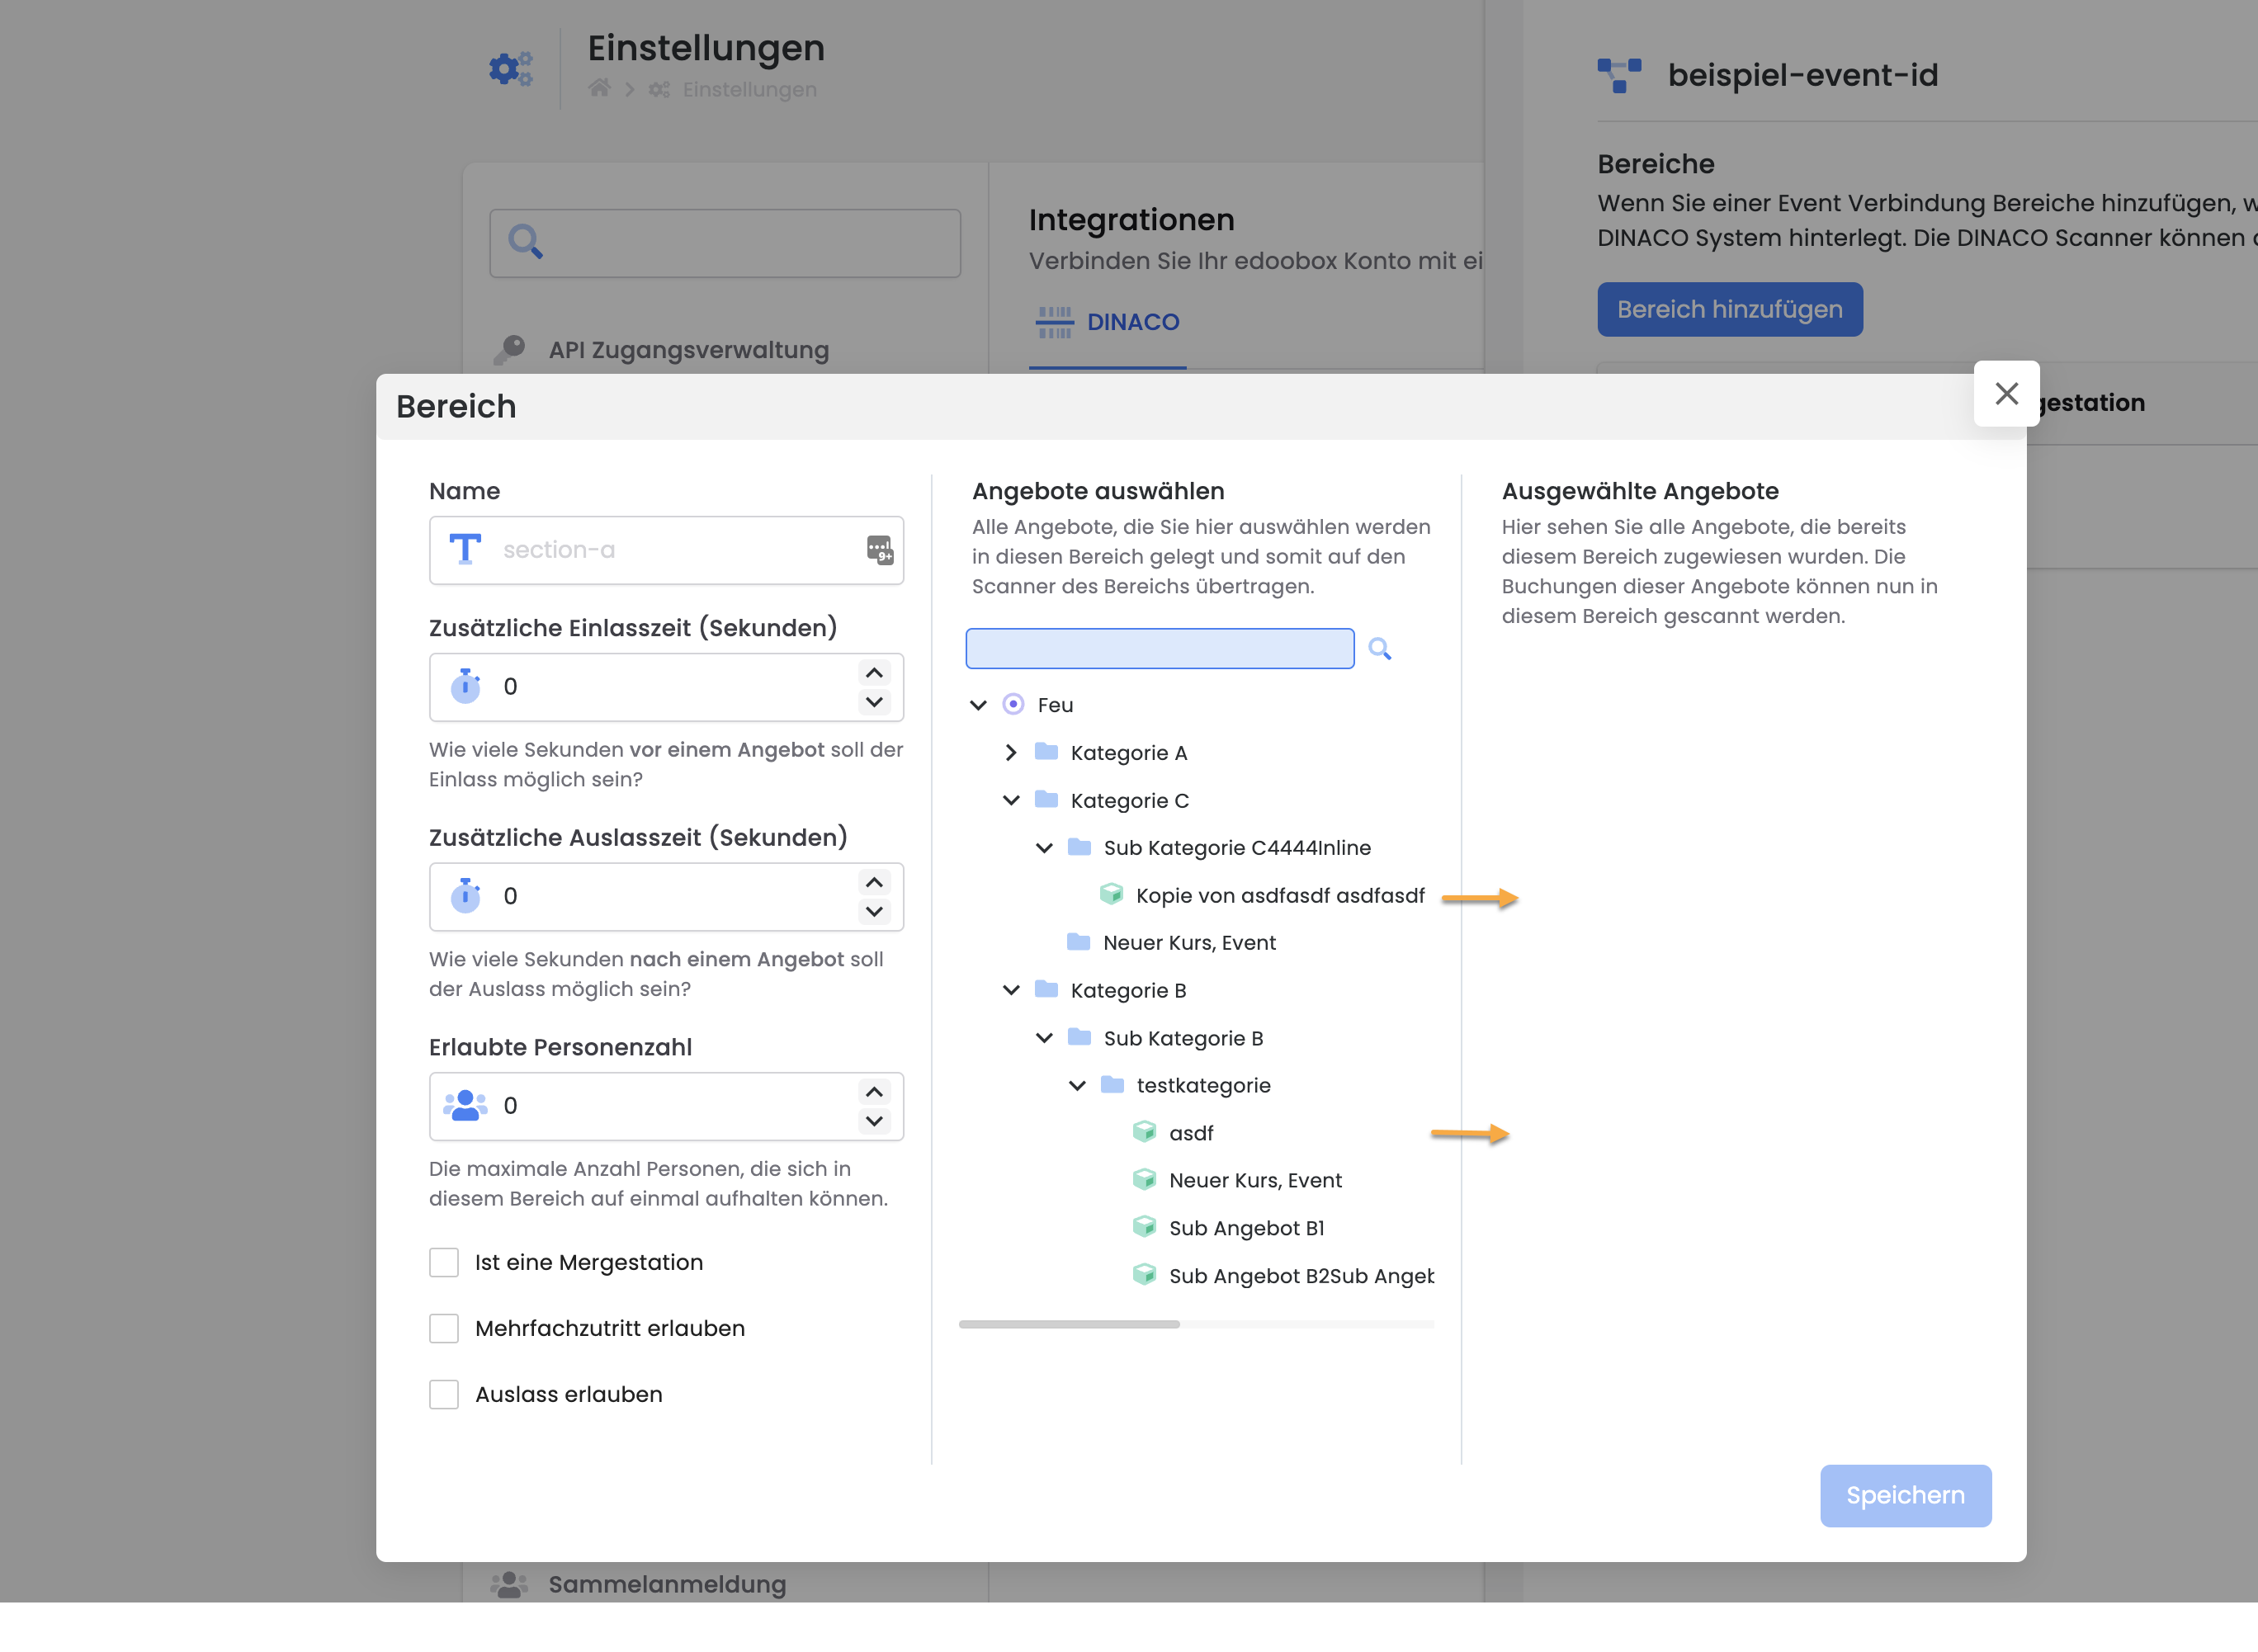
-
Repeat steps 2 and 3 for all control points/areas.
-
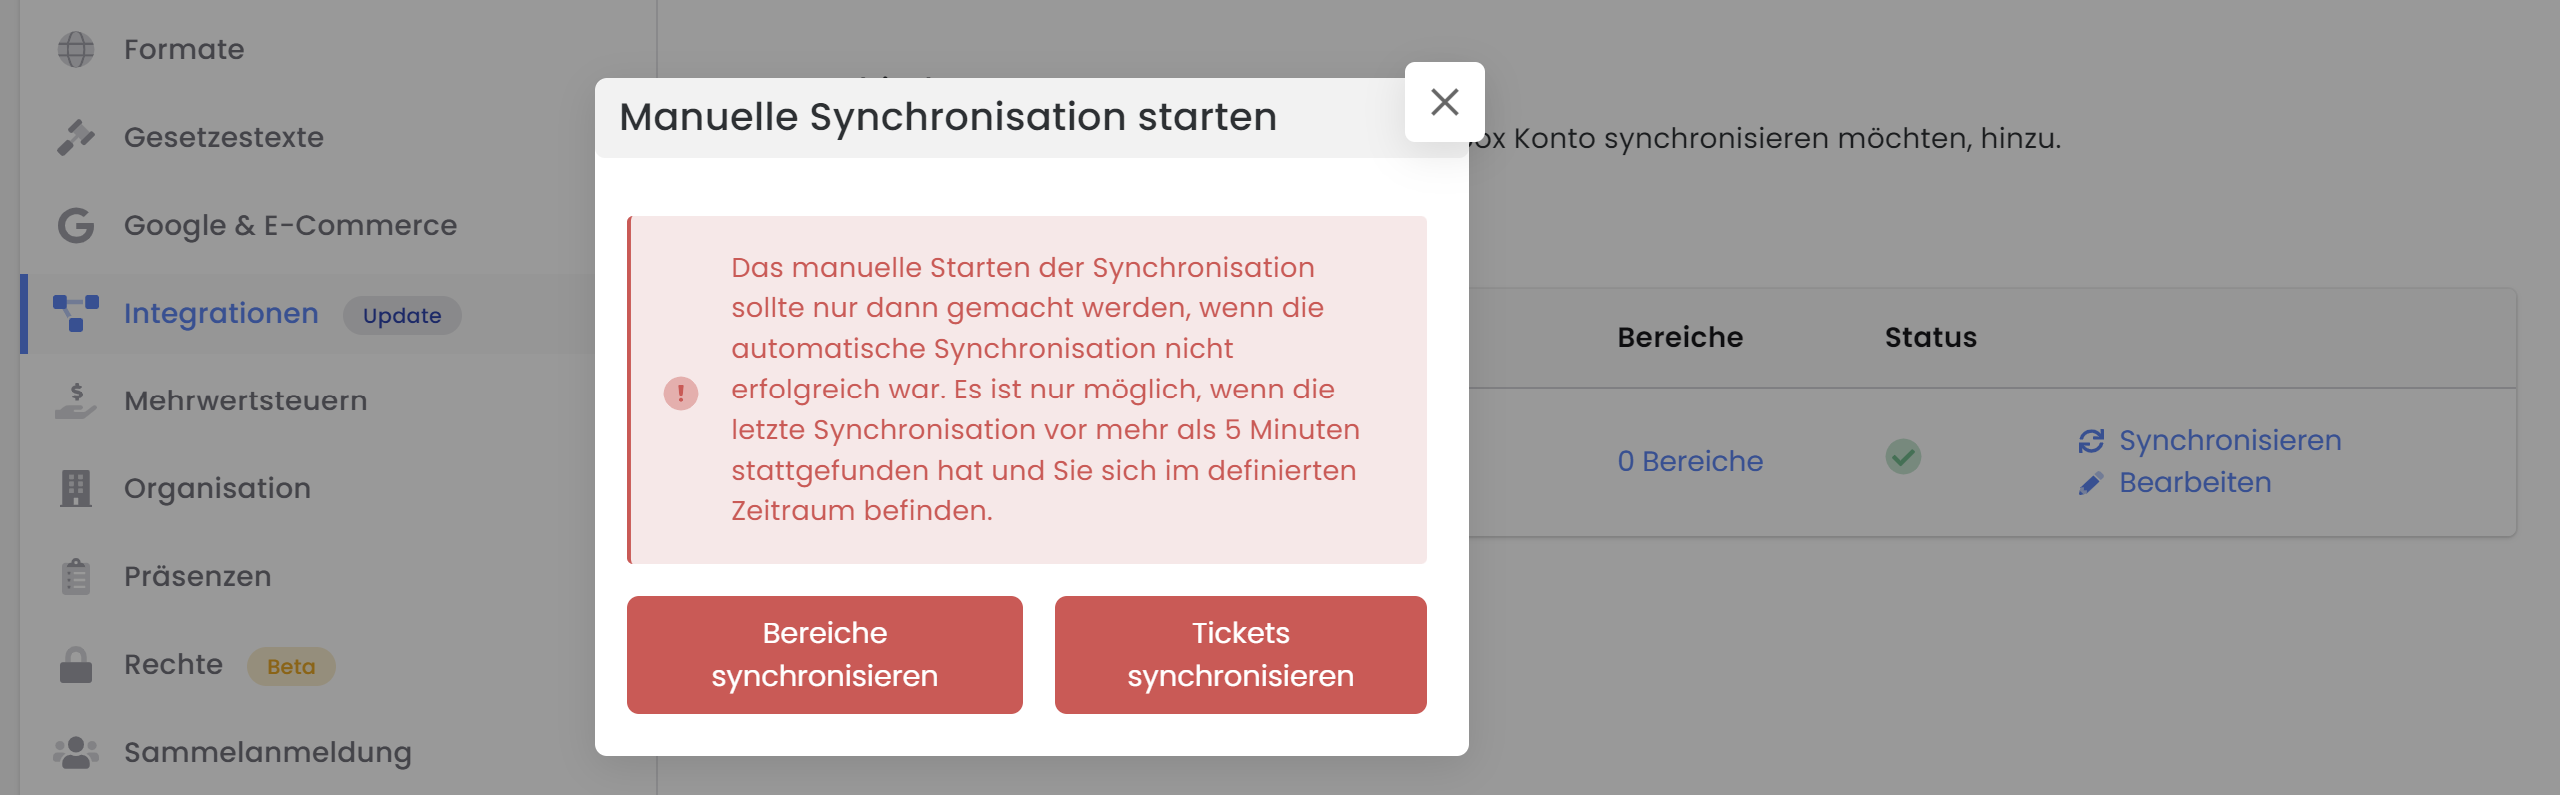
Once all offers have been added, exit the area assignment and click 'Synchronize' to synchronize all offers with the Dinaco system.
-
Select whether you want to synchronize the areas (possible every 10 minutes).
Note: Area Updates
Once offers are saved to an area, updates can only be modified within the Dinaco backend.
Offers are only synchronized when the 'Synchronize' button is pressed. Tickets are synchronized continuously.
If an offer needs to be deleted from an area, it should be manually removed from both the Dinaco and edoobox systems.
Always configure an area with the following options:
-
Single/Multiple Entry = Multiple Entry (The ticket allows multiple entries into the area)
-
Entry/Exit Mode = Entry and Exit Mode (The ticket allows multiple entries into the area)
-
Do not activate Mergestation unless specified by Dinaco.
3. Pair Scanners
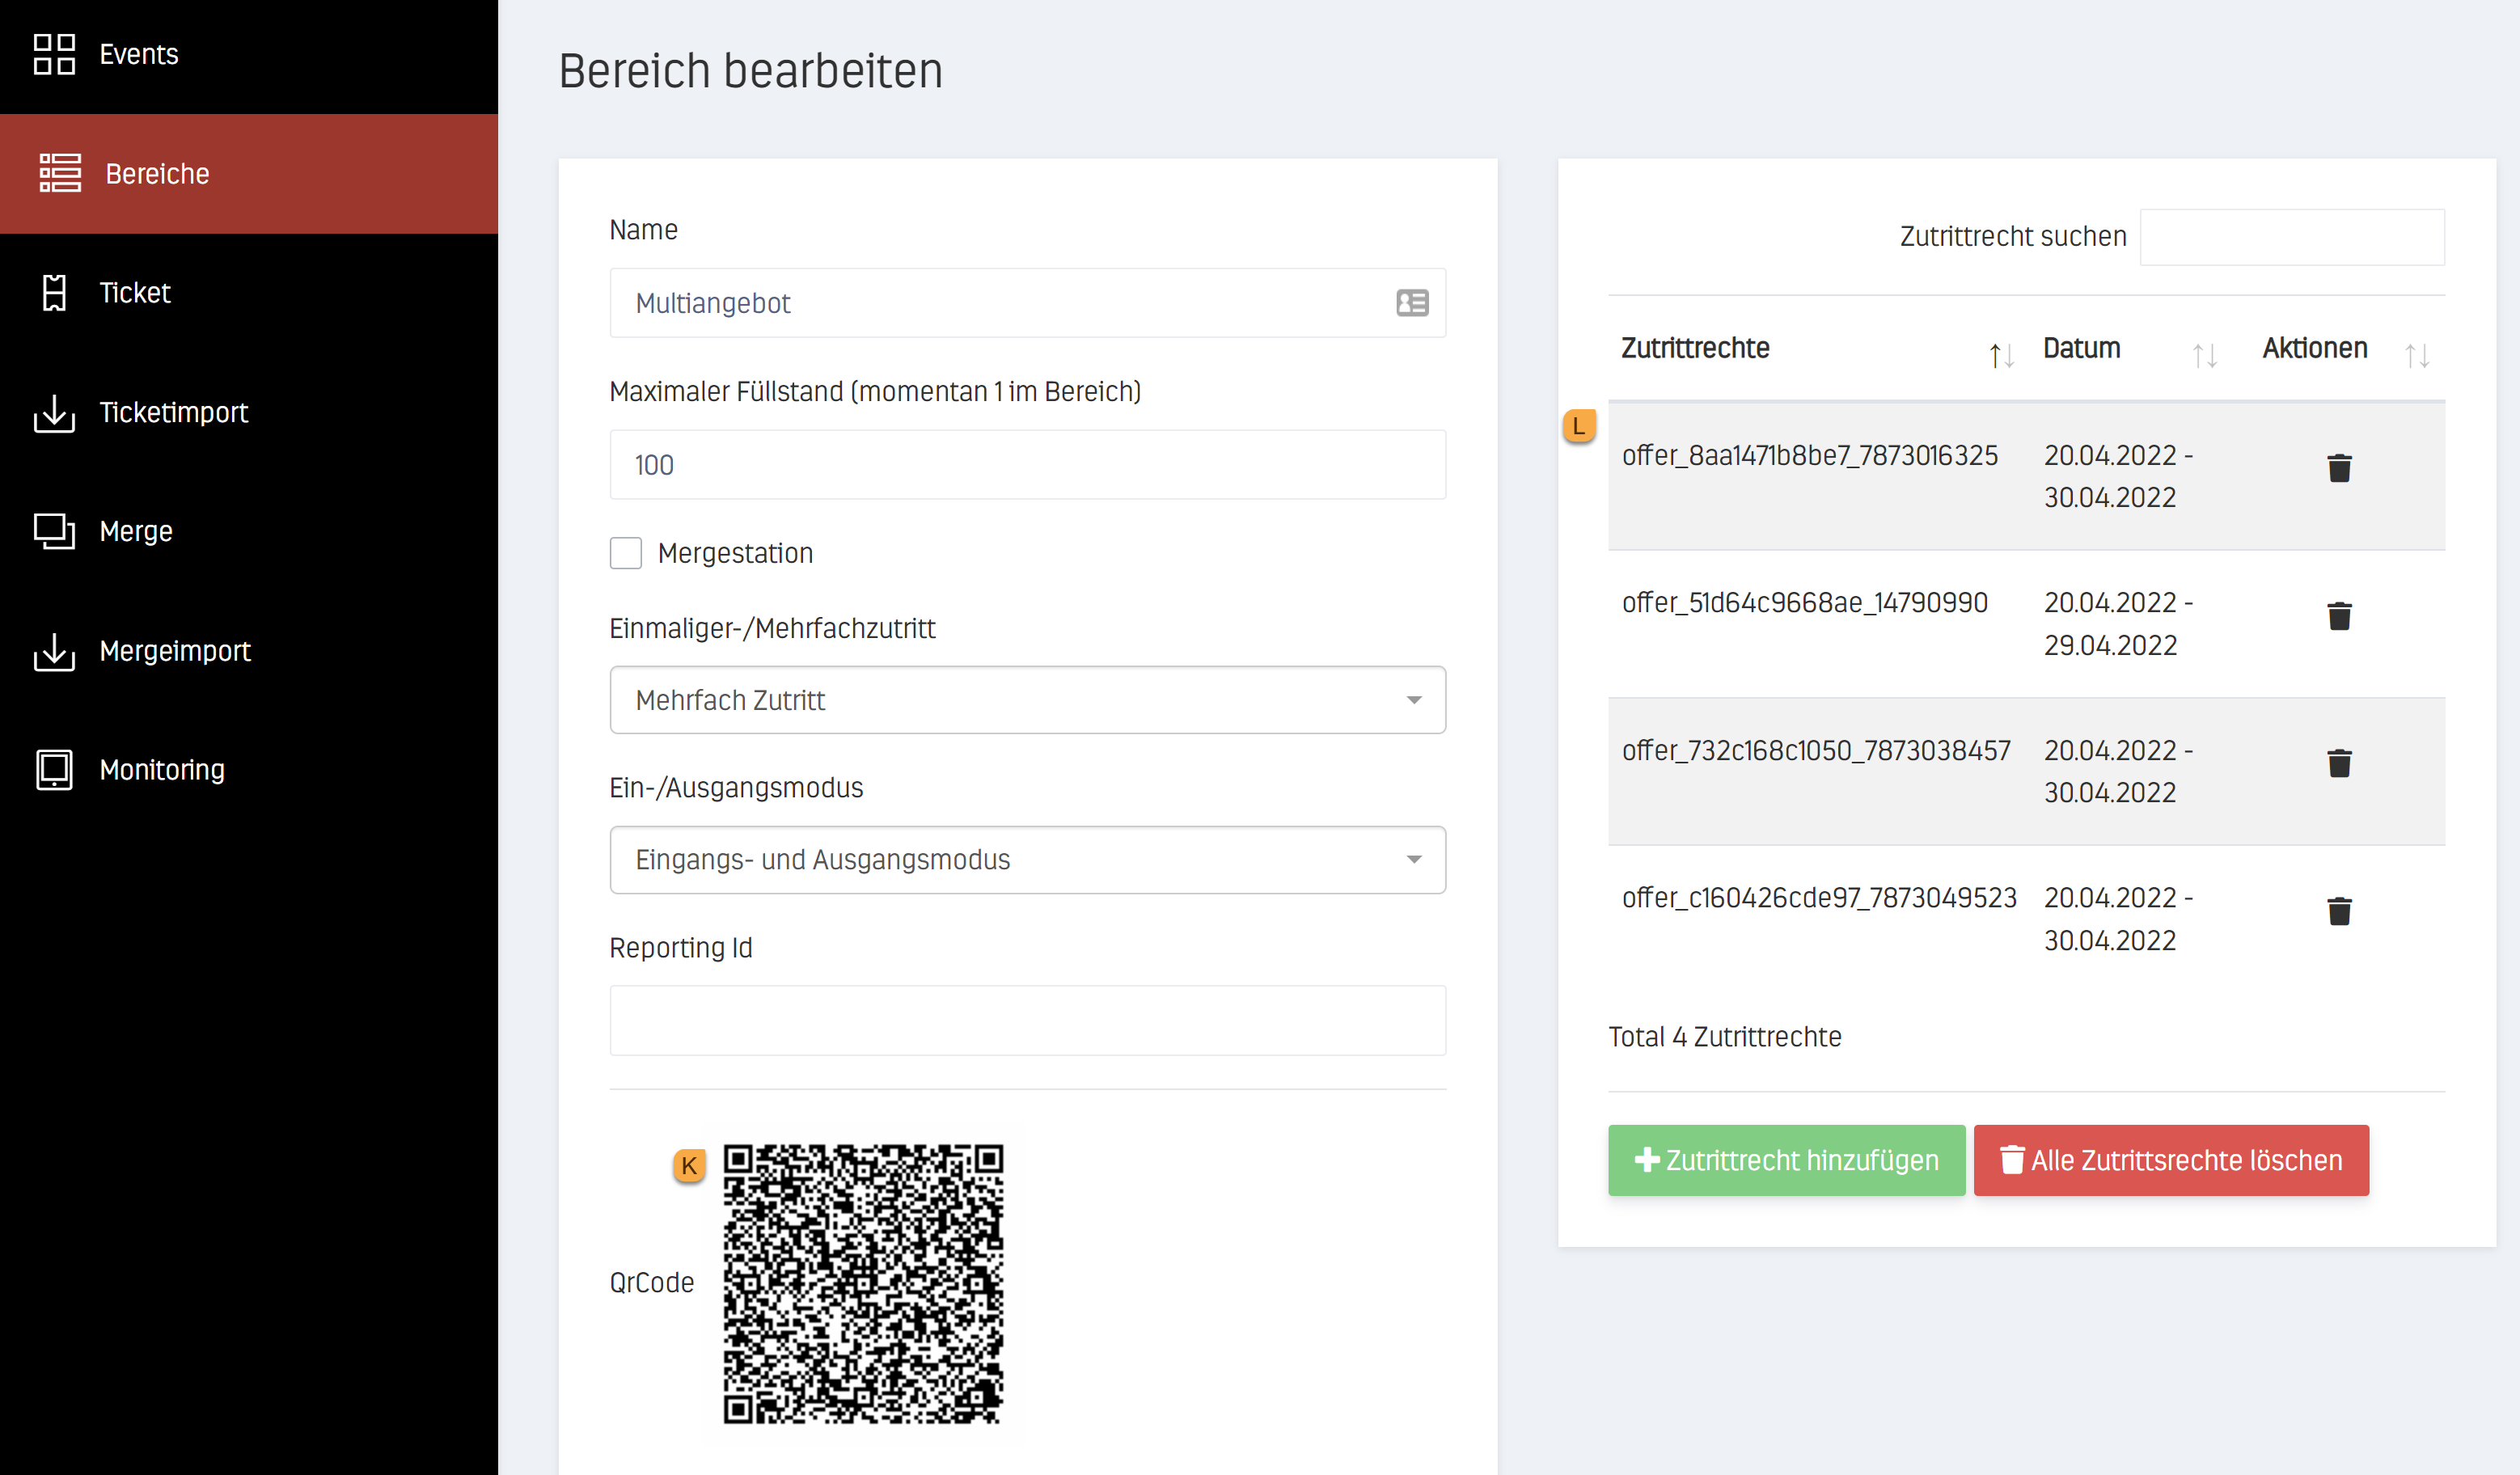
Each scanner must be connected to a control point/area.
-
Start the provided scanners.
-
Openthe Scanner app on the scanner and scan the QR code on the Dinaco website under "Areas" to connect the scanner to the area. K
If an area is already active on the scanner, you must first remove it by selecting "Disconnect Area" in the settings. -
You are now ready to scan tickets.
-
Under Access Rights L, you will also find all edoobox offers that have access to each respective area.
Scanner Status Feedback
After scanning a ticket, the feedback for the ticket is displayed on the scanner's screen:
|
Status |
Remark |
|---|---|
|
VALID |
The participant has a valid ticket for this area. |
|
NO VALID TICKET ON WRISTBAND |
The participant does not have a valid ticket for this area. |
|
ALREADY IN AREA (DD.MM.YYYY HH:MM) |
The participant is already in this area, or only an entry control was performed for this area, without an exit control. |
|
TOO LATE |
The participant holds a valid ticket for this area. The event has either started or already concluded. This can be adjusted within the Dinaco system via the admin interface for the respective area. |
Tips: Ticket Information
-
In edoobox, create tickets using the barcode type: QR code.
-
Should a ticket be canceled or rebooked, the barcode remains valid. Only the admission to the event is rebooked or canceled.
-
Price categories are displayed as information on the ticket during scanning.
-
For multiple bookings, the QR code remains the same. All booked events are stored within a single QR code.
-
To retrieve more information about a booking, click on Settings > Ticket Info on the scanner. Scanning the ticket again will provide an overview of all bookings.
Note: Flexible Date Selection
Flexible Date Selection cannot be used for entry control. In such cases, admission to the entire event is granted upon booking a single module.
Info: Activation
The Dinaco interface is not included in every edoobox subscription. Please contact edoobox Support so we can provide you with a quote.