When you create an edoobox account, you are automatically designated as a Superadmin, granting you the highest permission level. For each team member who works with edoobox, create a dedicated account access and assign the appropriate permission level required for their specific responsibilities. For instance, you might immediately create a second Superadmin account for your vacation coverage.
To ensure the highest level of data protection within edoobox, we also recommend enabling at least one two-factor authentication method for each administrator.
Overview of Existing Admins
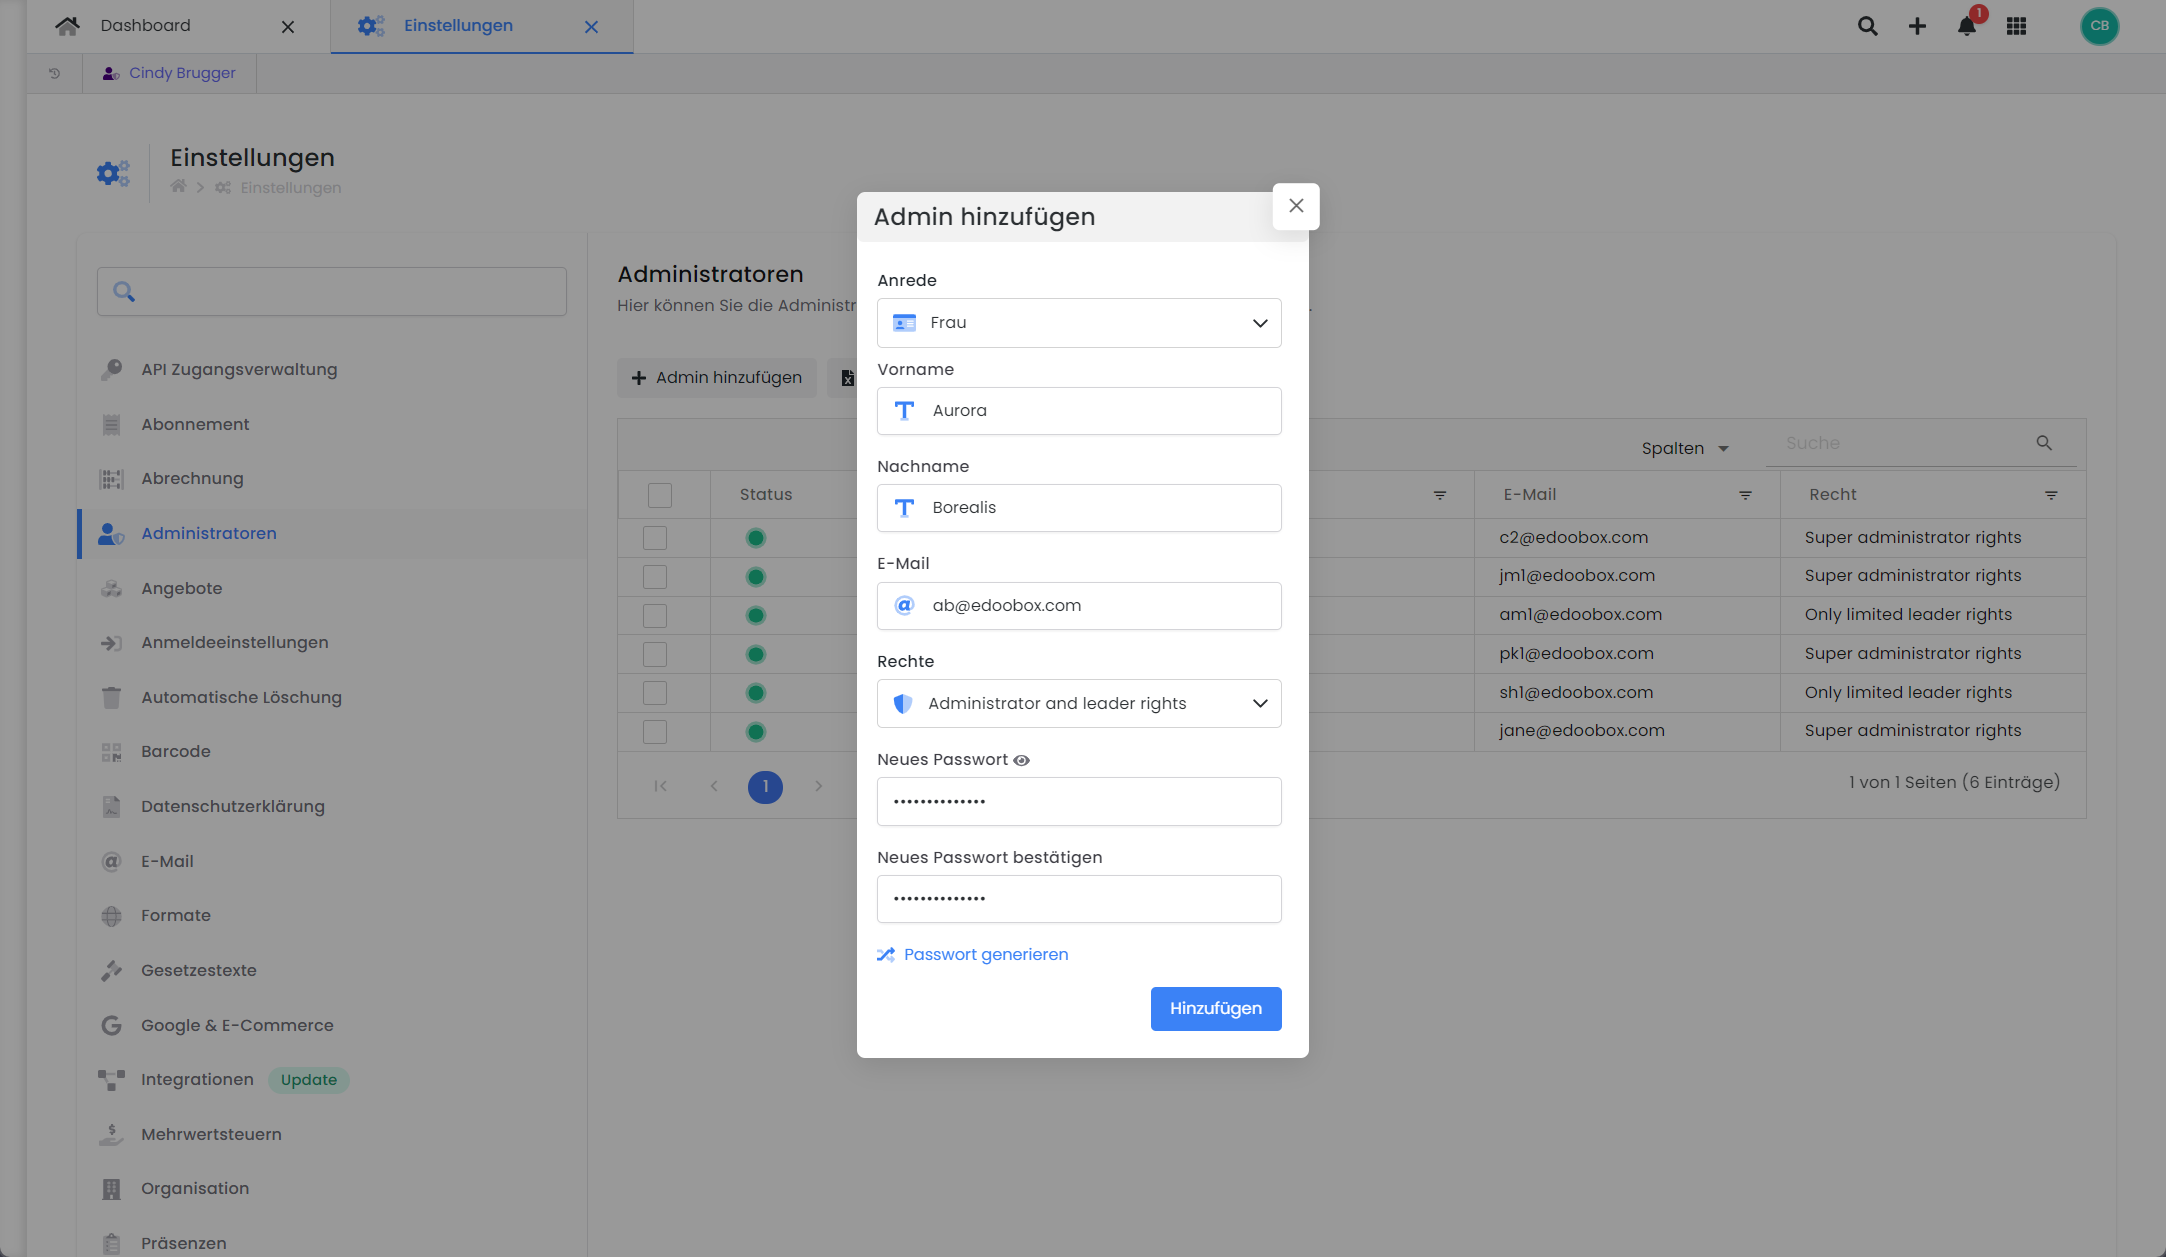
To view existing administrators, navigate to the «Administrators» section via the app menu. This section provides a tabular overview of administrators, which can be customized by column and exported in various formats. Under «Add Admin», you can register an unlimited number of administrators and/or lead instructors for offers. All administrators can be assigned to event dates within offers, allowing participants to view the lead instructors during the booking process.

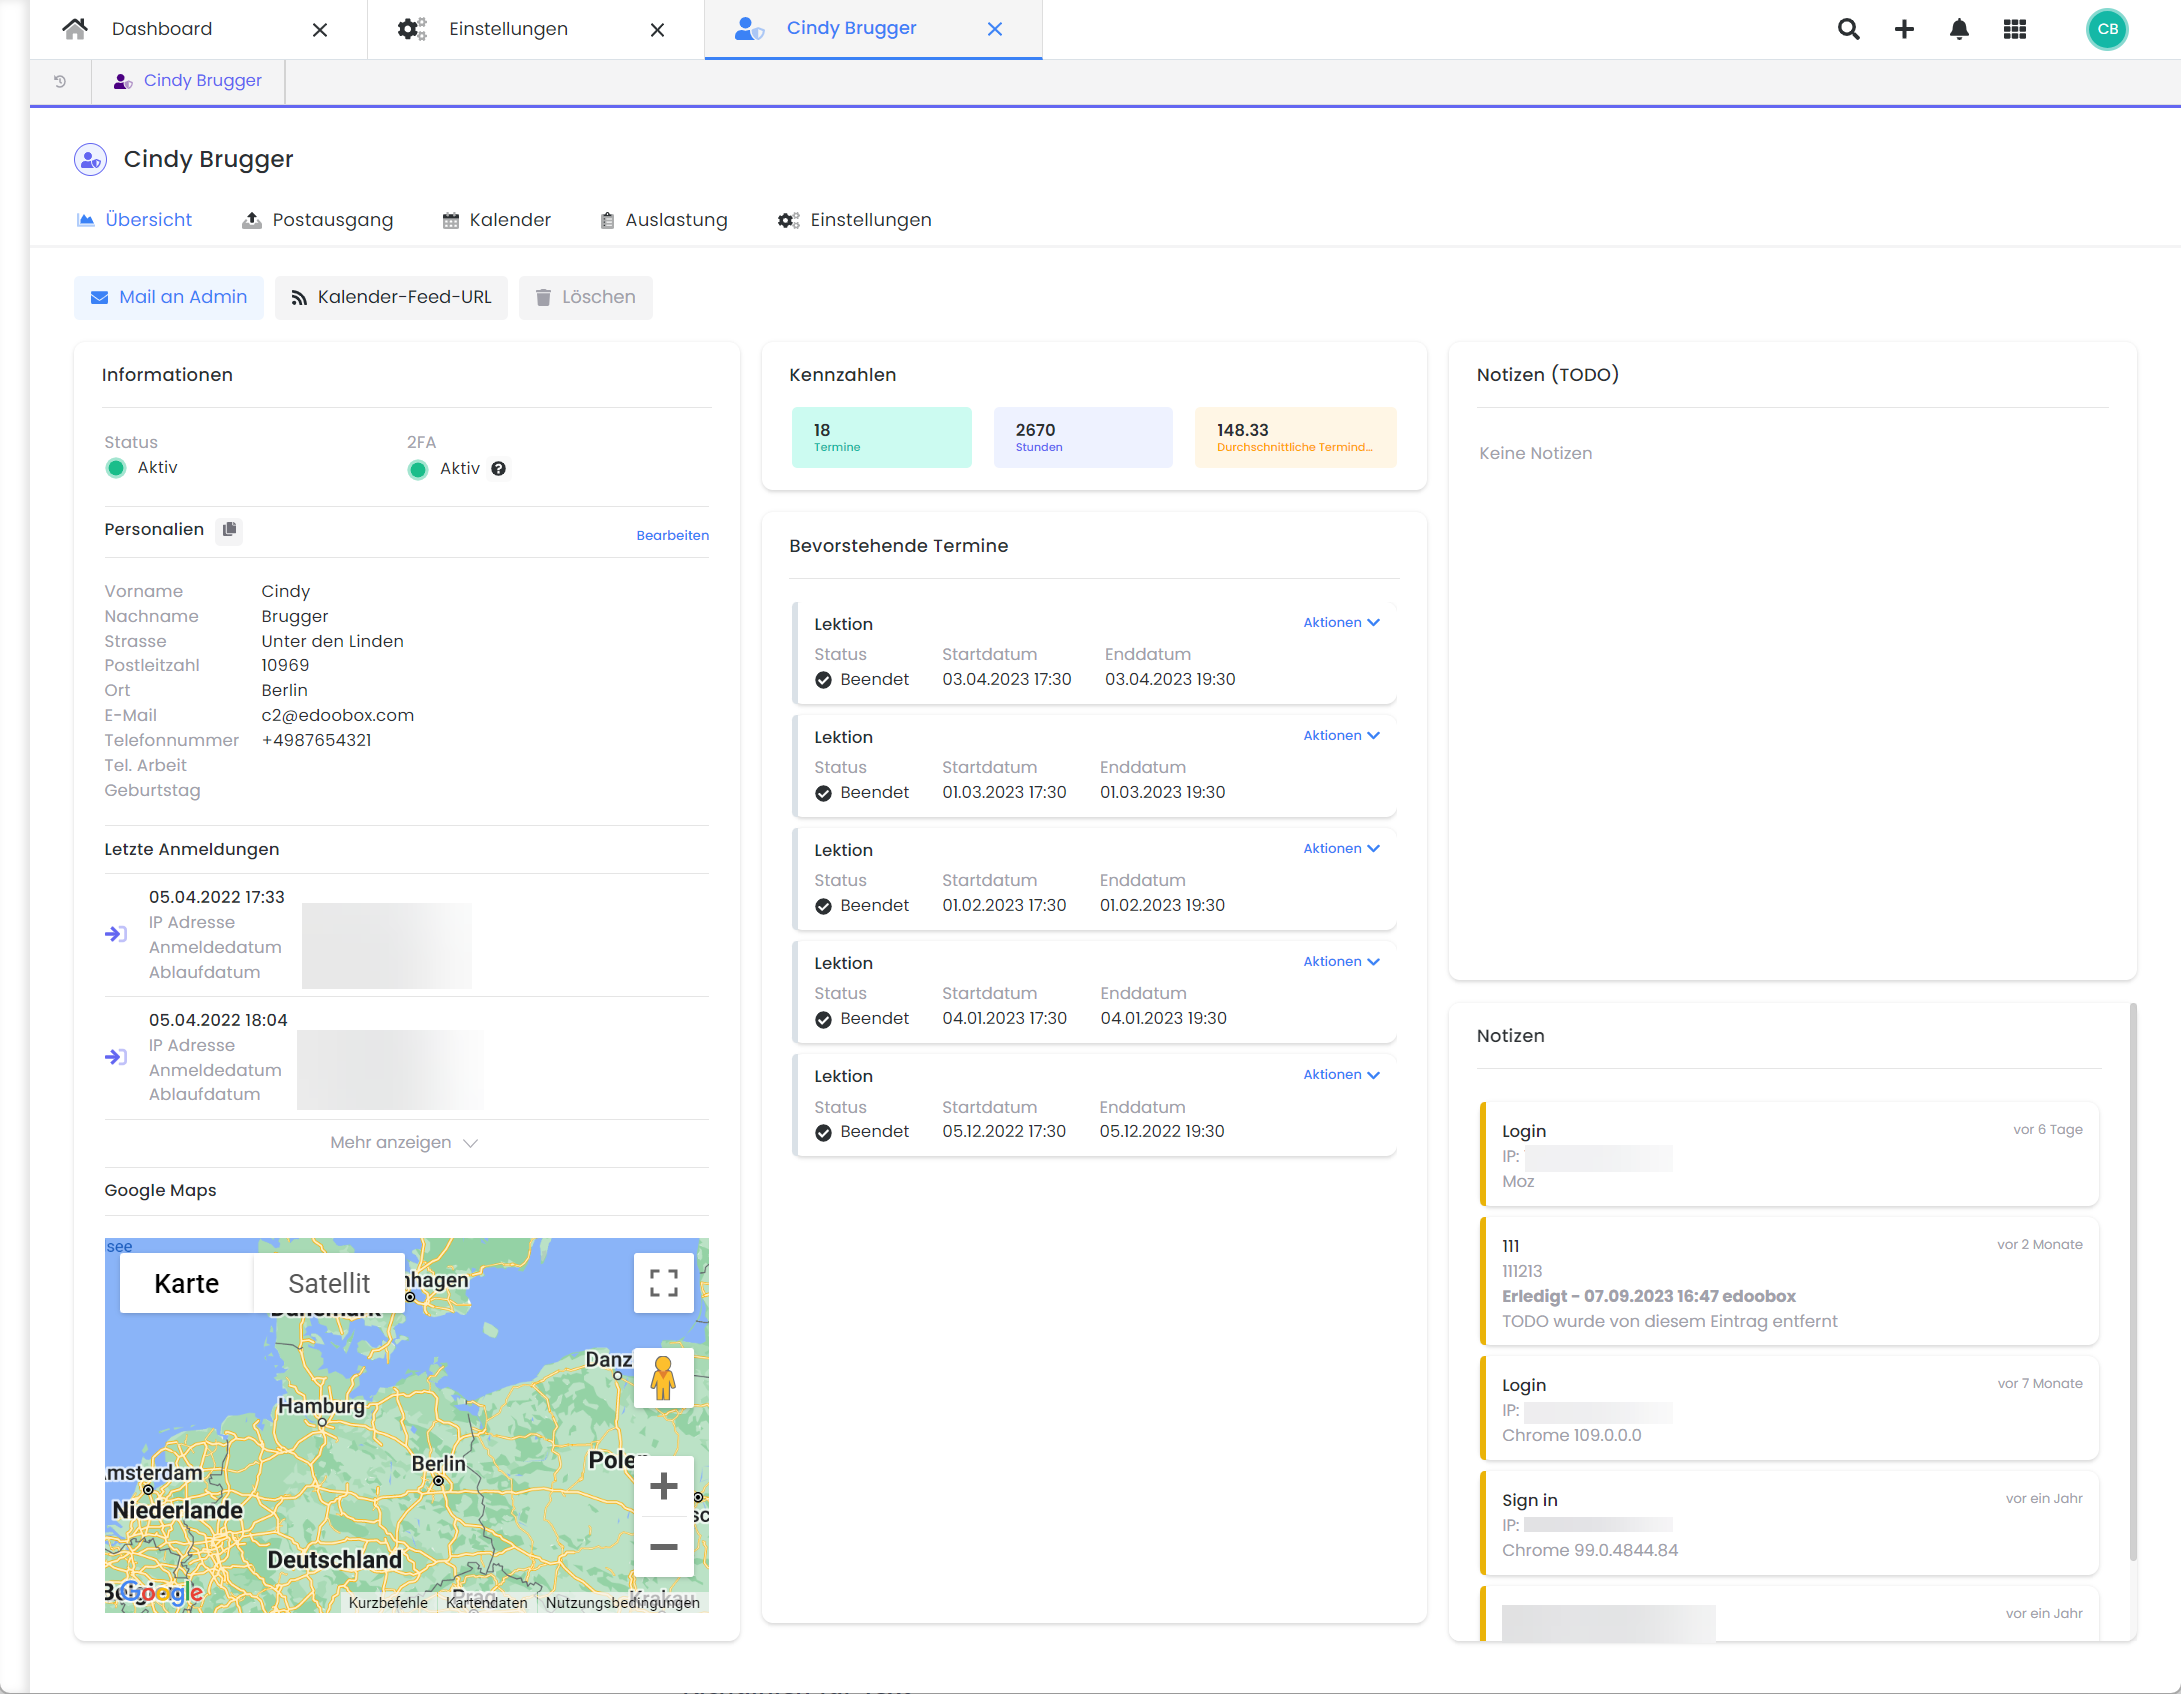
An individual Admin Dashboard can be accessed for each administrator. This dashboard provides various details about the administrator, including personal data, upcoming appointments, notes, outgoing communications, and workload (with export functionality). Furthermore, settings such as data modifications and two-factor authentication updates can be managed here.
Create New Admin
To create a new administrator, simply click «Add Admin» and complete the mandatory fields. We recommend using unique and accurate email addresses for administrators to ensure a seamless login and password recovery process. An unlimited number of new administrators can be created, and individual administrators can be deactivated or deleted.
Info: Secure Password
All passwords must meet the following conditions: at least 8 characters, one uppercase letter, one lowercase letter, one special character, and one number.
Additional information for administrators / managers
Additional profile information can be entered for administrators and managers. This allows instructors and other staff members to be presented clearly and professionally on the booking page.
In addition to contact information, the available profile data includes:
-
Title (e.g., M.D., Prof.)
-
Avatar (Profile Picture)
-
Description
-
Signature
You can add details such as academic titles, professional background, or a brief personal introduction to this information. The data can then be displayed on the front end of the booking page.
Title
In the Title field, you can select an appropriate title, such as Dr. med. or Prof. For this field to be available, the "Academic Title for Administrators" option must be enabled in the settings.

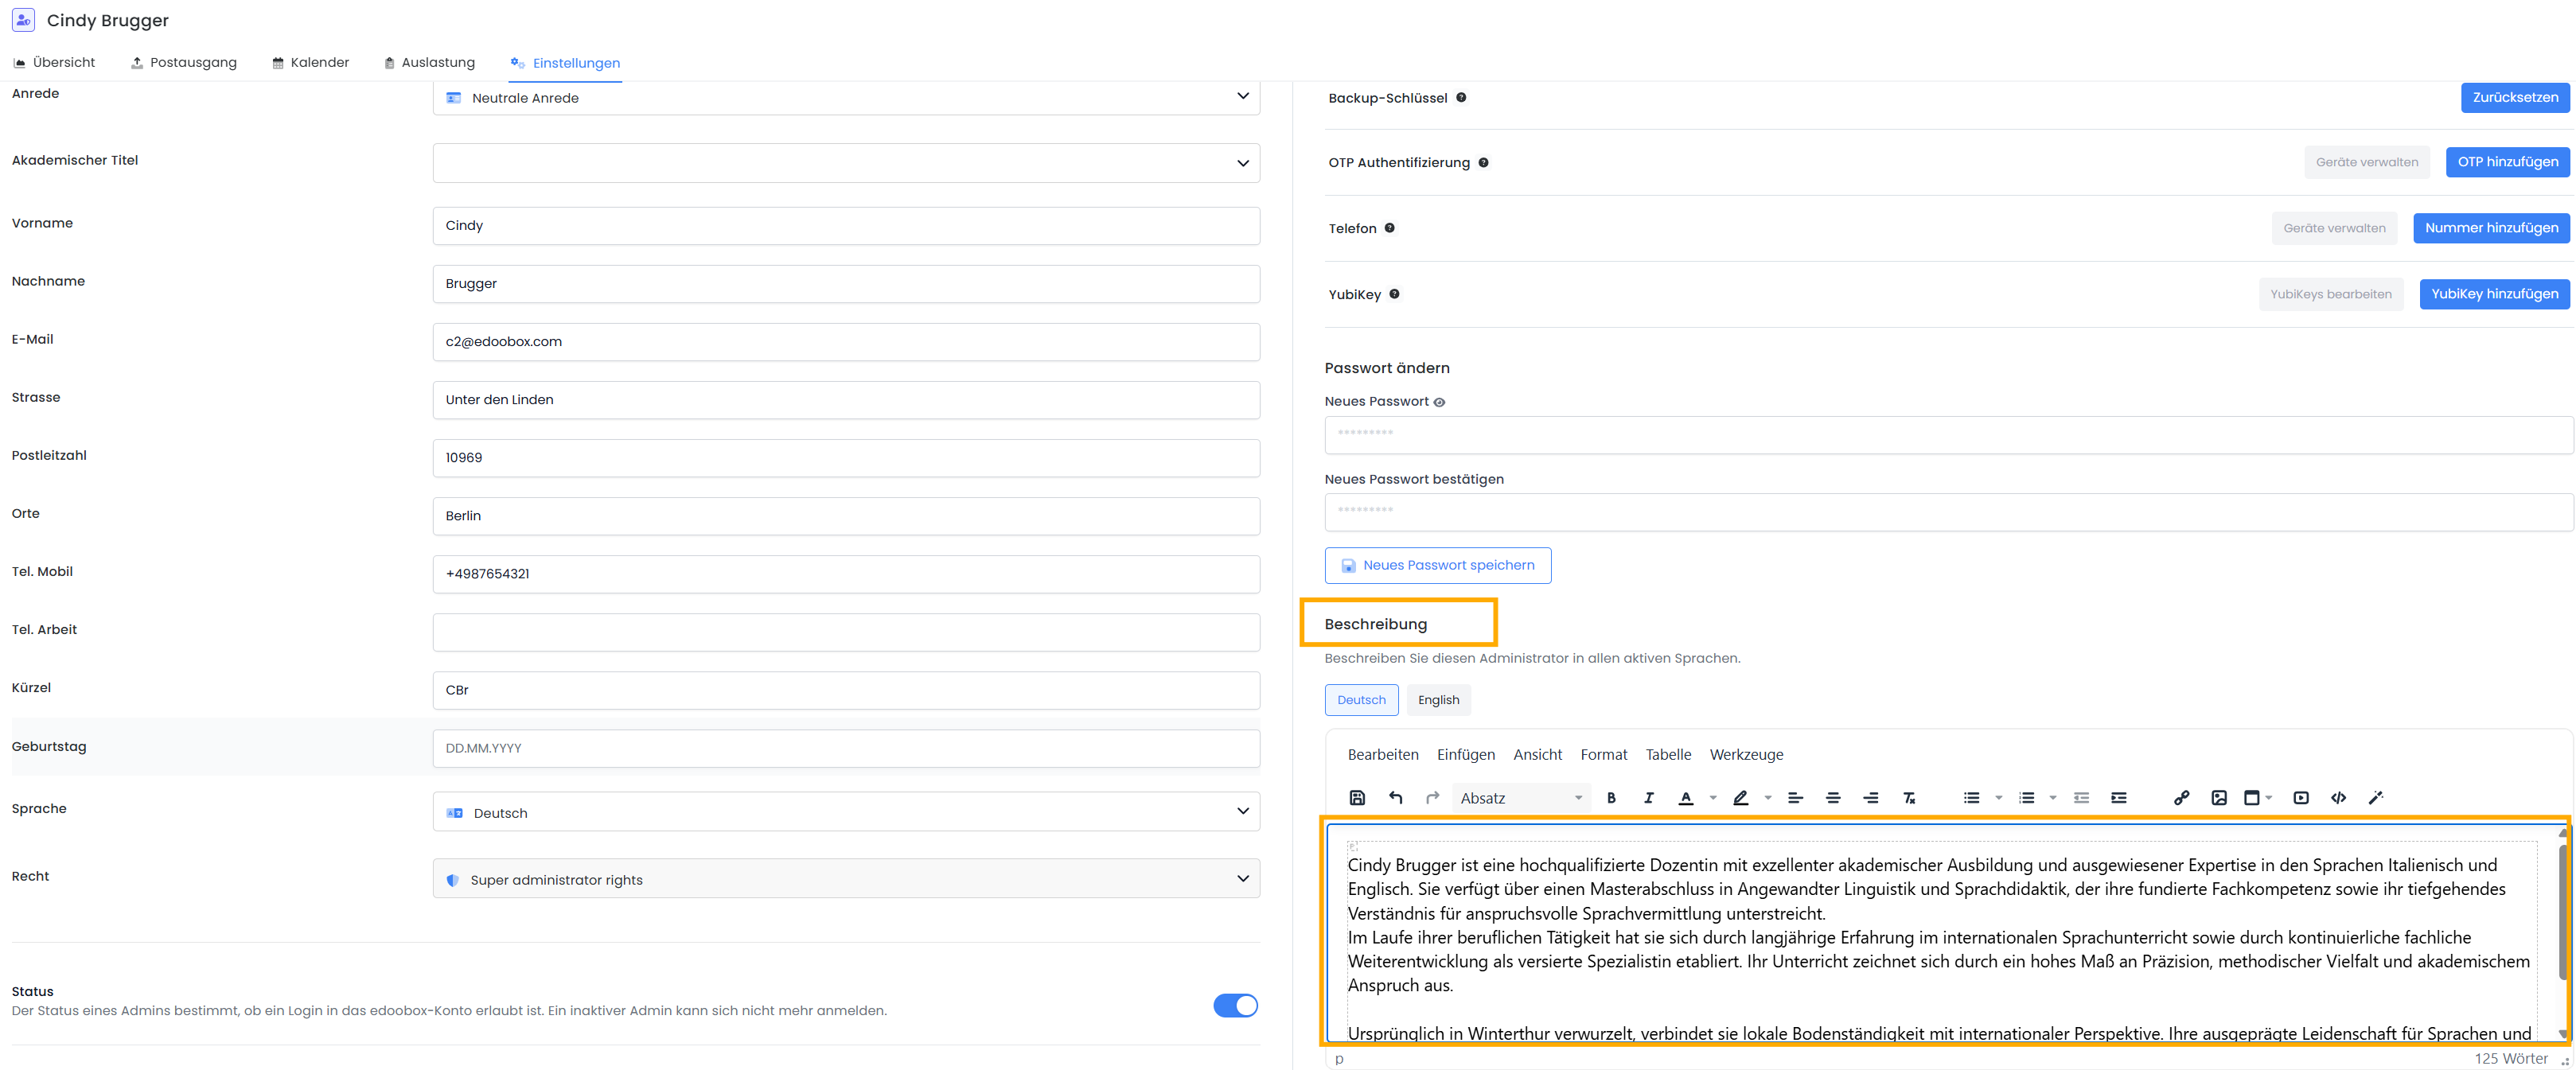
Description
In the "Description" field, you can enter a custom text for each person.
This is useful, for example, for:
-
professional qualifications
-
professional background
-
A brief introduction
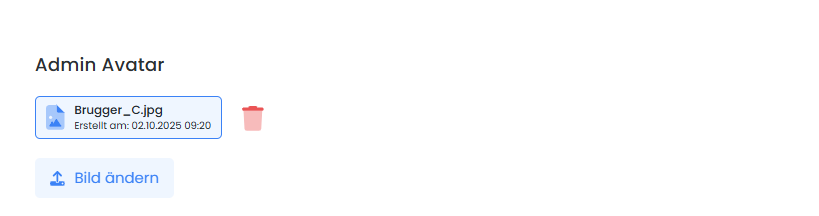
Admin Avatar
You can upload a profile picture in the "Admin Avatar" field. Use a photo in which the person is looking directly at the camera. Side-view or blurry photos are not suitable.
The system checks the image and automatically centers the head so that all displays appear consistent on the front end.
Message during the booking process
To ensure that the saved profile data is displayed on the booking page, the corresponding widget must be added in the Design Manager.
Procedure:
-
Open the Design Manager
-
Go to the " Offer Details" section
-
Insert the "Instructor Details" widget at the desired location
-
Save the design
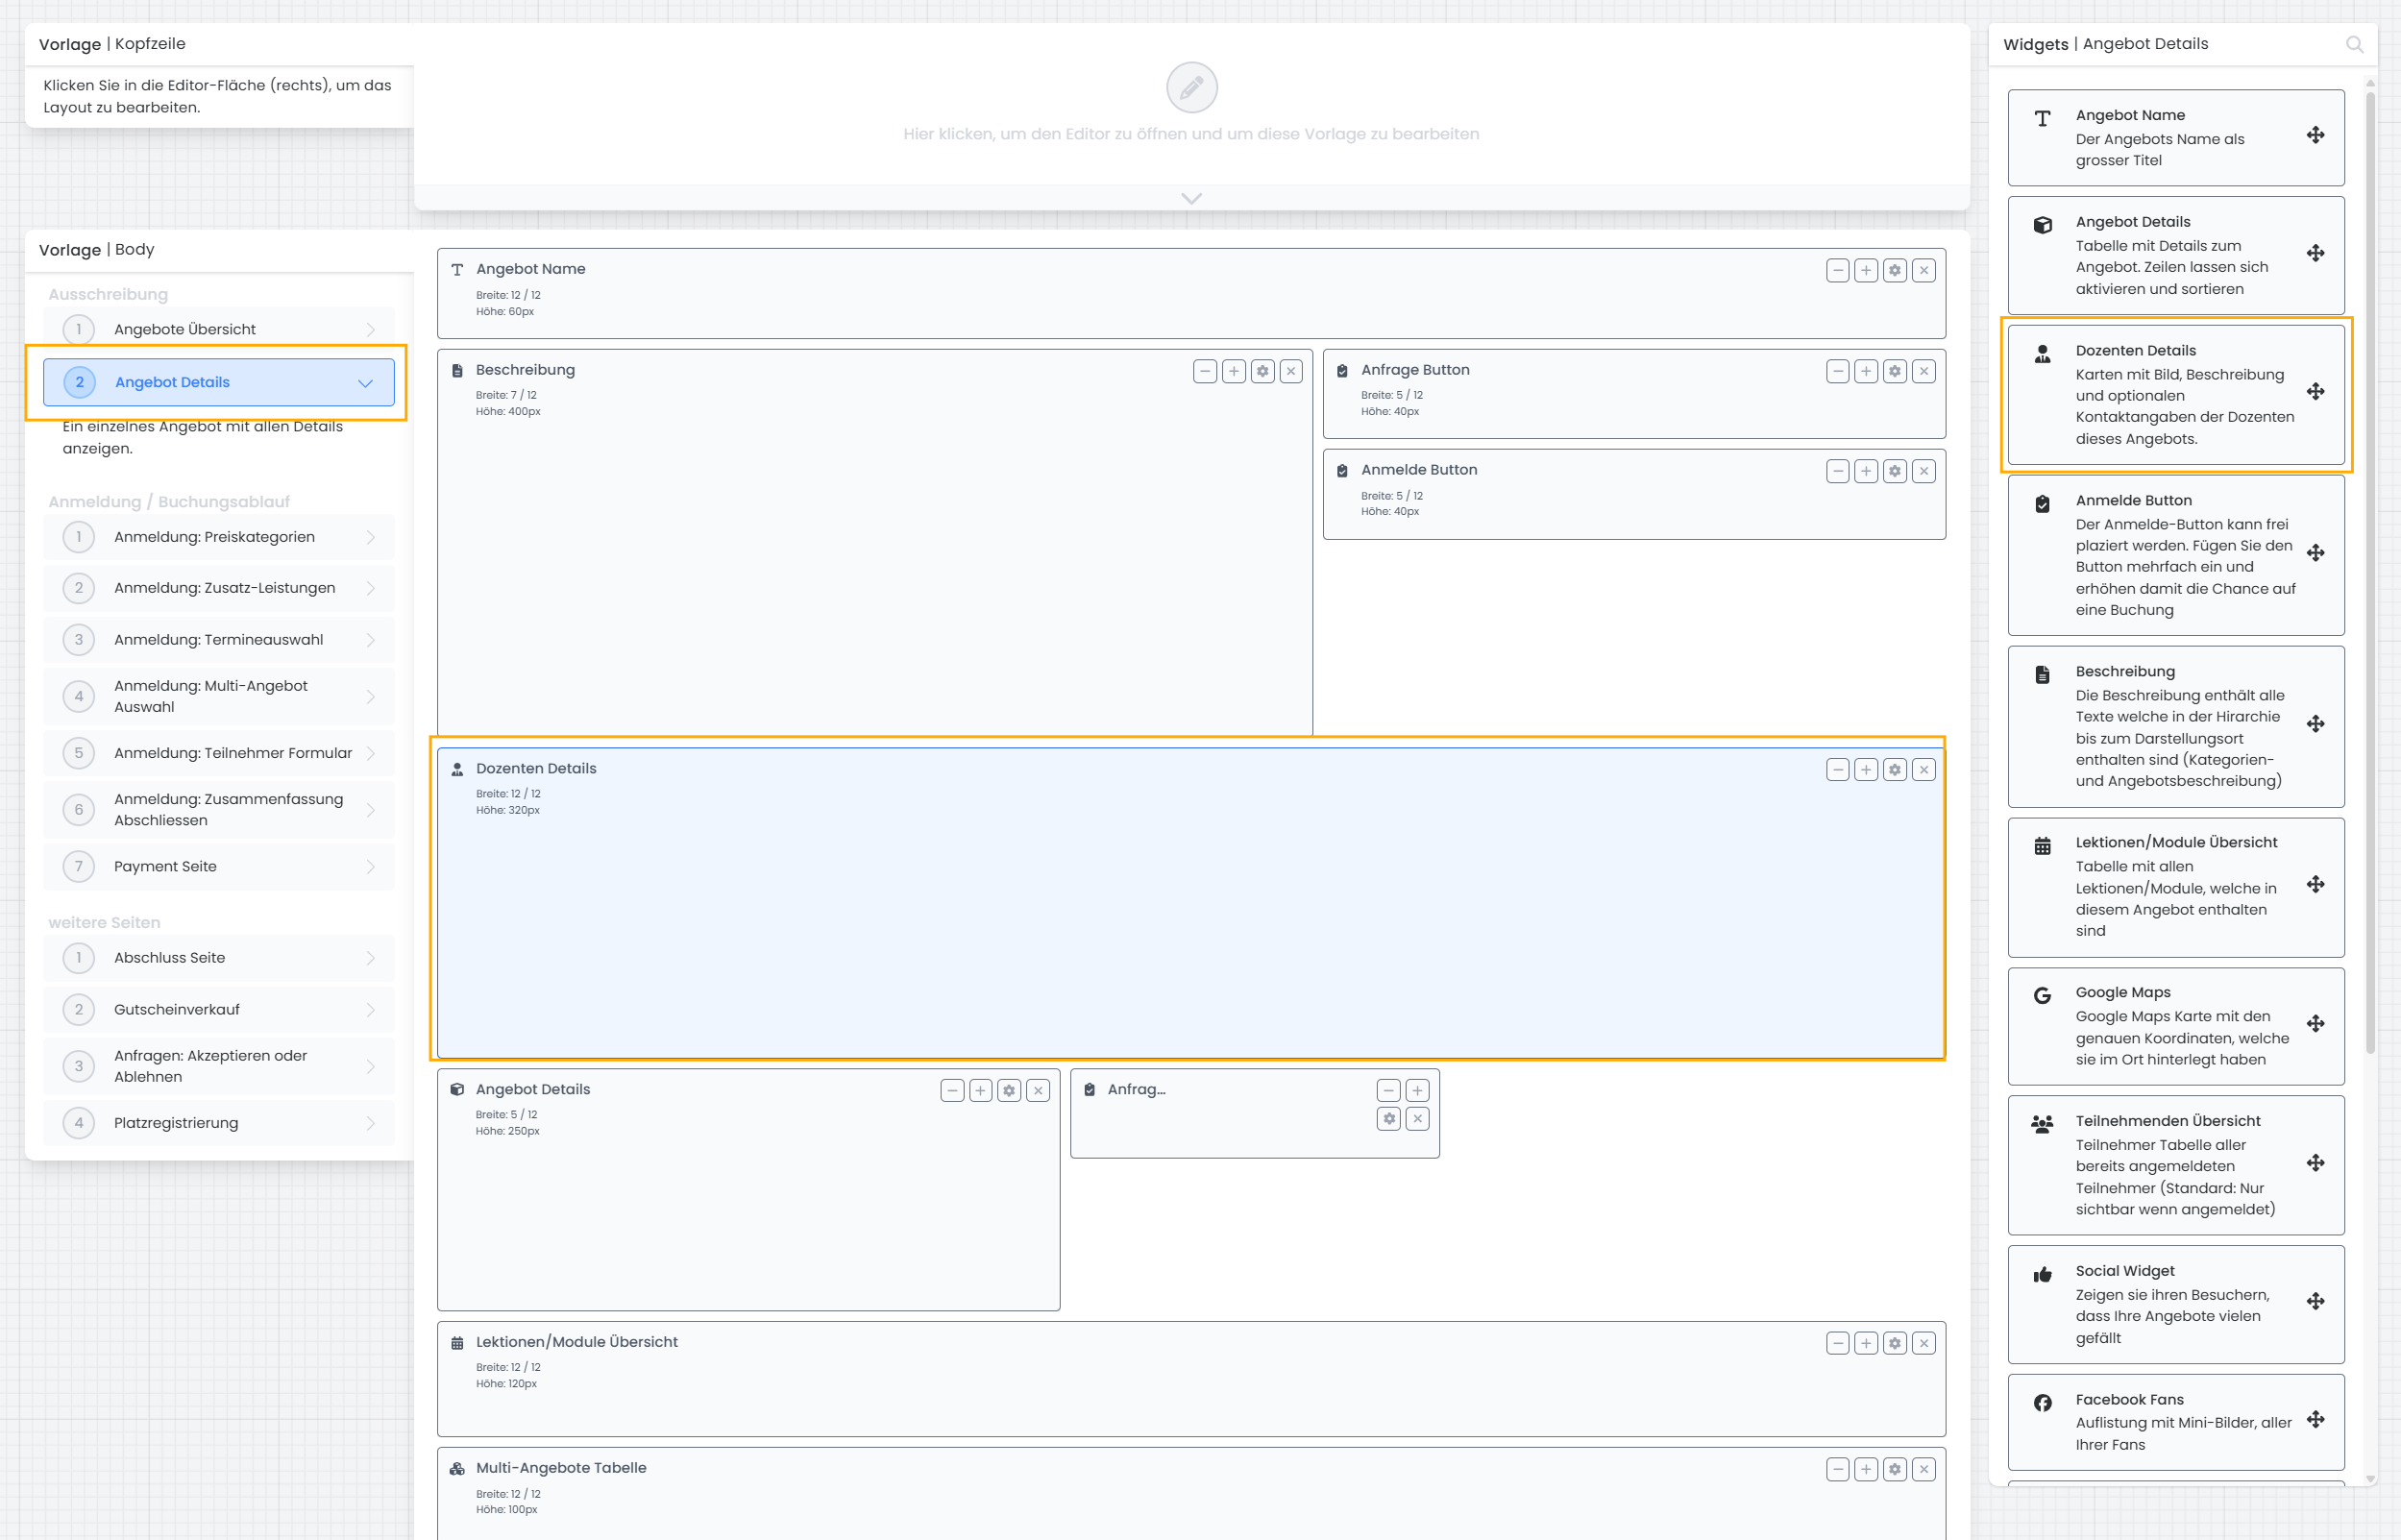
When you click on the "Instructor Details" widget, you can specify which information should be displayed on the front end.
The following options are available:
-
Title and Name
-
View image
-
View description
-
View email
-
Show phone number
This allows you to customize which details about the instructor are displayed on the booking page.

Front-end display
The "Instructor Details" widget displays the person associated with the course as a clear card.

User Permissions
System Permissions
The system provides the following three levels for assigning the necessary permissions to individual edoobox administrators:
-
Superadministrator Permissions: A Superadmin with this permission level can view, modify, and delete all datasets and settings within the edoobox account.
-
Administrator and Manager Permissions: An Admin with this permission level can perform almost all tasks in edoobox, but can only view a portion of the global settings and make few changes to them. Offer, booking, and participant data can be read, modified, and deleted by Admins.
-
Limited Manager Permissions: A person with manager permissions has very restricted system privileges. This person can read general sections related to offers, bookings, and participants, record attendance, and send emails.
Custom Permissions
In edoobox, you have the option to create your own Legal Group A. Administrators can be assigned custom legal groups. However, edoobox does not verify these legal groups. edoobox also does not accept requests to create specific legal groups. It is the responsibility of the administrator or the creator to ensure that the legal groups are configured correctly.
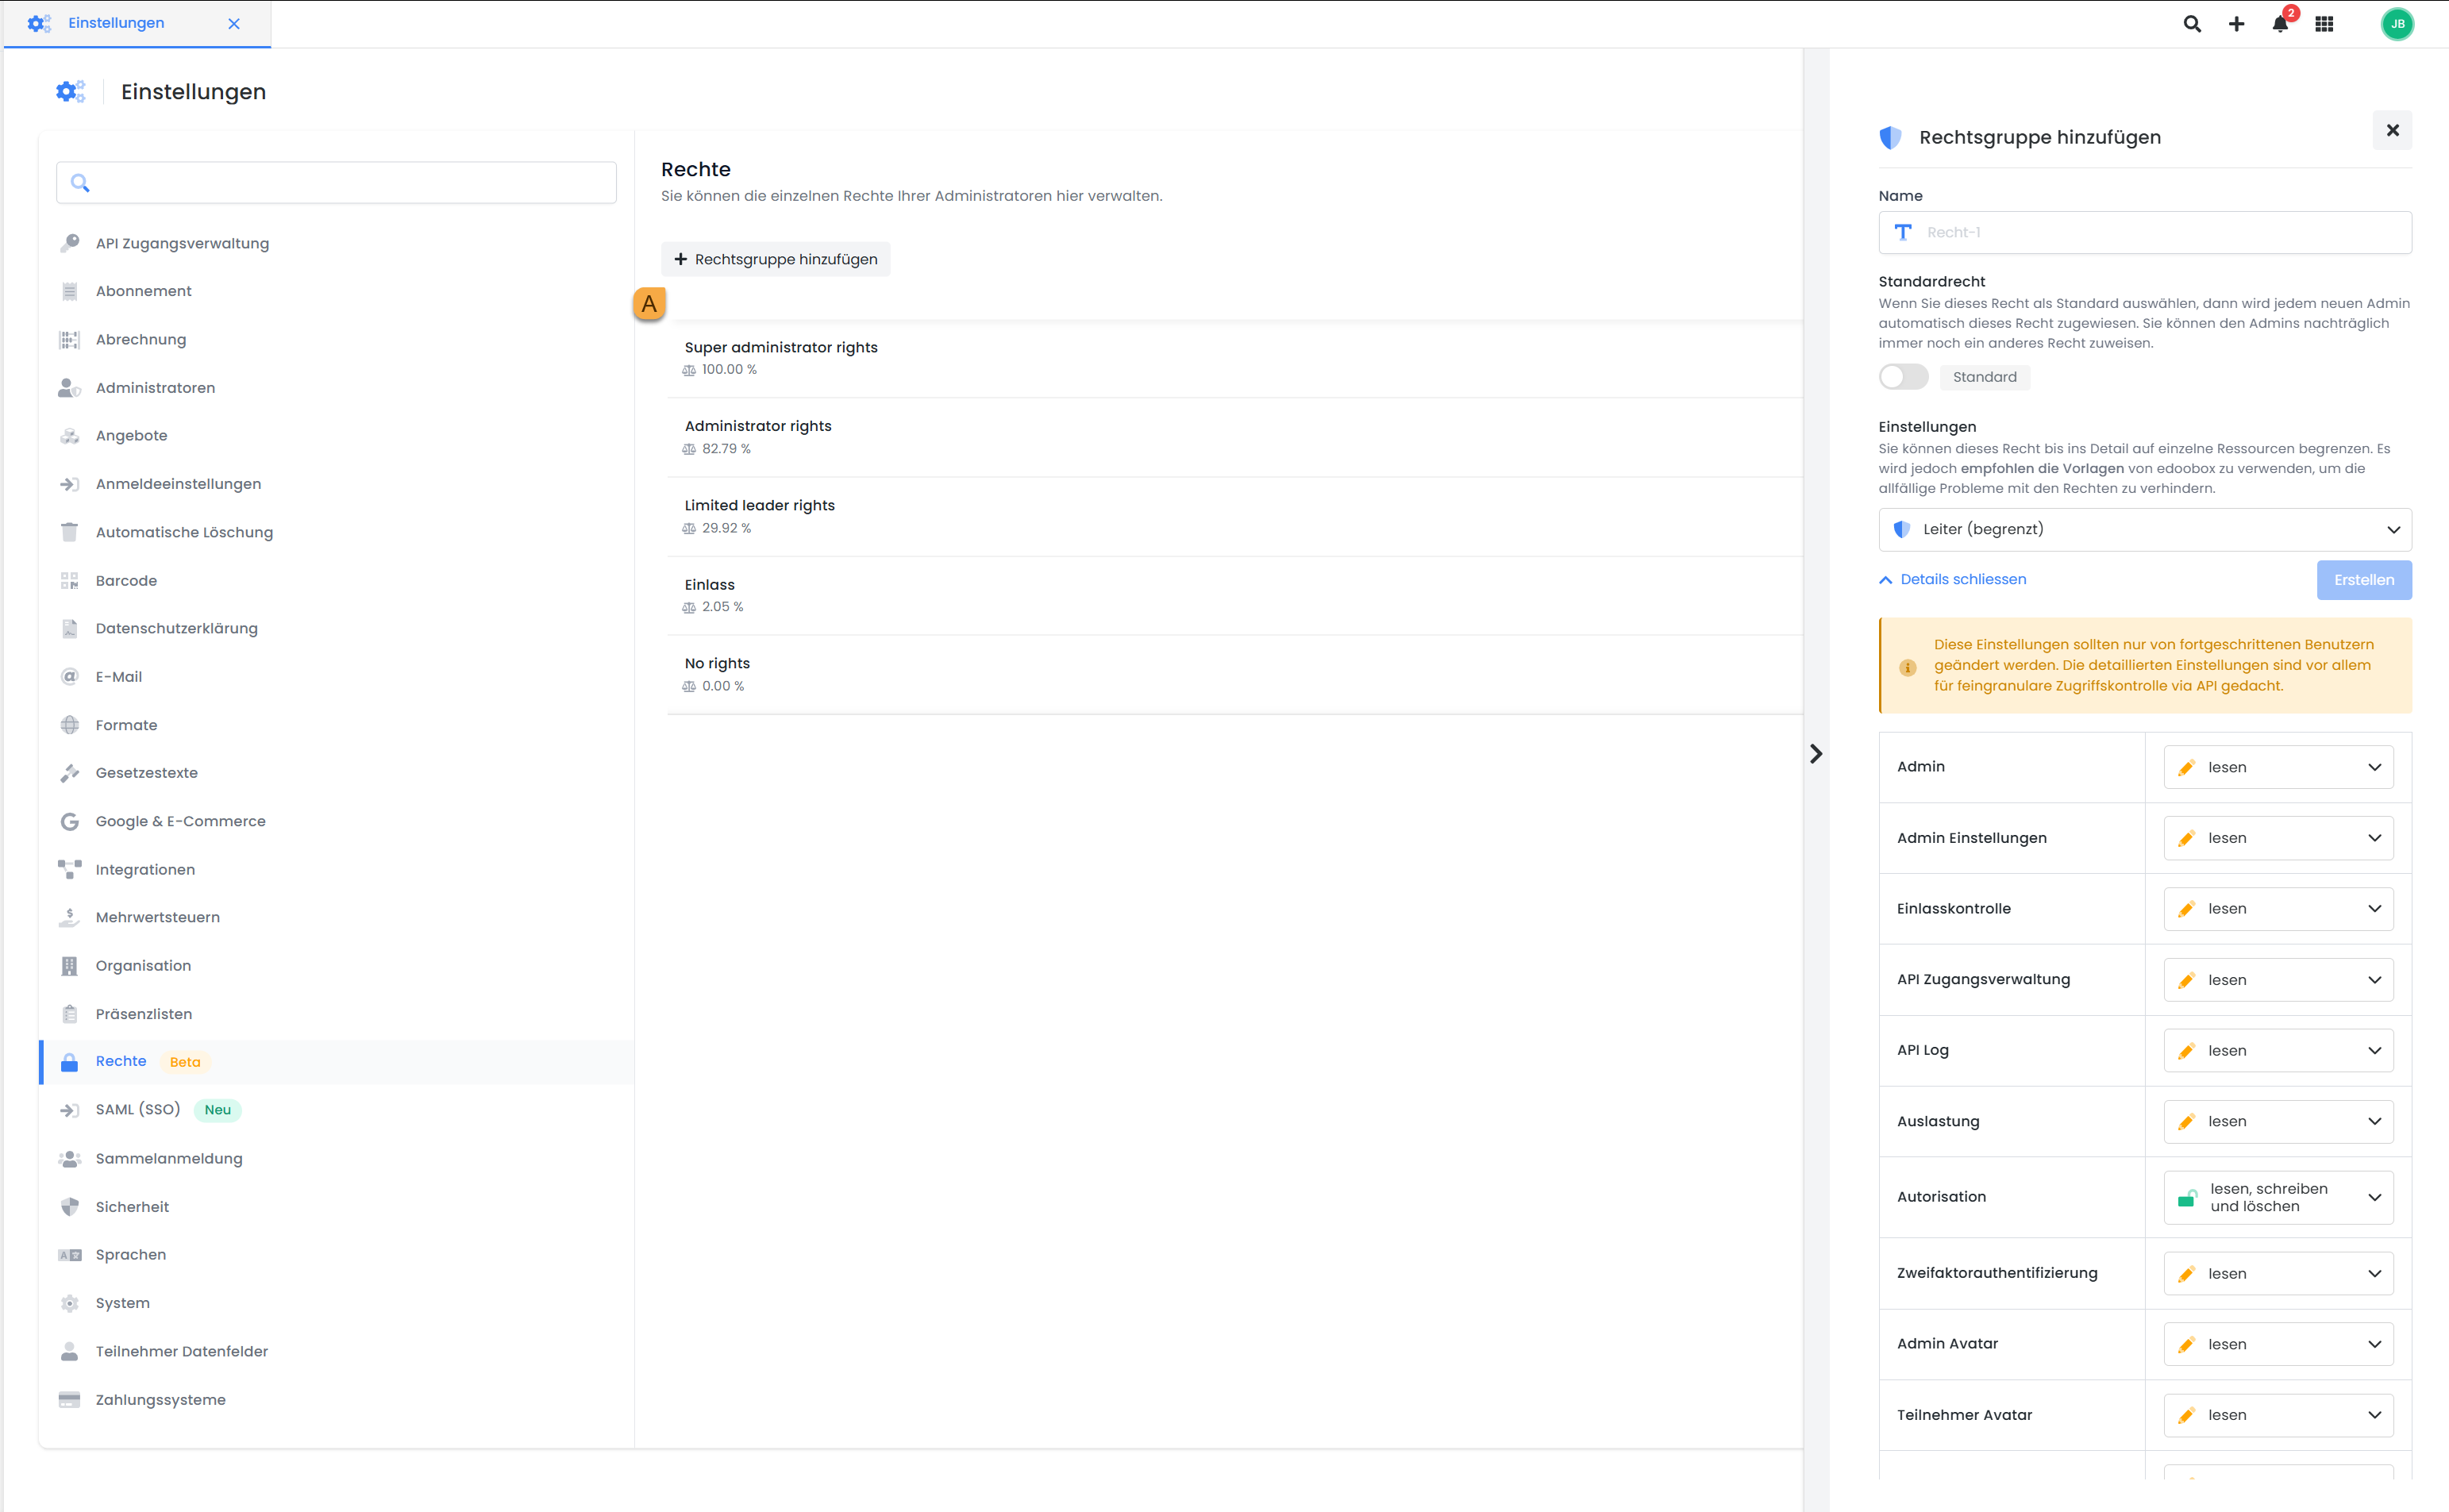
Info: Activate Custom Admin Permissions
To add a permission group, you must activate custom admin permissions in the security settings under Settings > Security.
Restrictions for Admins with Custom Permission Groups
Admins assigned a custom permission group can no longer log in to the edoobox V1 version. Access is exclusively possible via the V2 version.
Configuration Requirements
-
Configuring a permission group requires expert knowledge to ensure error-free use of the edoobox V2 version.
-
Missing or incorrect endpoints, as well as insufficient permissions, can lead to the V2 version being blocked and unusable.
-
It is strongly recommended to thoroughly test permission groups before productive deployment to ensure all required functionalities operate as intended.
Error Handling and Support
-
If errors occur in the V2 version due to a custom permission group, these must be documented in detail and submitted to edoobox.
-
There is no guarantee that edoobox will fix these errors or provide a solution.
Superadmin Permission
-
The assignment of Superadmin permission is exclusively possible using the edoobox template Superadministrator Right.
-
Solely assigning rights to specific endpoints is not sufficient to obtain full Superadmin permission.
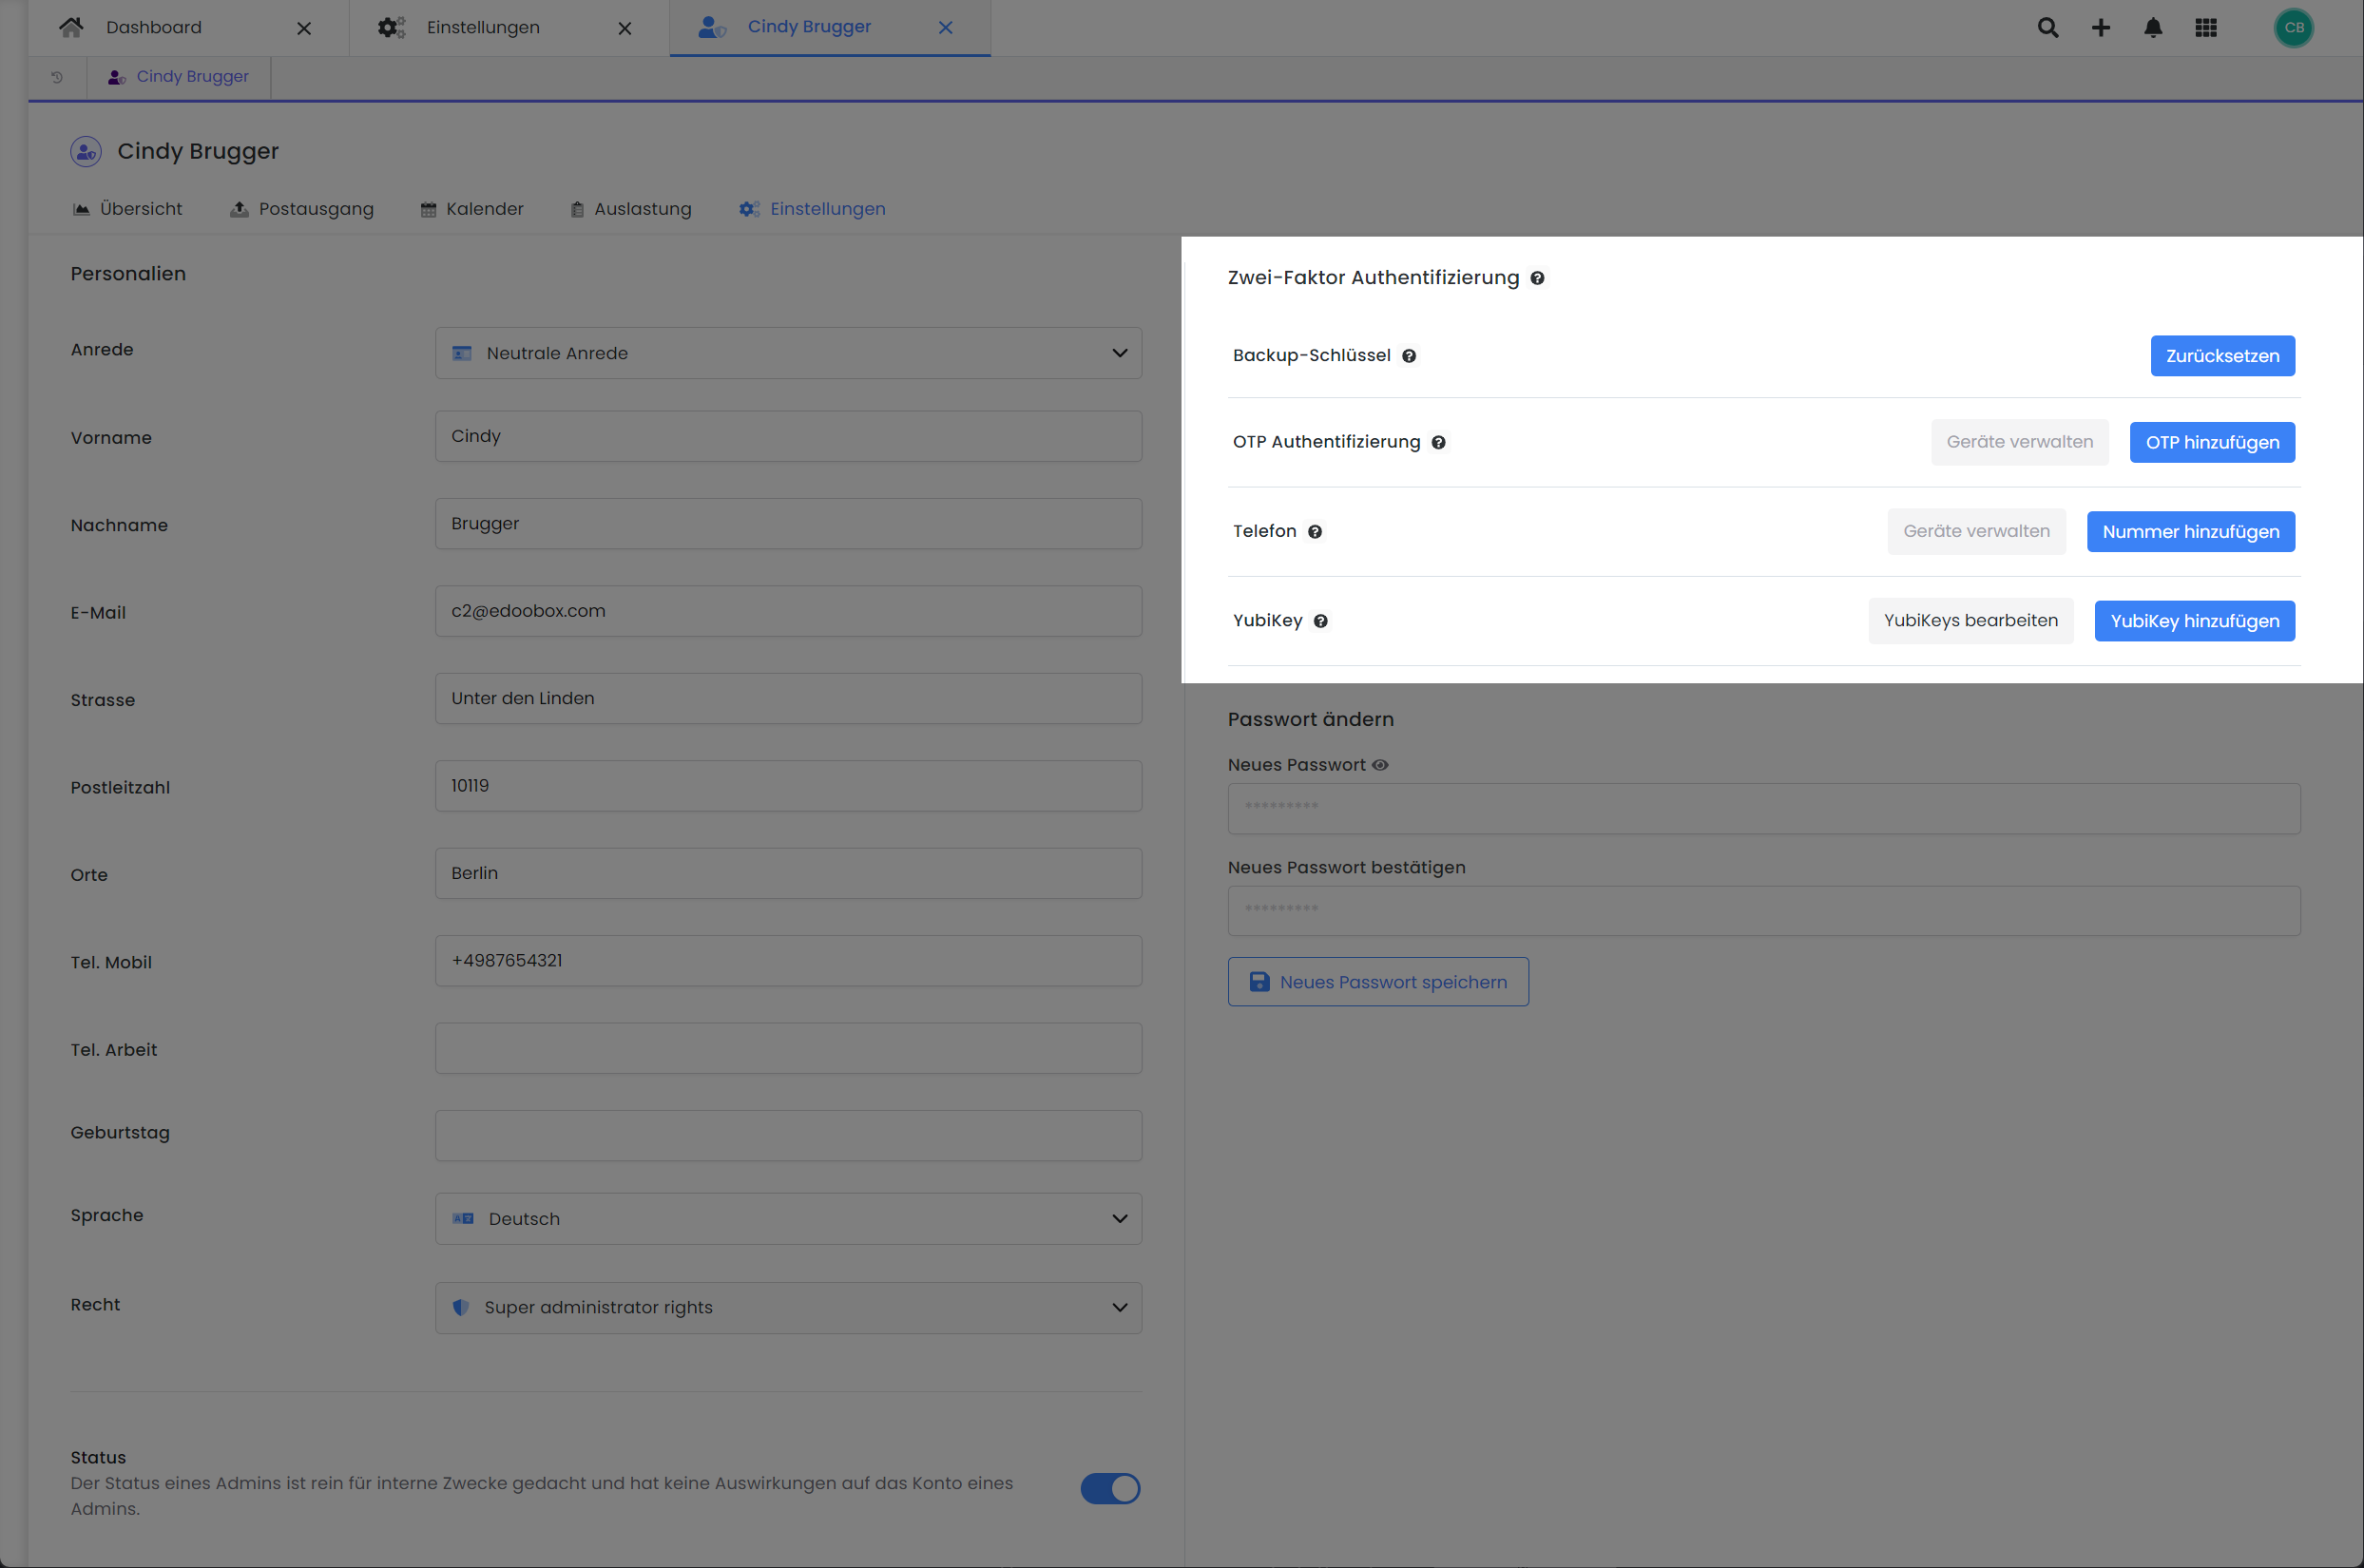
Two-Factor Authentication
In each admin account, one or more Two-Factor Authentications (2FA) can be activated in addition to the master password. This prompts for a second authentication after a successful login with the password. If multiple 2FA options are activated, the admin can select the desired authentication option when logging into edoobox.
The following authentication options are available:
-
Backup Keys: For this 2FA, edoobox generates 10 one-time backup keys that can be used for login. The backup keys are displayed once after creation and must be recorded by the admin in an appropriate format and stored in a secure location. The use of this 2FA is free of charge and serves as a complement to other 2FA options.
-
OTP Authentication Recommendation: The Google Authenticator app (available on Android and Apple) can be installed by the admin on their mobile phone. The app helps secure your edoobox account using time-based OTP codes (one-time passwords) in accordance with industry standards. The OTP code currently displayed in the app must be entered during login to edoobox for this 2FA (instructions from Google). Use of this 2FA is free of charge.
-
Phone: With this 2FA option, the admin can choose between an SMS or a call to their mobile phone number as the authentication method when logging into the edoobox account. The admin receives a code via SMS or call through the chosen method. The costs for these messages or calls typically range between 0.01 and 0.06 Euro/CHF per SMS or call and are charged to the edoobox account.
-
YubiKey Recommendation: When logging into the edoobox account, the administrator must connect the YubiKey via USB (for more information on the YubiKey, visityubico.com). This two-factor authentication (2FA) is free to use, with a one-time cost for purchasing a YubiKey.
Tip: Activate Multiple 2FA Options
We recommend using multiple 2FA options so that in the event of a 2FA failure (e.g., loss of a YubiKey or a defective mobile phone), an alternative method can be used, and logging into the edoobox account remains possible. Subsequently, the faulty 2FA can be removed or replaced from your admin account.
Related Guides
Keywords for this guide
Manager ¦ Admin ¦ Permissions ¦ Instructor ¦ Administrator ¦ User Permissions ¦ Usage Rights ¦ Authorization ¦ Access ¦ Permission Levels