The following step-by-step guide demonstrates how to implement the tile view for your categories and subcategories.
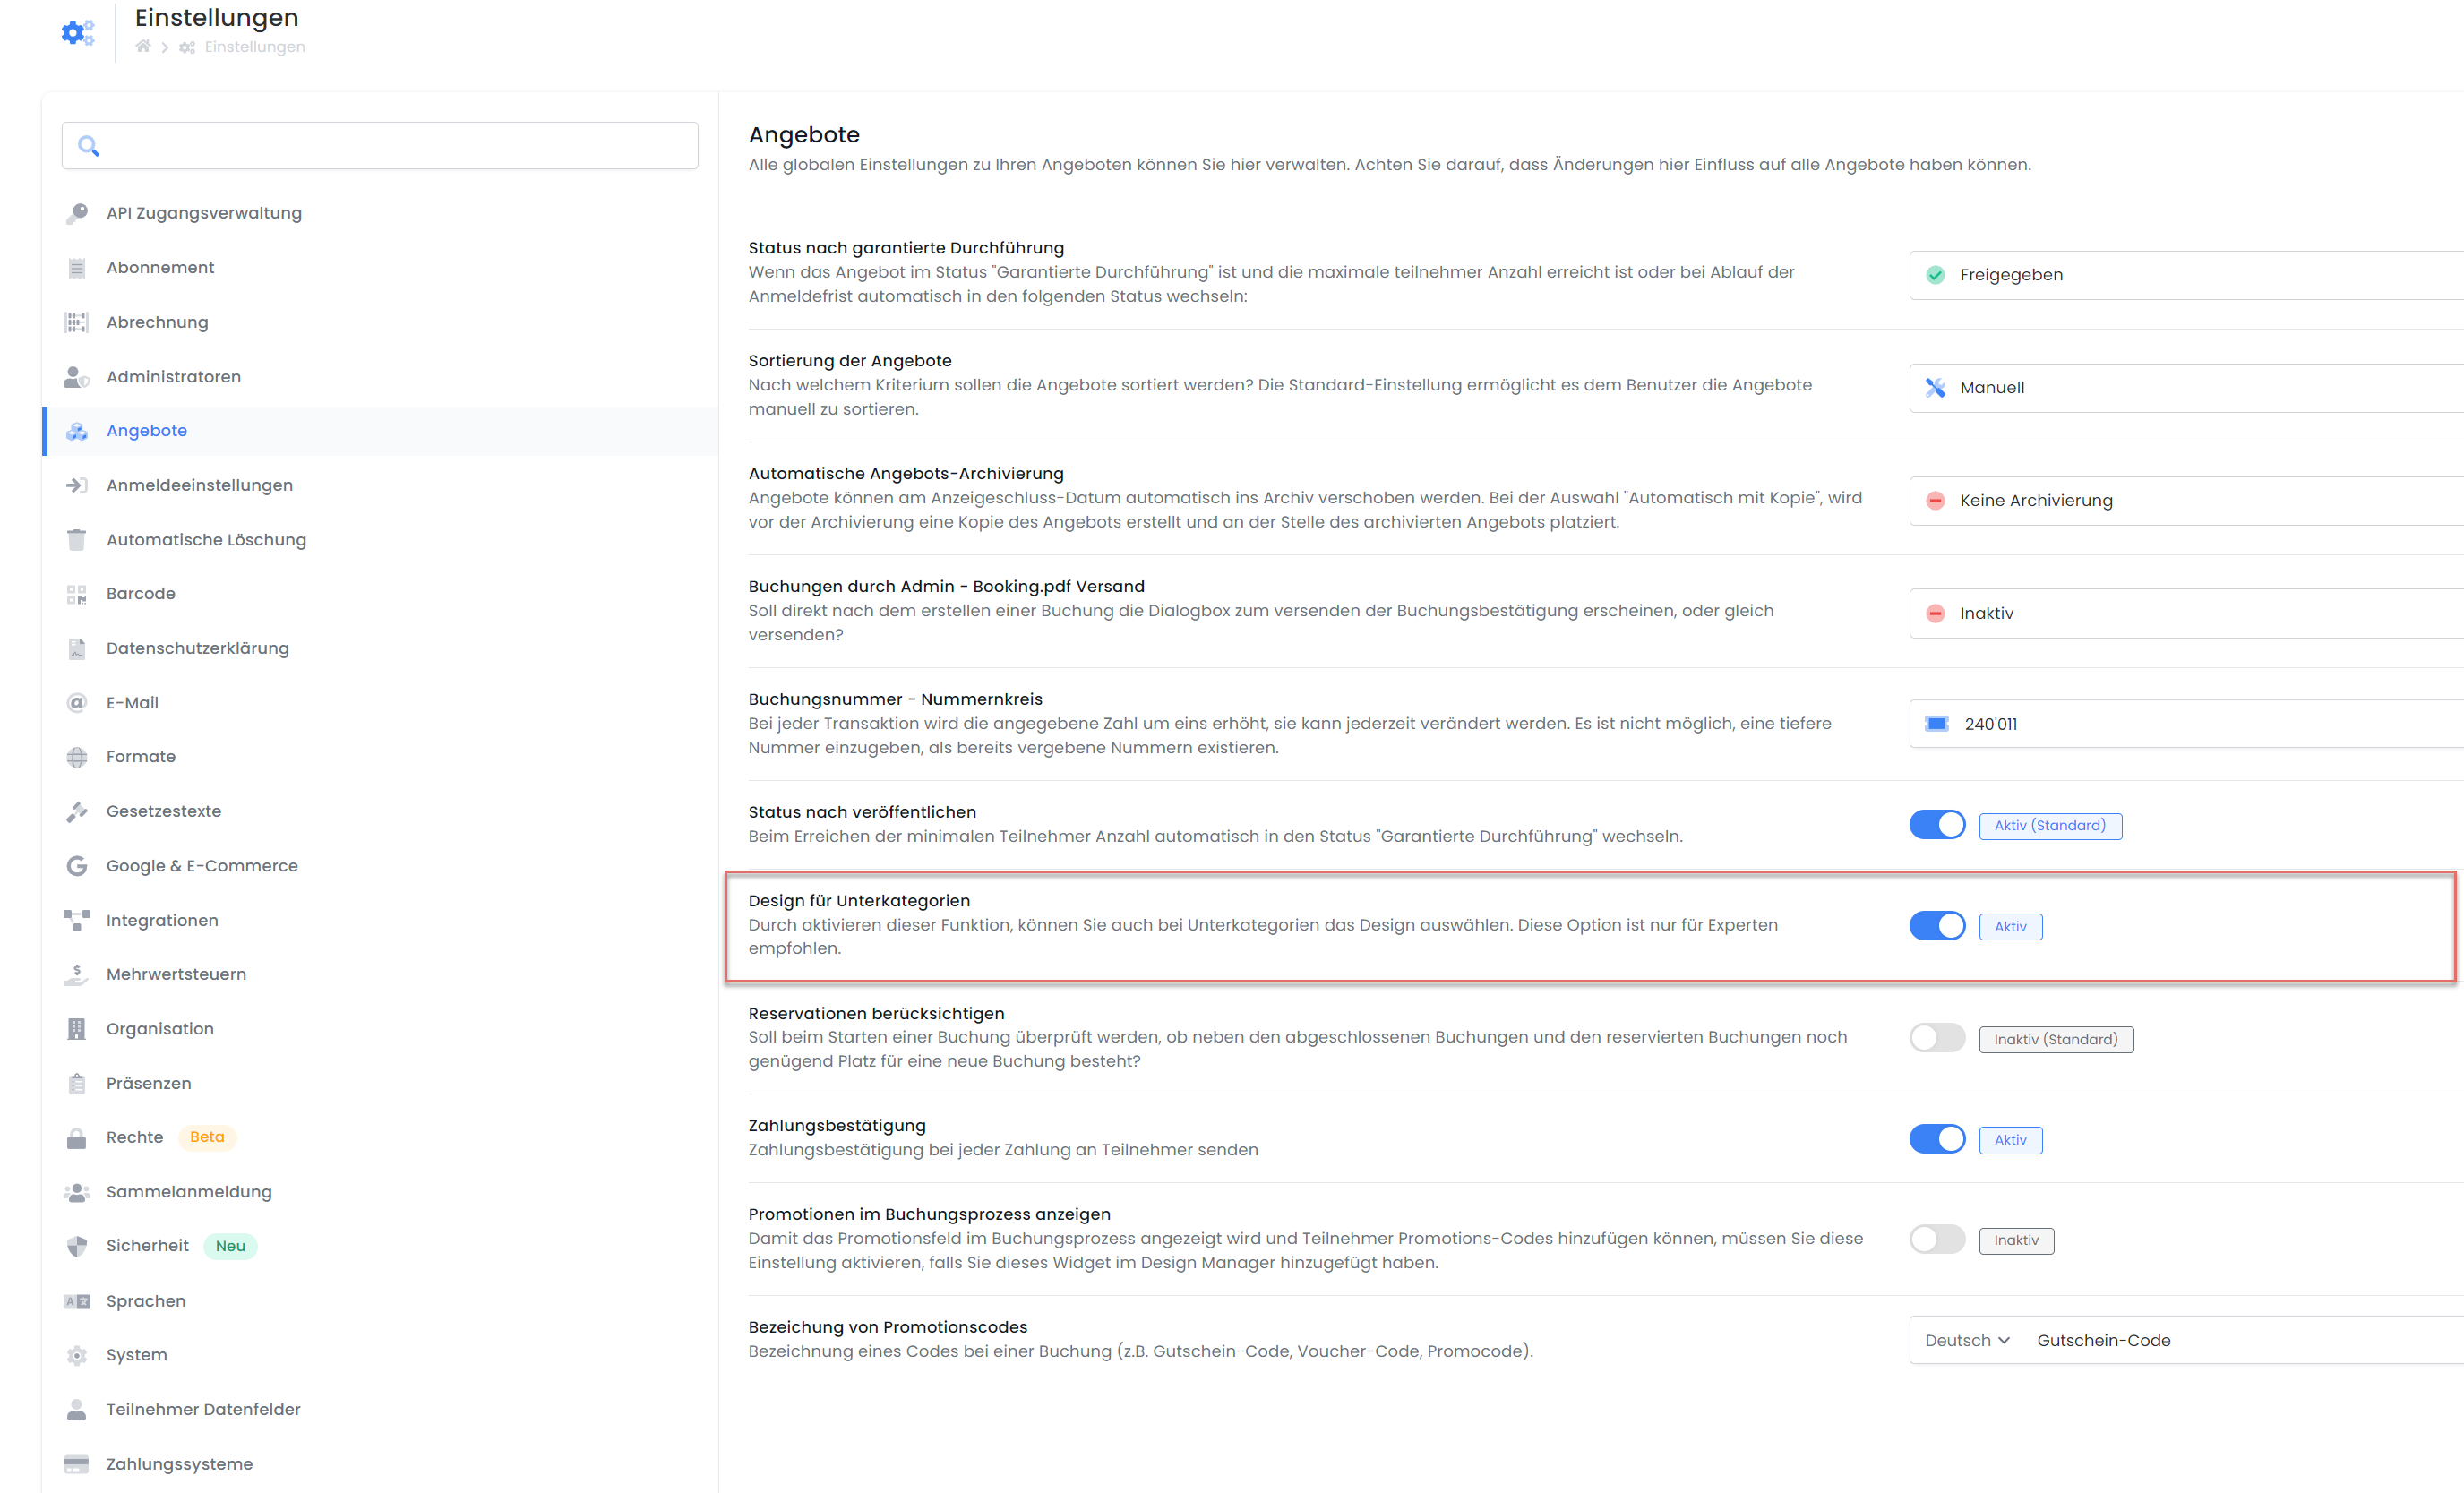
Navigate to the global edoobox settings and activate the 'Design for Subcategories' function under Offers. This enables you to assign a specific design to subcategories.
-
Open the Design Manager.
-
Create a new design and assign it a unique name to clearly indicate that it is the design featuring the tile view for the main category. In our example, we name the design LanguageSchool_MainCategory.
-
Now set the LanguageSchool_MainCategory design as the default design and assign it to no category.
-
Within the LanguageSchool_MainCategory design, in the 'Offers Overview' template, drag the 'Category Tiles' widget to the workspace and save the design.
-
Now create another new design, based on the LanguageSchool_MainCategory design, and name it, for example, LanguageSchool_Subcategory.
-
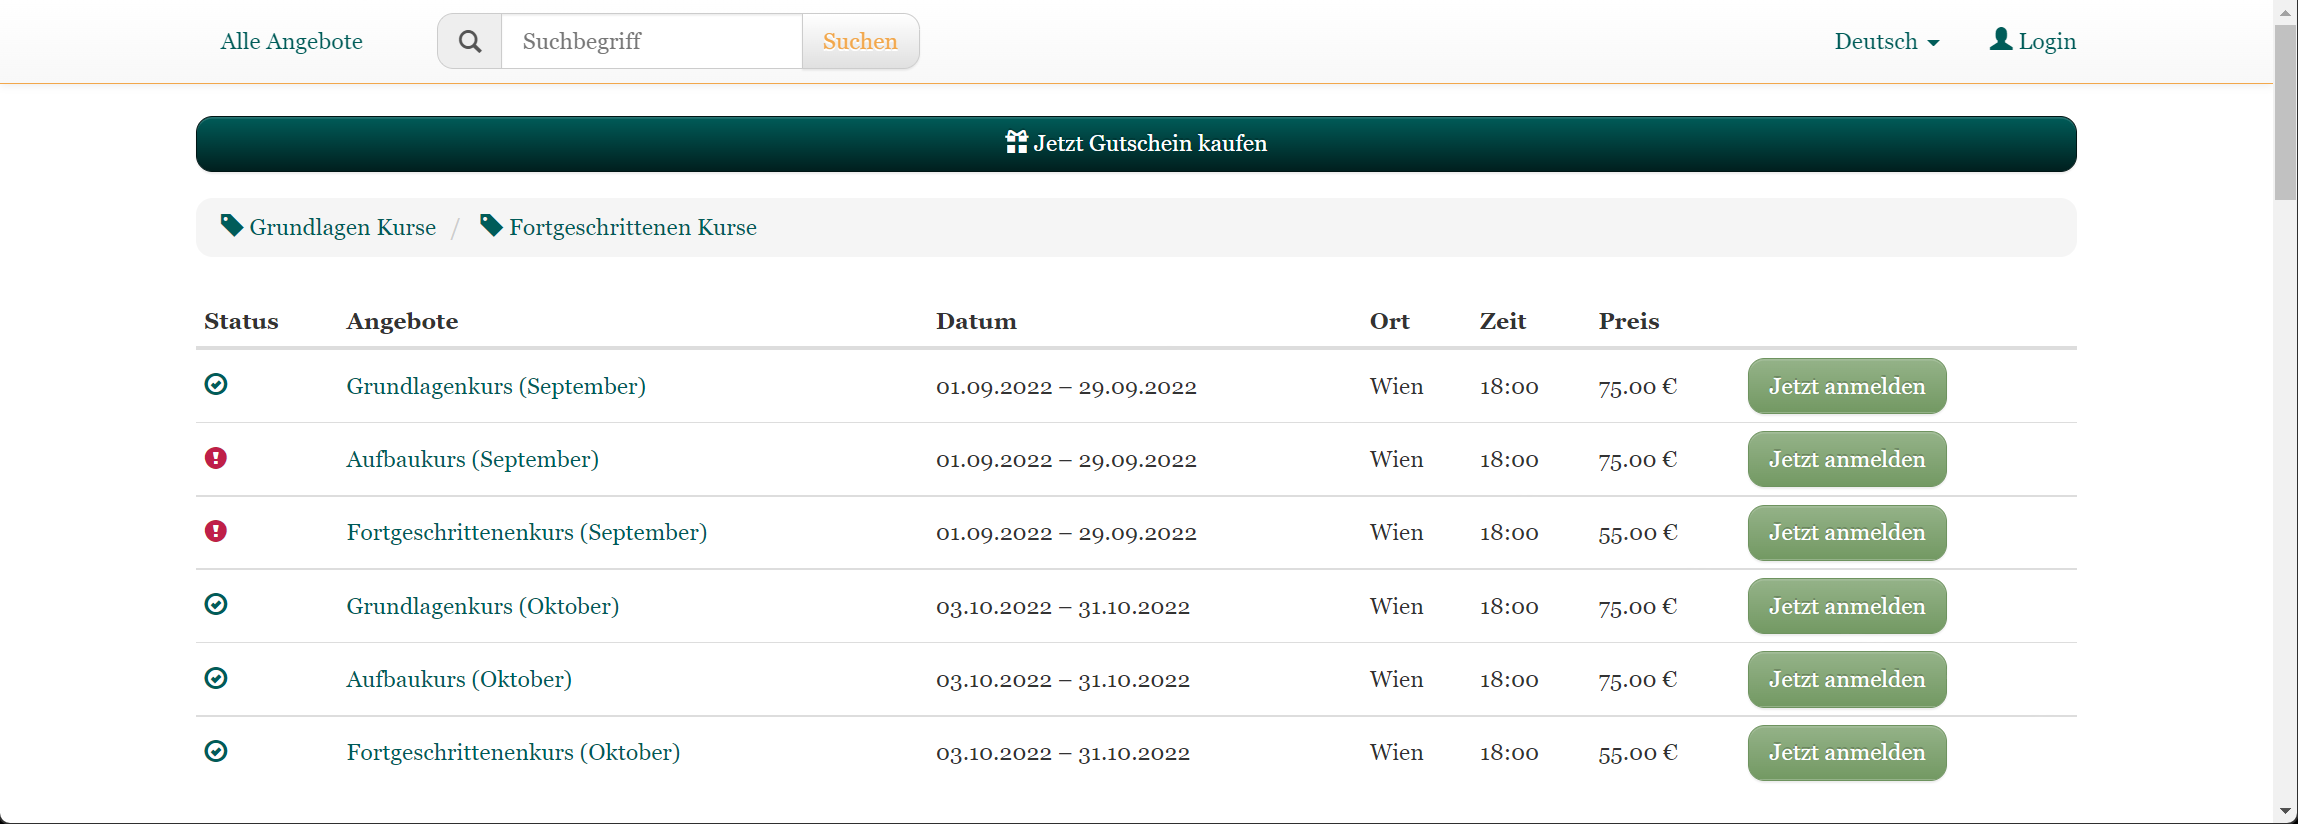
In the LanguageSchool_Subcategory design, within the 'Offers Overview' template, remove the 'Category Tiles' widget and replace it with, for example, the 'Offers Table' widget.
-
If necessary, assign 'No Design (Default Design)' to all main categories. This ensures that the default design is always used, which, according to Step 4, is the LanguageSchool_MainCategory design.
-
Afterward, click on your subcategories and set the LanguageSchool_Subcategory design for each.
-
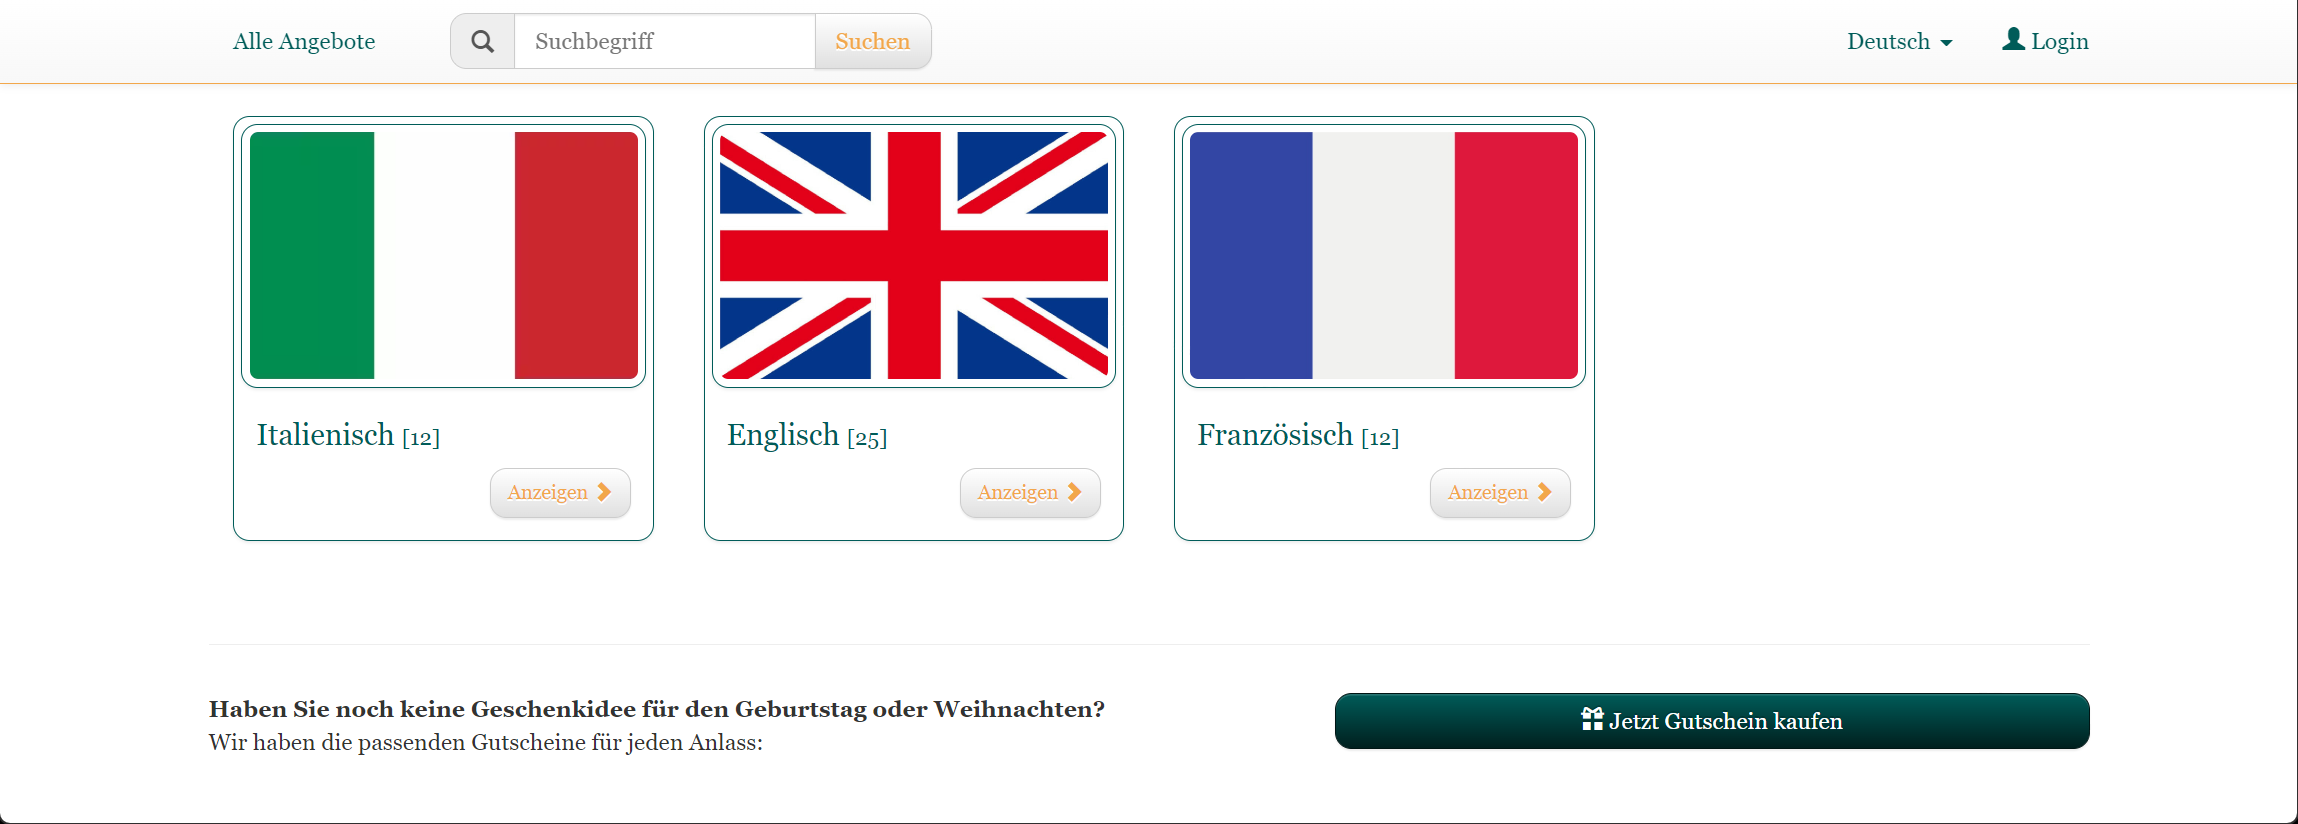
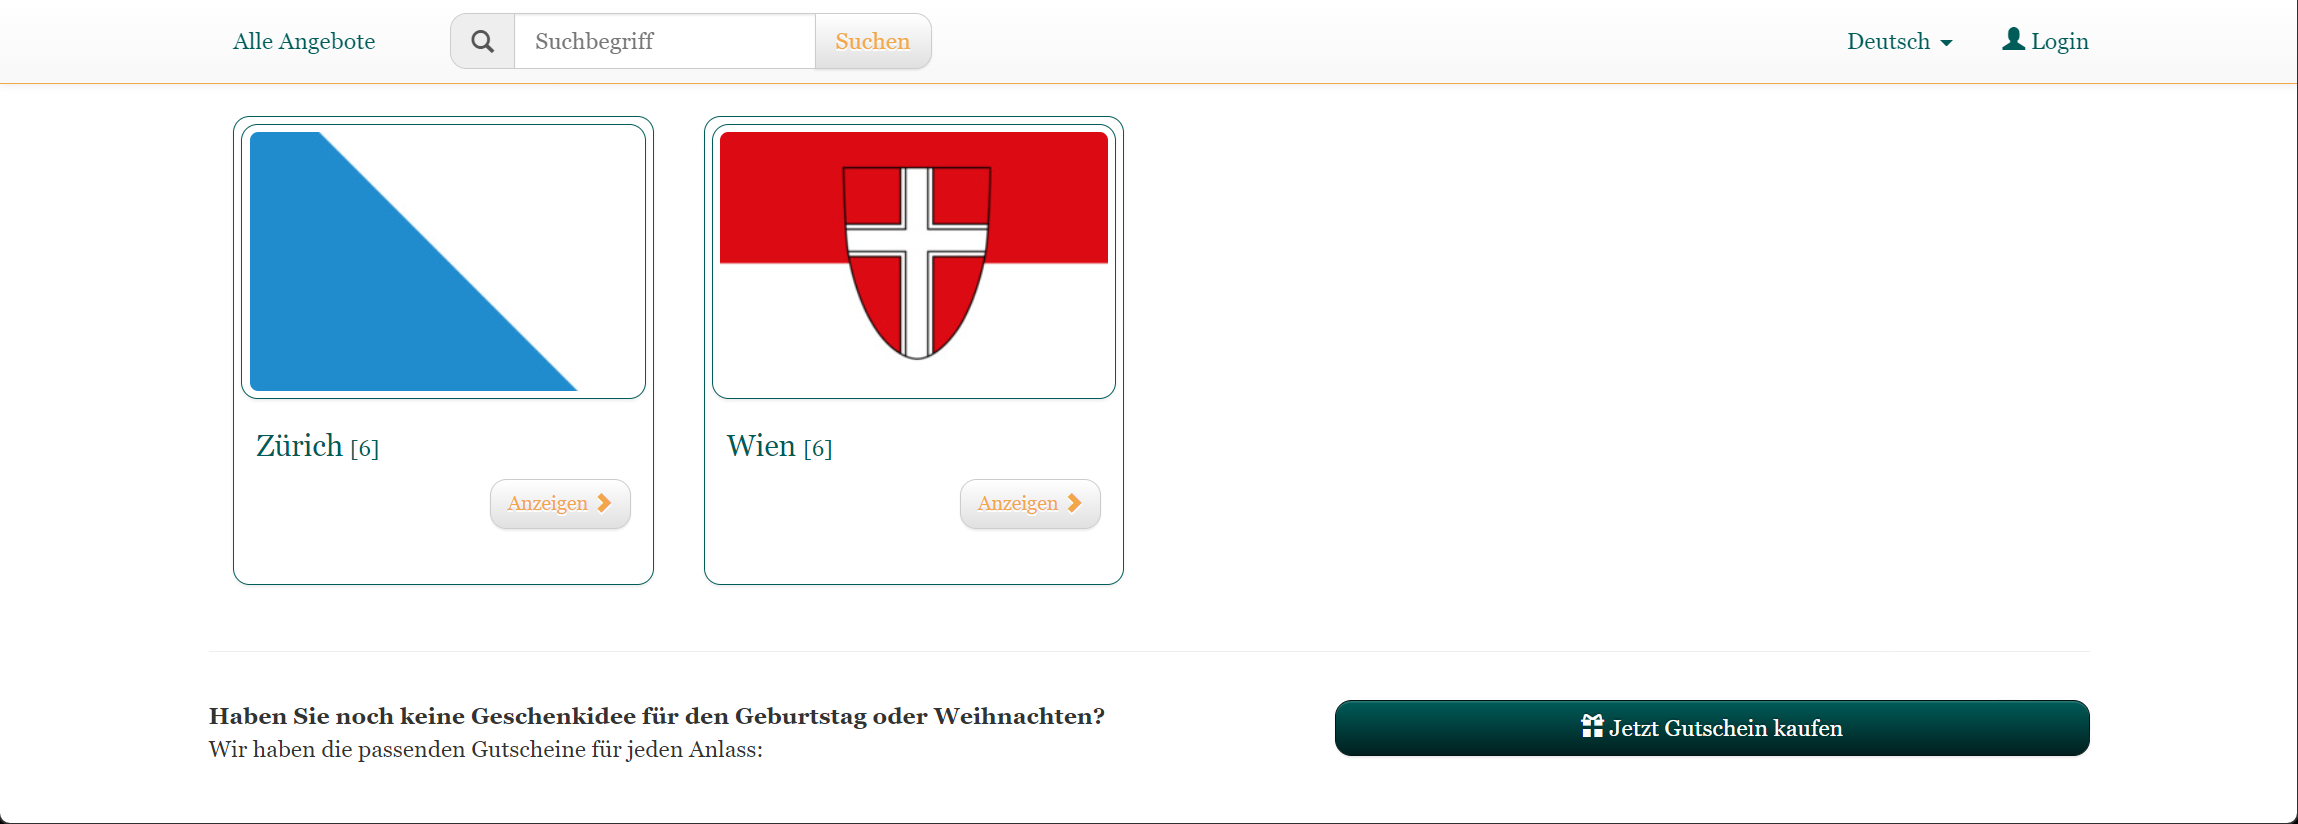
For an appealing presentation, add appropriate images to all categories (optional).
-
Verify your result by opening the standard view via the preview share function on your account shortcut.
Example: